When performing repair work in the bathroom, the kitchen often has to increase the number of food outlets. It is important to install the socket on the tile without damaging the cladding, so you need to cut the tile on the floor before attaching it to the wall.
The nuances of working with tiles
Facing tiles are extremely fragile material. Therefore, if the cutting tool / attachment is incorrectly selected, the square may simply crack. You have to use new tiles until you get the desired result. To avoid this, you should adhere to the recommendations of professionals:
- Holes in the tile for the outlet are drilled only at right angles. Any deviations redistribute the load of the cutting element on the tile and the material cracks.
- The tool is operated at low speeds: 300-500 rpm. Maximum - 800 rpm.
- Do not apply excessive pressure to the facing material when cutting. This weakens the strength of the tile, which also leads to splits.
- It is advisable to cut the tiles on the floor, on a special substrate made of wood or chipboard.
- It is best to soak the tiles in water for an hour before drilling. This will increase the strength of the cutting facing material.
- Before performing work, an accurate marking is applied to the surface of the tile with a marker.
- It is advisable to paste over the intended place of the cut with masking tape or any adhesive tape so that the tool does not slide off the smooth surface of the tile.
It is advisable to wear protective goggles so that small fragments do not damage your eyes.
Required tools
In order to mount the socket outlets in the tile in the future, you should prepare a tool for cutting it:
- hammer drill or drill;
- grinder (grinder);
- nibblers (popularly called "ballerina");
- crown with diamond plating or with victorious teeth;
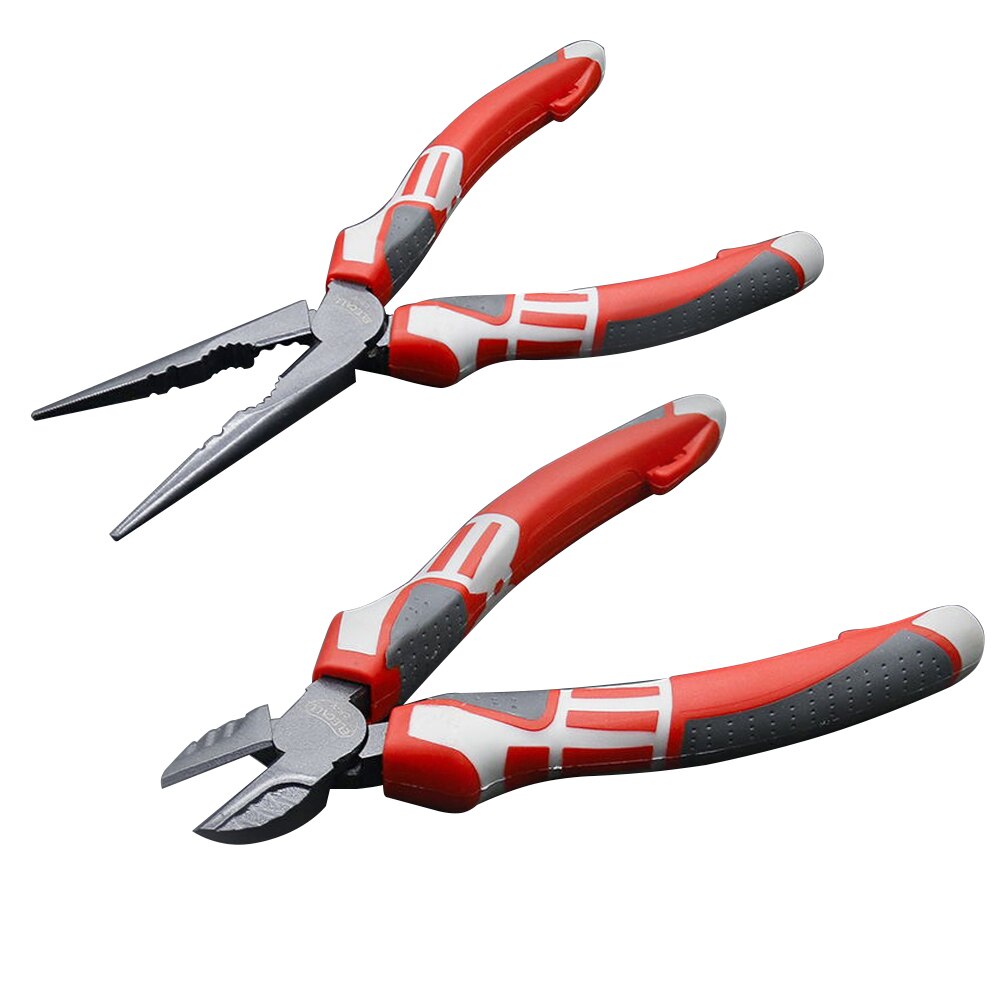
- nippers, pliers;
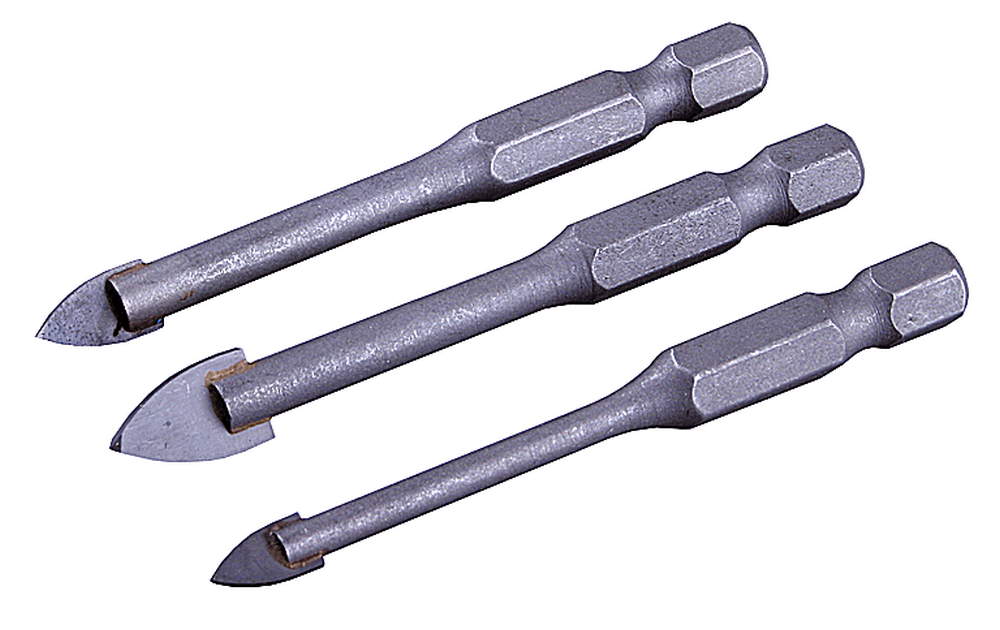
- the drill is victorious, having a hardness greater than that of a tile;
- sanding paper;
- jigsaw.


It is not necessary to buy an expensive one-time tool. It can be rented from specialized stores.
Methods for cutting holes in tiles
Before making a hole in the tile for the outlet, it is important to understand that the method is selected depending on the availability of a special tool and certain skills. The principles of work for each type of equipment are quite simple.
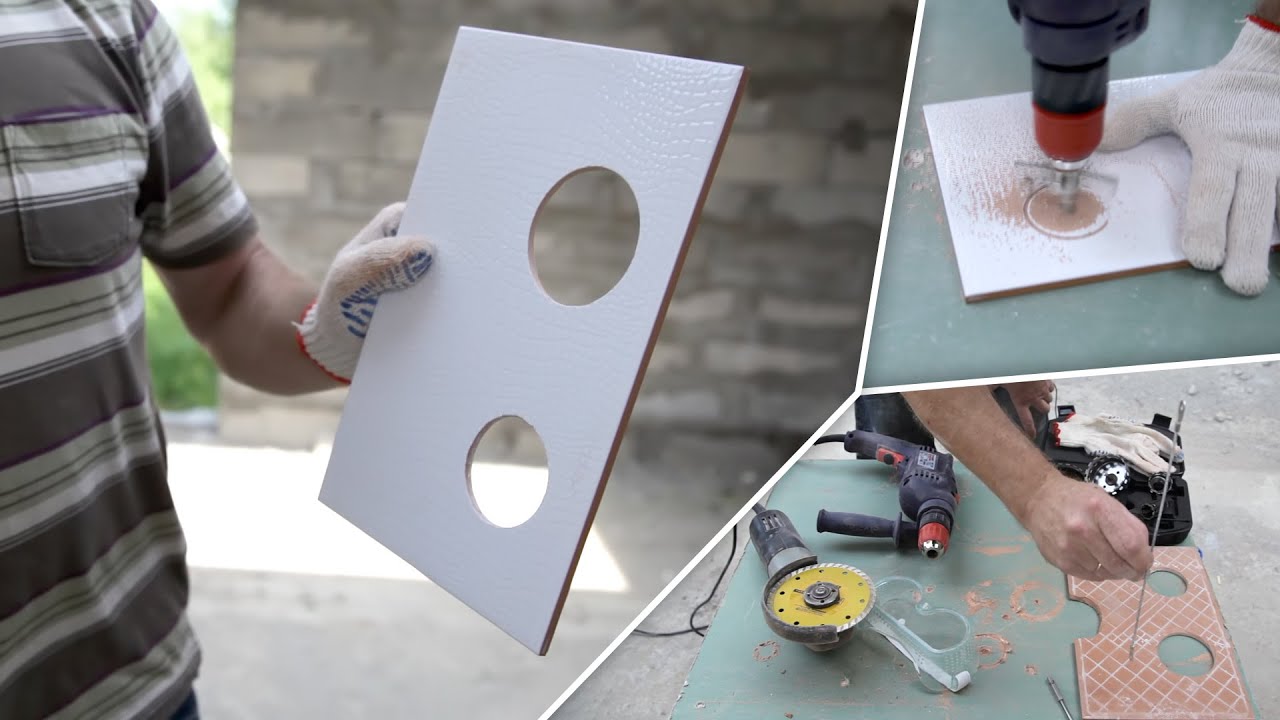
Core cutting

The principle of operation looks like this:
- The tiles are laid face up on a special wooden flooring. The tile is clamped in a vice.
- An accurate marking (circle) is applied to the surface of the cladding. In its center, a point is placed at which the axis of the nozzle will abut.
- They put a circle of the crown on the marking and start work at low speeds.
The hole must be made in one go, without changing the angle of inclination of the crown.
Nibblers (ballerina)

Installation of sockets on tiles can be done in this way. The ballerina is an attachment similar to a school compass for an electric drill. The work is performed in this way:
- The tiles are laid face down on the substrate and clamped in a vice.
- Marking is applied to the tile.
- Nibblers are attached to the chuck of an electric drill.
- The point of the center drill is placed at the intended point, the cutting element is extended to the required distance, it is fixed and the cut begins. You need to work with the tool at low speeds.
- It is advisable to clean the edges of the finished hole and trim with a sanding paper or emery.
So that the electric drill does not break out of its place during the entire operation, before starting work, you need to make a central hole in the intended circle with a victorious drill. The tip of the ballerina nozzle is inserted into it.
Tungsten string
This method of processing tiles is manual. The risk of damaging the tiles is significantly reduced. A tungsten string is inserted into a hand saw as a cutting tool, after having passed it through a hole that is made on the line of the intended circle. Then the tile is held in weight, pressing it with one hand to the opera, and a cut is made.
During operation, the thread must be moved translationally-rotationally. The formation time of one socket for a socket using a tungsten string is about 30 minutes. The edges of the resulting circle help to ensure that the socket is installed without problems.
Victory or diamond drills
With their help, it is possible to gently overcome the technical strength of the tile. The work algorithm is as follows:
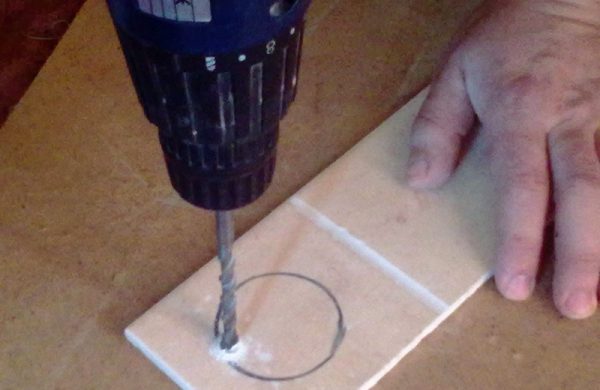
- Pobeditovogo drill with a diameter of 6-8 mm is attached to an electric drill.
- The tiles are laid on a substrate and marked on it (a circle equal to the diameter of the cup holder) before cutting a hole in the tile for an outlet.
- Using the nozzle along the marked line, you need to drill holes in increments of 0.5-0.8 cm.
- All jumpers are then removed with pliers or special nippers ("parrots").
- The edges of the hole are sanded.
When working with nippers and sandpaper, it is advisable to use protective gloves to avoid cuts. It can be easily installed into well-processed edges.
Bulgarian

You can work with this tool if you make a hole in two adjacent tiles - cut out semicircles along their edges. The work is done like this:
- Apply the desired semicircular markings to both parts of the tile.
- A diamond disc is attached to the grinder.
- The tile is laid on the base surface so that it is suspended in the place of the cut.
- Clamp the tile with one hand, pressing it tightly against the substrate.
- With the other hand, straight cuts are made from the edge of the facing material to the edge of the arc in increments of 1 cm - as if cutting a semicircle into longitudinal strips.
- Excess ceramics are removed with parrot pliers.
The same actions are performed with the second square / rectangle of the cladding. With such a hole for the socket, it will be easy to install the outlet.
Jigsaw
This tool works on the principle of a tungsten hand saw. The only difference is that the translational movement of the cutting element (diamond wire) depends on the electrical component of the jigsaw. The apparatus is moved along the intended marking line. This tile cutting tool is ideal if the master does not have more modern equipment in his arsenal.
Holes in glued tiles

It is better to use a special diamond-coated bit. Before performing the work, it is advisable to prepare a special wooden template (jig) with holes of the required diameter. You can also simply select the ceramic a little in the center of the marked circle and make a hole so that the central axis does not slide off the smooth facing.
Work with the conductor is performed as follows:
- The template is applied to the wall at the intended place and the cut is started at low speed.
- It is advisable to immediately remove ceramic dust.
- Having reached the base of the wall (concrete, brick, foam blocks), the crown with a diamond edge is changed to a more suitable one and continues to work until a nest of the required depth is obtained.
If you work along the center point, you can additionally glue a piece of masking tape in its place. Then the tool is pressed tightly against the wall and cutting begins, after placing the central axis in the socket. It is important to hold the rock drill at a 90 degree angle to the plane of the cladding. Further, upon reaching the main wall, the crown is also changed to an element "on concrete", "on aerated block", etc.
When working on an already laid cladding, it is undesirable to make holes along the edges of the tiles, at the junction of two or four tile blocks. This often leads to splits, cracks, damage to the material.
Before making a hole in the tile for the outlet, be sure to prepare protective gloves and goggles. Fragments of ceramics are traumatic. Even if a simple tile or glass cutter is used.
When marking a dark lining, a marker or pencil will not be visible on it. You can fix this by sticking a piece of masking tape on top. A future circle is already applied along it.