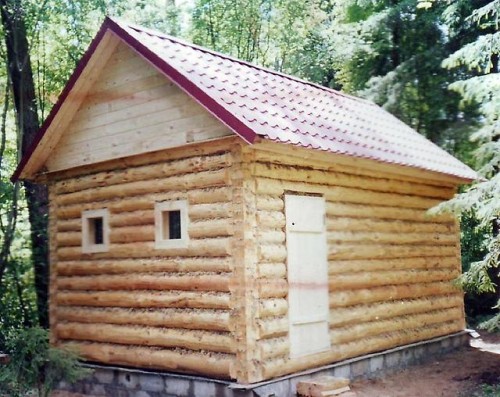
The efficiency of the work and the service life of the structure depends on the quality of the foundation. A well-designed and built foundation for a bathhouse with your own hands will protect the building from cold and dampness, and will ensure the maintenance of a healthy and comfortable microclimate in the premises. There are several options for making a base for a sauna. The choice depends on the assessment of many factors, each of which is important.
Soil study when choosing a foundation for a bath
The type of soil is one of the decisive conditions that influence the choice of the type of base for the bath. Indicators of density, humidity, groundwater level and degree of expansion during freezing (heaving) are evaluated. You can determine them by conducting laboratory tests, but it is easier to check with your neighbors.
There is the following classification of soils:
- Non-porous. Massive stone, pebbles, sand of medium and coarse granularity, When freezing, give expanded to 1% of the volume. The depth of the foundation can be any, regardless of the freezing point, but not less than 50 cm to create a safety margin.
- Puffy. Fine sand, loam, clay, sandy loam. When frozen, they expand up to 10%. The foundation is laid at the depth of the average freezing point, which is established for the region.
Based on the data obtained, appropriate conclusions are drawn and optimal decisions are made.
When building on solid soils, light, shallow or surface structures can be preferred. On terrain with slopes or unstable soils, you should choose heavy and wide structures with a large immersion depth.
Preparatory work
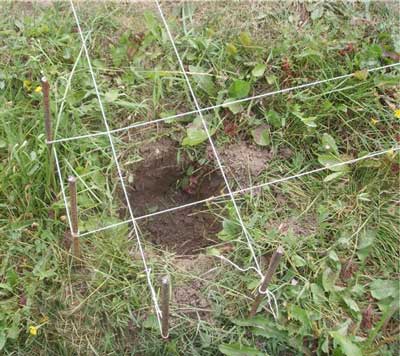
After drawing up the project, marking on the ground and preparation of the workplace are carried out.
It is recommended to perform this activity in the following sequence:
- Determine where one of the corners of the building will be. Drive a count in this place.
- Using a tape measure, mark the rest of the corners. Check the accuracy of the marking by measuring the distances along the diagonals.
- Pull the cords between the stakes. Mark the position of the inner partitions with beacons. Drive in the next stakes and stretch the cords between them.
- Focusing on the project, determine the internal boundaries of the foundation.
The final stage will be earthworks. They are carried out in accordance with the type of future foundation and instructions for its manufacture.
Types of foundations for a bath
To make a solid and durable foundation for a bath with your own hands, it is enough to have the usual set of household tools that are found in almost every household.
The minimum set consists of the following materials and accessories:
- concrete mixer;
- roulette, level;
- shovel, hammer, ax, hacksaw;
- grinder, welding machine, screwdriver;
- marker;
- self-tapping screws;
- geotextile;
- sand, crushed stone, cement.
The list may be more or less, depending on the technology of arranging the base for the bath.
Tape
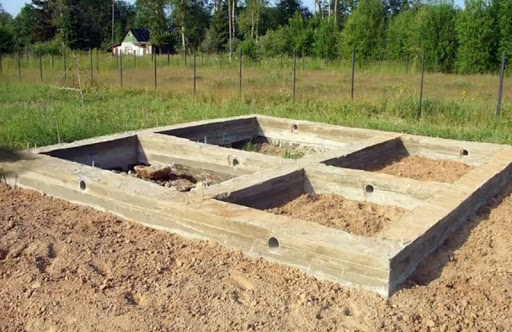
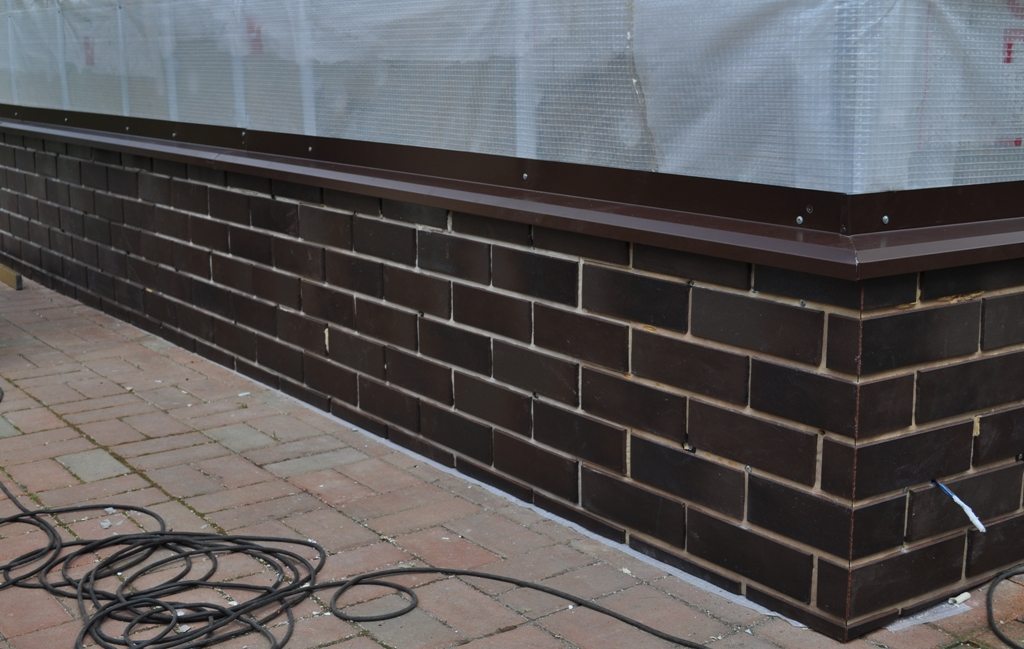
This type of construction is the most popular in private construction. It can be done literally within one day, provided that it is shallow.Arrangement of the buried tape will require more time and effort, but as a result, you can get a full-fledged concrete basement.
Construction sequence:
- Excerpt from the trench. The width is made so that there is room for the installation of the formwork.
- Sand filling. Depending on the degree of heaving, the layer thickness is 10-40 cm. The material is well wetted, leveled and rammed.
- Formwork manufacturing. Used material at hand or a factory-made panel set.
- Assembling the steel frame. If the joining of the rods was carried out by welding, then such places are cleaned and painted.
- Pouring concrete. This process is carried out continuously to avoid delamination of the material.
After filling the mold, the concrete needs 28 days to gain strength.
There is an alternative technology, which consists in laying reinforced concrete blocks (FBC) in a trench. The block foundation is assembled using lifting equipment. This is an additional investment, but the end result is worth it.
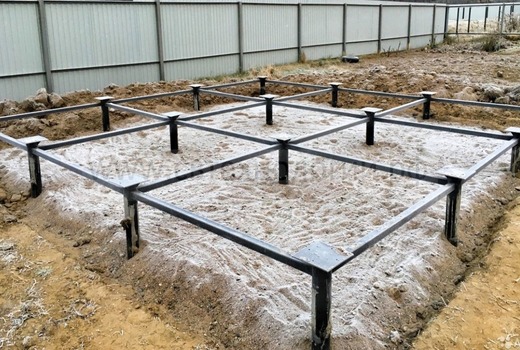
Columnar

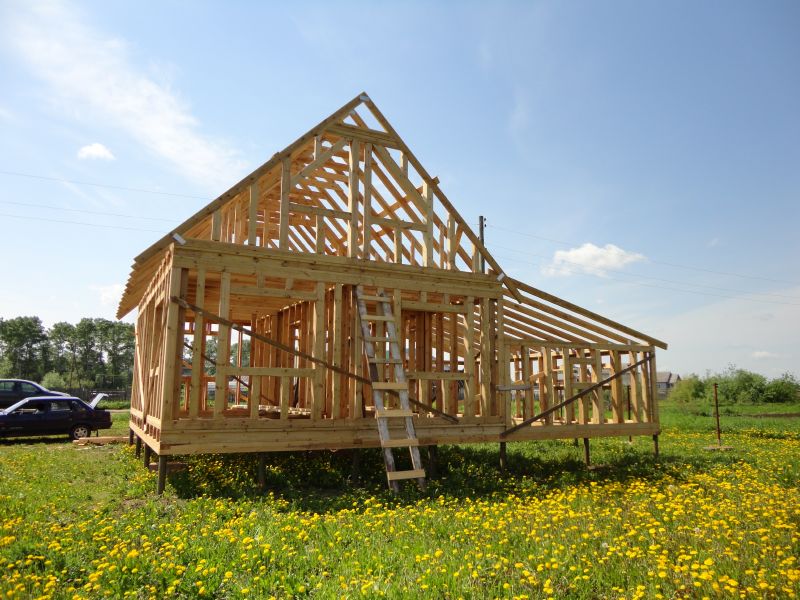
A columnar foundation is chosen when construction is carried out on solid, non-rocky soil. This option is great for the construction of light frame, wooden buildings, baths made of timber and foam blocks, log cabins. The arrangement of the columnar base is extremely simple - supports are installed along the perimeter of the structure and under the partitions.
The material of manufacture can be:
- clay bricks, bonded with cement mortar;
- reinforced concrete foundation blocks;
- concrete-filled tires that serve as molds.
Step-by-step installation process:
- Transferring the projection of the building to the ground. Determination of points of installation of supports.
- Excavation of holes up to 60 cm deep. Removal of stones, roots, leveling of the bottom and its compaction.
- Arrangement of a sand cushion. Material wetting and tamping.
- Installation of pillars. Each method involves the use of its own technology. As a rule, cement mortar is used to bond the fragments, and reinforcement is used to stiffen the structures.
- External finishing of supports. This procedure includes waterproofing and the application of cladding materials to give the structure aesthetics.
After the supports gain strength, a slab or grillage is laid on them.
Pile
A pile foundation is an excellent solution when building a sauna on slopes and areas with unstable ground. The length of the products is up to 450 cm, but if necessary, they can be increased to 900 cm. This allows you to achieve a solid material in which the piles will hold firmly, regardless of the weather and season.
There are such types of foundation piles:
- Driven (pressed). They go deeper into the ground with a mechanical hammer. They are reinforced concrete pillars with a square section and a pointed end.
- Bored. Steel or asbestos-cement pipes are inserted into pre-drilled wells, which then need to be poured with concrete.
- Screw. The most efficient and practical products. They are hollow iron pipes with blades at the tip. After screwing into the ground, they hold firmly and stably in it.
The piles are immersed in the ground in accordance with the scheme drawn up taking into account the expected load. After aligning the supports, they are connected into a single structure with a grillage.
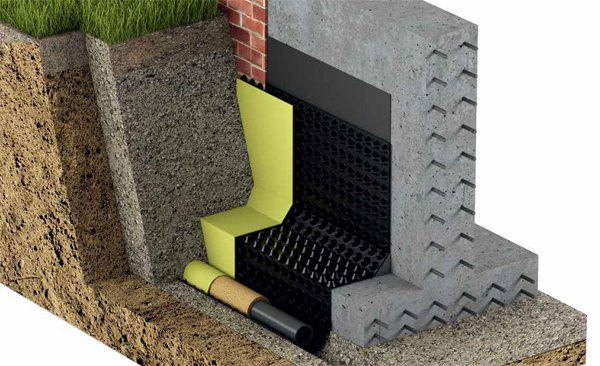
Monolithic
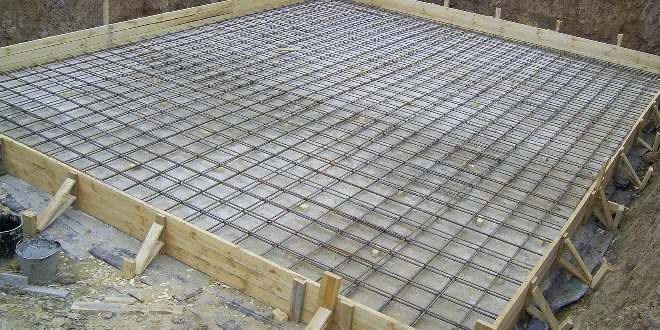
The main feature of a monolithic base is that it evenly transfers pressure to the ground. This allows construction to be carried out even on permafrost. The foundation of the slab for the bath is made up to 50 cm thick, depending on the calculated vertical load. The advantage of this solution lies in the fact that the cast base is a ready-made sub-floor, on which ceramic tiles can be laid immediately after the concrete has set.
Phased construction process:
- Transferring the contour of the building to the terrain.
- Excerpt from the foundation pit, removal of tree roots from it.
- Laying the bottom with geotextiles, backfilling with a crushed stone and sand pillow.
- Installation of a thermal insulation layer made of foam or mineral wool.
- Installation of the reinforcement cage.
- Filling the mold with concrete mortar.
For 28 days after pouring, the slab must be moistened daily so that cracks do not form on it.
Rules for building a foundation for a bath with your own hands
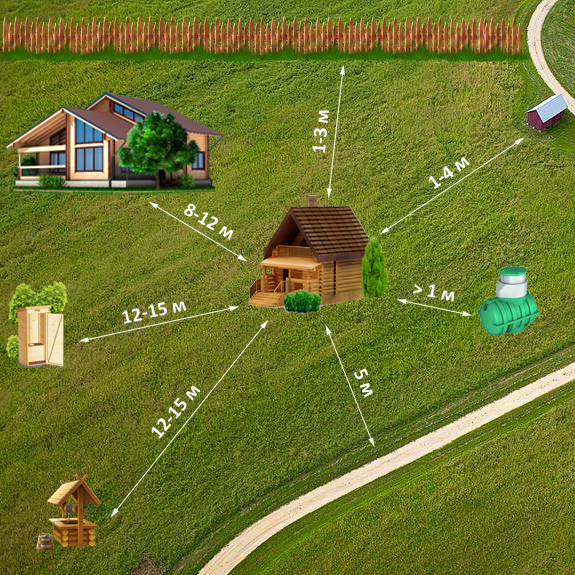
- Not closer than 3 m from the fence with a neighboring plot. It is necessary to provide that the shadow of the building does not fall on their ground.
- You cannot enter construction under power lines or over underground utilities.
- There should be no tall trees closer than 5 m, as their roots can destroy the foundation.
- The location of the drain pit or septic tank at a distance of 7 m from the house and 25 m from the water intake well.
- The entrance to the building and the area around it should be hidden from prying eyes.
The plumbing issue should be considered. There are two options here. The first is to enter from the central line, if the house is connected to it. It is better to lay pipes underground in order to exclude the possibility of freezing in the cold season. If the water supply is carried out from your own well, you can install a tank heated from the boiler chimney in the attic of the bathhouse.
Making a foundation for a furnace

As a rule, the stove has a rather large weight, which affects the stability of the entire base in the ground. The metal structure weighs a little, but if it is loaded with stones, the total weight can be 500 kg or more.
Depending on the type of foundation chosen, the following decisions are made:
- install additional piles;
- pour a branch with a shallow or deeply buried tape;
- put a separate reinforced concrete block.
On a monolithic foundation, auxiliary foundations are not required, since the slab has a sufficient stability margin.
It is more difficult with a brick stove, since together with the chimney it can weigh up to 2000 kg. Such a structure requires a separate support. It is advisable not to associate it with the main foundation of the bath in order to prevent its destruction, deformation or change in position in space. The best option is to make your own mini foundation, corresponding to the manufacturing technology of the base for the structure.
The foundation for the furnace must have a sufficient margin of safety, exceeding this figure for a similar building structure. This will avoid costly repairs, the need for which will arise at the most inopportune moment.