Polycarbonate often replaces silicate glass in the construction of a greenhouse. The choice is justified: the material is much stronger and less fragile than glass, transparent, lightweight and retains heat, which is very important for a greenhouse. During installation, it is important to choose a suitable method of joining the sheets so that the coating does not allow moisture to pass inside, and heat outside.
Preparing polycarbonate for docking

For outbuildings, both cellular and monolithic polycarbonate are taken. The second is a solid slab and does not need preparation for installation.
Cellular - 2 thin sheets of polycarbonate, fastened together by numerous thin partitions. They form cavities that resemble honeycombs. This option is lighter than monolithic, it bends easier, but at the same time it can withstand fairly high loads.
However, honeycomb panels need protection. The ends of the sheets are open, moisture or even insects can get into the cavity inside the material. This happens if the sheets are installed at a slope. The ends should be closed. To do this, determine which edge of the slab is considered the top and which is the bottom. The upper one is sealed with a solid sealing tape to prevent water infiltration. The bottom edge is sealed with perforated tape so that condensation or rainwater can flow out.
If the sheets are fastened with an arch, the ends need not be pasted over. This method of joining for cellular polycarbonate prevents leakage inside.
What tools and materials will be required

To join polycarbonate plates to each other, you will need the following tools:
- hacksaw for metal or circular saw for cutting;
- screwdriver or hammer with a screwdriver;
- drill, if it is better to make holes in the crate in advance;
- connector - depends on the selected docking technology;
- fasteners - galvanized hexagonal self-tapping screws with a thermal washer.
Polycarbonate attracts precisely by the fact that special tools are not needed for the construction of even complex structures.
Choice of sheet joining technology

The connection of polycarbonate to each other is performed by several methods. The choice depends on the size of the structure, installation method and experience. For example, thermal fastening gives the best result, but it is very difficult to perform. For beginners, it is better to choose an easier method of fastening.
Plastic sheets do not overlap.
One-piece profile
An easy method, ideal for joining sheets in one plane. The connector is a profile with grooves and a channel formed by jumpers. Polycarbonate sheets are inserted into the slot of the connector, and the strip itself is fixed to the frame support. The profile is fastened with a self-tapping screw, setting the latter strictly perpendicularly. The self-tapping screw goes through the channel without touching the material and goes deep into the wood by at least 5 mm.
Before attaching the connecting profile, it is necessary to insert a sheet into it and put a second profile on its edge. This kind of "fitting" allows you to more accurately position the entire structure on the frame. This is due to the fact that each connector must be installed exactly in the center of the frame parts, on which it is fixed.Otherwise, the sheet will sag, since this is an excessive load for plastic.
They produce plastic and aluminum profiles. The first is easier, for its installation you need to take self-tapping screws with a thermal washer. Aluminum is stronger, usually placed on a metal profile and fastened with self-tapping screws for metal.
There should be a 2–3 mm gap in the connector between the edge of the slab and the channel partition. It compensates for thermal expansion.
Split profile

This option is used when curved slabs need to be joined on an arched frame. The profile consists of 2 halves - lower and upper. The step-by-step installation instructions are somewhat different.
- First, the lower bar is attached to the frame. They are fixed with self-tapping screws through the central channel in increments of 30 to 50 cm.
- The sheets are laid so that their edges are in the profile, but at the same time, 2-3 mm of a gap remains from the partitions to the edge. Polycarbonate can lie at different angles.
- The upper bar is fixed, leveled and glued. It is somewhat difficult to do this manually, so a light wooden hammer is used.
On a split profile, you can fix sheets in the same plane. But since it is more expensive, it is better to buy it when there is a need.
Adhesive technology

The profile does not always look neat, especially when an arched structure is being erected. If it is necessary to achieve smoothness of the walls and complete transparency of the structure, the connection is made with glue.
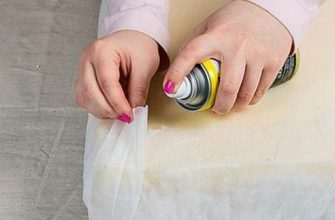
The silicone composition is applied to the end along the entire length. The edge of the second sheet is pressed against it. The composition sets very quickly. It is important that the joining of the sheets is very tight. After drying, the seam remains transparent and unobtrusive.
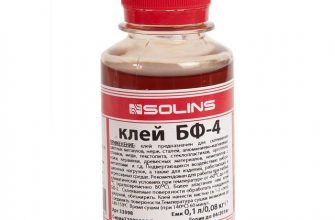
In addition to the silicone composition, you can take solvents based on methylene chloride or ethyl chloride. The ends of both sheets are treated with this composition before gluing.
Thermal fastening and connection of sheets using a profile
It is recommended to dock polycarbonate in this way if greenhouses are being built in a very rainy region. Docking through the connector does not guarantee that there will be no leakage. Thermal sealing ensures absolute waterproofness.
A special docking lock is heated to the temperature specified in the instructions. Then both sheets of polycarbonate are inserted into the lock. When the structure cools down, the sheets will automatically take the desired position.
You need to perform work on a flat surface, preferably on a carpentry table.
This method is of little use for a large greenhouse. In this case, it is better to resort to point bonding.
Special and corner profile fasteners for docking

Polycarbonate allows the construction of roofs and canopies of an unusual, complex shape. This requires a special profile for docking.
The corner connector for solid and cellular polycarbonate is used when the sheets are held together at an angle. One-piece and split models are produced. The former are used more often, since they decorate such joints better.
When connecting the slopes on the roof, it is recommended to take a special angular profile - "ridge". It allows you to bind sheets at a steep angle.
It is important to place the joints on the supporting elements of the frame.
Polycarbonate bonding tips

Joining sheets of material is a fairly simple job. However, some recommendations should be followed.
- All cutting work must be done on a level surface.
- Cut polycarbonate with a saw with the smallest teeth to achieve an even cut.
- Shavings and dust must be removed and shaken out of the cavities.
Polycarbonate is resistant to temperature extremes, but it is better to cut and fasten it at positive temperatures. If work is carried out in winter, the correct clearance must be observed for docking and fixing.