Very high humidity and the presence of a large amount of condensation on all surfaces of the bathroom are a big problem for many. An exhaust fan will help to cope with this task.
Why ventilate your bathroom

The bathroom is often small, so without constant air circulation, the humidity level will be very high. This will encourage the growth of mold, mildew and other microorganisms. In addition, the service life of many building materials used in the arrangement of the premises can be significantly reduced. Since the bathroom does not have windows, the only way to maintain normal humidity is to use the installed ventilation systems. They are usually designed so that air circulation is maintained without additional devices. Check if this is enough by placing a sheet of thin paper to the hole and letting go. It must be held by the pressure difference inside and outside and must not be fed. If this does not happen, a fan is needed, which will provide forced air circulation and reduce the humidity level.
Fan characteristics
The correct choice of a device cannot be made without knowing its technical parameters and characteristics. The timer fan has the following features:
- power. In order to determine the required performance, you need to measure the volume of the bathroom and multiply the result by 8 (the air exchange rate recommended by sanitary standards). The power received is the minimum required;
- noise level. The fans are produced with and without noise mufflers. The exact value of the generated noise can be found in the passport of the device. If it exceeds 30-35 dB, the installation of such a fan in the bathroom is not desirable;
- type of control. The fan timer can be set in various ways. By pressing the buttons on the device, by turning a mechanical relay or by a signal from the control panel. It is necessary to choose the most convenient method, although it does not have to be adjusted too often;
- humidity sensor. With the help of this sensor, it is possible to automatically turn on when a critical level of humidity is reached and turn off when it drops to the required one or turn on after a person enters, and turn off after a decrease in humidity or by a timer signal. This helps to reduce energy consumption.
electrical safety
Compliance with safety rules in rooms with high humidity is very important. There must be a mark on the body of the device indicating the possibility of its use in such a place. It is permissible to use a fan with a timer with an IPX3 class and higher.
| Class | Water resistance level |
| IPX0 | No protection |
| IPX1 | Only from drops falling vertically |
| IPX2 | From drops falling with a slope of <15 degrees |
| IPX3 | From water spray |
| IPX4 | Splash |
| IPX5 | From water jets |
Devices with a class higher than IPX5 do not need to be used.
What is a timer for?
When connected via a switch, a device with a timer can operate in 2 modes:
- start work after turning on the switch, finish in 15-45 minutes;
- do not turn on if the light was turned on for less than 90 seconds, otherwise, after turning off the light, work for 15-45 minutes.
The operating time is regulated by the trim switch on the device body using a screwdriver.
Differences in operating principles
Different types differ in price and technical characteristics: noise level, power. Fans for domestic use can be divided into 3 types:
- axial;
- diametrical;
- radial;
The use of cross-flow exhaust fans is usually not required in this case. It is enough to choose between radial and axial.
Axial
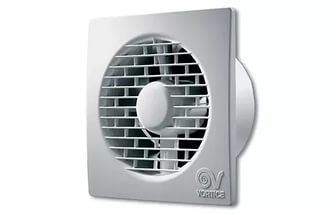
The most budgetary option, moreover, as a rule, with higher performance. However, the noise level can be significantly higher than that of radial ones. It is recommended to stay on it if the bathroom has a large area.
The device consists of an electric motor and an impeller with blades fixed to it. The principle of operation is as follows: the engine rotates the wheel, air is captured by the blades and is directed into the ventilation channel. If the device is equipped with a non-return valve, the flow of air from the ventilation to the bathroom becomes impossible, which protects against dust, harmful microorganisms and insects.
Radial
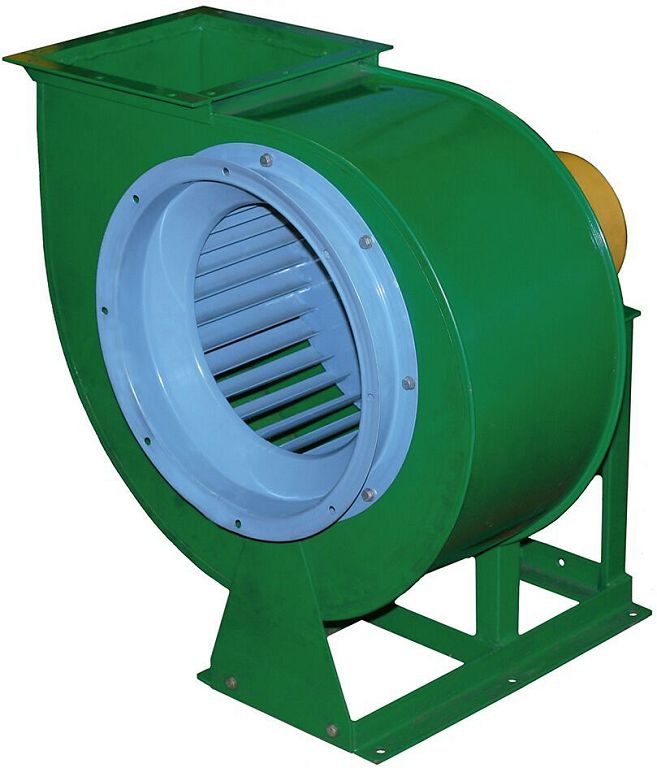
Consists of a wheel in a spiral casing. Through the holes between the blades, air enters the device, then compresses and passes into the spiral casing, and then into the heating hole. The performance of budget devices is quite low.
Installation of equipment
Domestic fans can be divided into 2 categories:
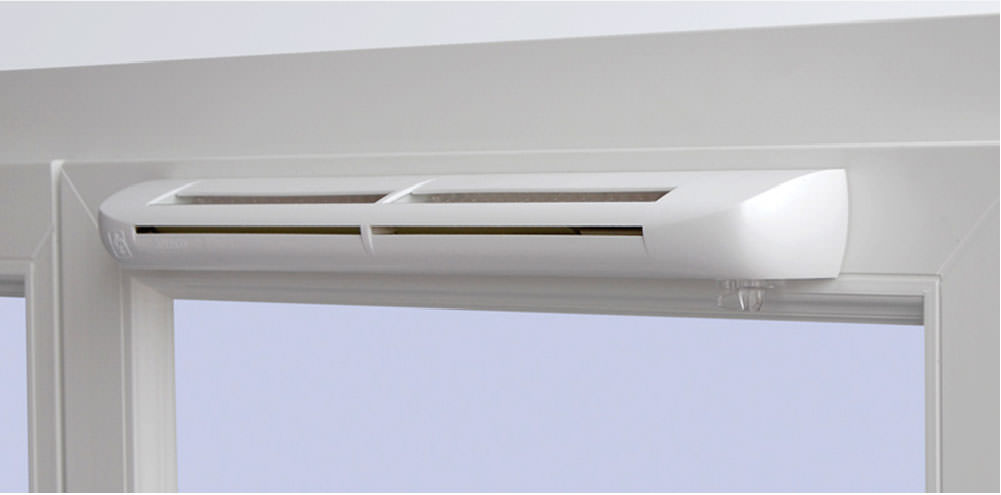
- wall-mounted;
- channel.
The wall unit is placed directly in front of the vent outlet. If there is a need to move the device away from the hole (for example, when installing in a bathroom with a false ceiling), an air duct can be installed to connect the fan and the shaft. The duct construction can be carried out in the gap above the false ceiling.
The second type of fans can be mounted only inside the ventilation duct. They are usually used when working in conjunction with a false ceiling and are installed inside the conductive duct. Their body can be round or rectangular. You need to choose the one that will match the shape of the installed duct. A diffuser is installed at the outlet. It can be used to regulate the air flow.
The height for mounting the device must be selected as high as possible. The top edge should be 50 mm below the ceiling. If the ventilation opening is significantly lower, it is recommended to relocate it. Fastening is carried out using self-tapping screws or liquid nails. The choice depends on the weight of the device and the material of the walls.
Electrical connection
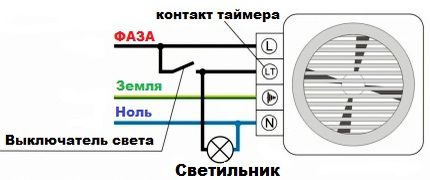
Usually the fan is connected to the lighting fixture. In this case, he begins to work simultaneously with the entrance of a person into the bathroom, and ends after a certain time set by the timer after turning off the light.
The cables are connected in the following way:
- phase - contact L;
- zero - contact N;
- earth - contact earth;
- phase - switch - luminaire input - luminaire output - timer contact (LT).
It is also possible to use an additional switch without connecting the device to the bathroom light. In this case, it is enough to remove from the proposed scheme a fragment of the luminaire input - luminaire output. This method is less convenient, since a person has to take more steps to start the device, but it allows you to save energy by not turning on the device in some cases (for example, when using a washing machine). It is most convenient if both switches are located in the same place.
If the installation is carried out at the time of repair, the cables can be run under the finishing materials on the walls and ceiling. If the repair has already been completed, you can use cable channels.It is necessary to ensure that a large amount of water spray does not reach the places of their installation. In order not to spoil the design of the bathroom, the cable channel can be run close to the ceiling. If the ceiling is made of plastic panels, you can carefully remove them, hide the wiring under them and put them back together.
How to install the wall unit
First, the wiring is laid to the installation site. Do not forget about safety precautions. When connecting cables, the electricity must be turned off.
- The top panel is removed from the device.
- The cable is connected to the fan contacts via a terminal block. The wire connected through the luminaire connects to the first contact of the luminaire block, and the second contact connects to the LT contact of the device.
- The device is securely mounted on the wall.
- The upper decoration panel is returned to its place. If fitted, an insect screen is placed between the device and the panel.