According to medical recommendations, the humidity in any living space should be at the level of 50% - only in this case everyone staying there will feel comfortable. Low moisture content in the air worsens overall health, increases the likelihood of various diseases, and leads to skin problems.
Humidifiers are used to bring this to a normal level and maintain it.
What are humidifiers
All existing devices that serve to increase the moisture content in the air are divided into three types:
- aquatic;
- steam;
- ultrasonic.
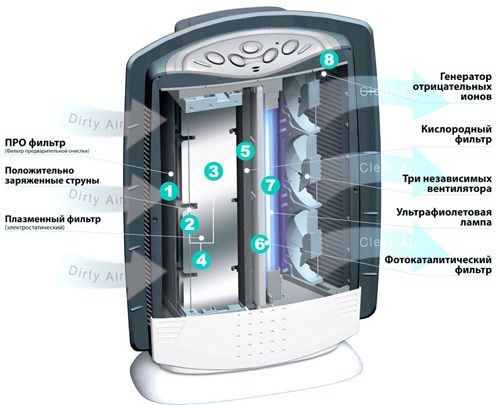
The simplest type of such equipment is water humidifiers. Their work is based on the passage of air through the filter element, which is pre-moistened. The filter is most often cassettes made of several layers of paper. The increase in air content occurs at normal room temperature, this is achieved due to the natural evaporation of water. Although the efficiency of these types of devices is low, they are characterized by an affordable cost.
Steam humidifiers perform their functions by heating and evaporating water - something like a boiling kettle without a lid. Devices of this category are capable of providing good humidification, but they are not safe to use - you can easily get burned. Therefore, the use of such humidifiers in a home with small children is not recommended.
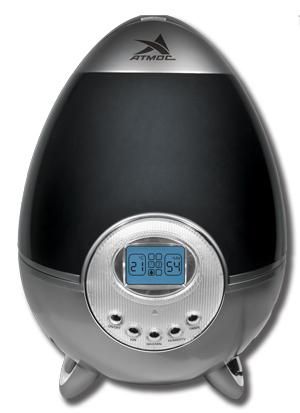
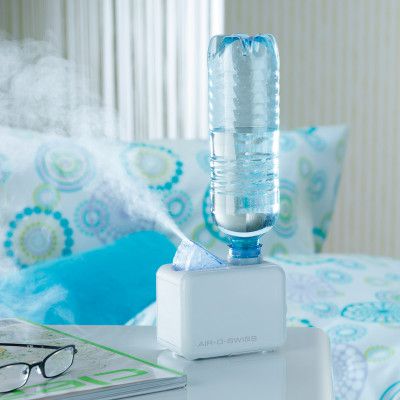
The most modern and efficient type of humidifier is ultrasonic. There is a plate inside the device that vibrates, from which the water breaks up into very small drops, the fan carries them throughout the room. The effectiveness of such humidification is at a decent level.
Simple homemade humidifier
The modern market offers consumers a variety of humidifiers of different types, performances and prices. In addition, you can always make a do-it-yourself humidifier - developing simple models is quite simple.
There are many DIY schemes for increasing the moisture content of the air. Let's consider the process of creating a device of the simplest design.
Materials and tools used
First of all, for the self-production of such a device, you will need to find a plastic container. Its dimensions do not play a big role, the main thing is that the height is at least 20-30 cm.
In addition to such a container, you will also need a computer fan. The last component of the future humidifier is the power supply unit, which will ensure the operation of the fan. For computer coolers to work, the voltage must be 12 V - a block of just such a voltage will be needed.
After preparing all these materials, you must also prepare the tools. Among them:
- drill;
- soldering iron;
- stationery knife.
Sequence of work

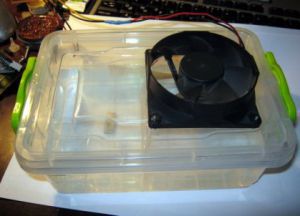
After preparing everything you need, you can start the process of assembling the device. How to make a simple design DIY humidifier? The sequence of actions is as follows:
- Holes are drilled in the lid of the plastic container - through them, a fan will be attached to the upper edge of the box;
- Further on the lid is marked the place where the cooler blades will be located. Using a clerical knife, a marked hole is cut out;
- The next step is to install the fan on the place prepared for it using the selected mounts.
On this, the hand-made manufacture of the humidifier is almost completed: it remains only to connect the installed cooler to the power supply using a soldering iron, pour water into the container, and close the lid. The device will then be ready for use.
Such a simple design is able to provide indoor air humidification by about 30 percent, which is a decent indicator.
Expanded clay humidifier
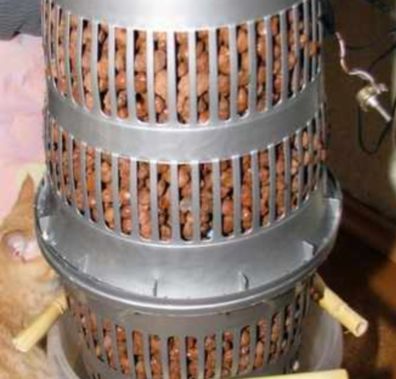
A home-made device that uses expanded clay, a material that absorbs moisture well and releases it, is distinguished by a higher efficiency. Since devices of this design provide a good increase in humidity, it can be used not only for domestic purposes, but also, for example, for growing mushrooms that require very high air humidity.
To make a humidifier according to this scheme, you will need:
- plastic waste baskets - 4 pieces, two large and two smaller;
- bucket for 10-12 liters;
- computer fan;
- aquarium pump.
The process itself is carried out in the following sequence:
- Two small baskets are connected to each other. This can be done with glue, plastic fasteners, or a household hair dryer.
- Similarly, baskets of large volumes are connected by installing small connected ones inside them. This will create a humidifier body similar in design to a thermos.
- Next, a hole is cut out in a large basket, expanded clay is poured into it.
- This material must be selected so that the granules do not fall out through the slots in the baskets. Pre-claydite is thoroughly washed with water.
- An aquarium pump is installed at the bottom of the water bucket, its tubes are brought out to the very edge of the bucket.
- The plastic ring, in which the holes are made, is installed on top of the humidifier - moisture from the holes will drain back into the bucket.
- A fan is installed on top of the ring, which will provide air supply to the inside of the humidifier, which, being humidified, will go out through the holes in the baskets.
After pouring water into the bucket and installing the lower part of the container with expanded clay into it, the homemade humidifier will be ready for use - all that remains is to supply power to the cooler.
Homemade ultrasonic humidifier
Now everyone knows how to make a humidifier of the simplest design. Ultrasonic types of such devices are even more effective; they can be used for domestic purposes, for growing mushrooms, or for solving many other purposes. How to make a DIY ultrasonic humidifier?
The scheme of work is as follows: on the float, the piezoelectric emitter will be lowered into the water, producing "cold steam". A fan is used to supply air to the inside of the case, which will also expel steam from there.
Materials:
- a small plastic bucket with a lid is suitable for the device body;
- computer fan;
- two tubes of 10-15 cm, the diameter of which is the same as that of the cooler blades;
- Styrofoam;
- disposable cup;
- an ultrasonic emitter that can be purchased at many radio parts stores.
After preparing the materials, you can start developing the device:
- Holes are made for pipes in the lid of the bucket. A cooler is installed on the top of one of them.
- A hole is made in the foam for the cup. It is installed in the hole - the float for the emitter is ready.
- In the bottom of the glass, two holes are made for the flow of water. An emitter is placed inside such a float, water is poured into a bucket, the float is lowered there.
- The bucket is covered with a lid, the tubes are inserted into the prepared holes.
After that, you can turn on the emitter. If everything has been done correctly, "cold steam" will immediately come out of the free tube. Thus, the emitter is a useful household appliance that can be made with your own hands.