Installing a split system is an additional cost. The owner of the climatic equipment decides individually whether to pay professionals or carry out the installation on their own. Installation of an air conditioner is a responsible procedure, the efficiency of cooling and the service life of the equipment depend on it.
Installation materials and tools
The task of the installer is to fix the outdoor and indoor unit in the selected places, connect them with a bus and connect them to the power supply. The assembled system is evacuated, filled with freon and tested.
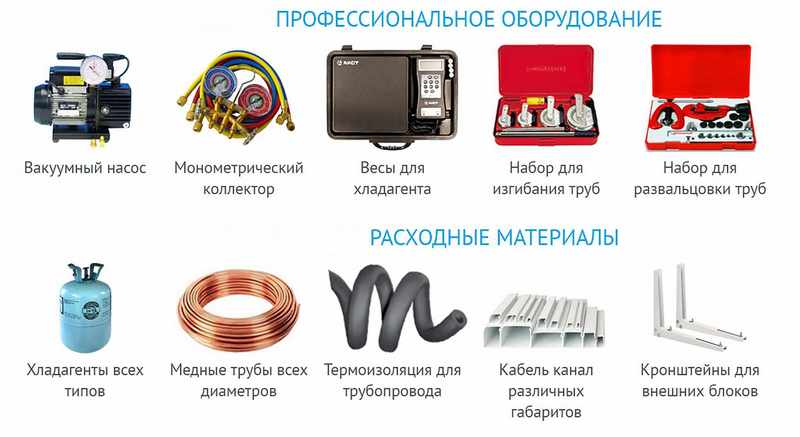
- perforator with a diamond drill with a diameter of at least 45 mm;
- Vacuum pump;
- pipe bender;
- rolling;
- gauge manifold;
- pipe cutter;
- rimmer stripping.
Installation materials:
- 2 copper pipes with plugs along the edges, the length is equal to the length of the line plus a margin of 20-30 cm. The diameter depends on the recommendations of the equipment performance, the higher it is, the larger the section of the route. The common version is 1/4 and 3/8 inches - for the supply and return of freon.
- A plastic box, inside which the freon track and electrical wiring will be hidden.
- Electrical cable. The wire cross-section depends on the power of the split system: up to 3 kW - 1.5 mm2, 3-5 kW - 2.5 mm2, 8 kW - 4 mm2.
- Drainage tube corrugated or polypropylene water pipe 80 cm longer than the line between the blocks.
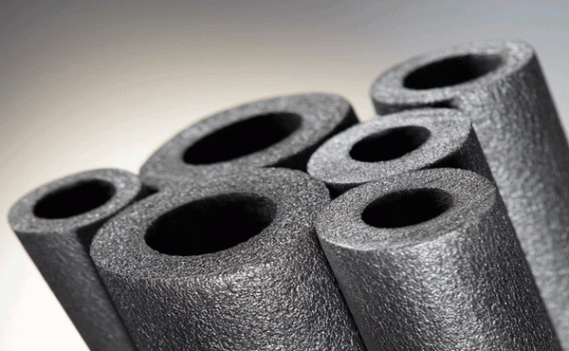
- Thermal insulation for the freon line - K-Flex rubber sleeve. The material is durable, has low thermal conductivity, and is fireproof. It will prevent energy loss in the refrigerant.
- Brackets for mounting the outdoor unit - metal corners designed for a load 2 times the weight of the equipment.
- Fasteners (bolts, anchors, plastic clips).
When choosing the wall thickness of copper pipes, the type of refrigerant is taken into account. In systems with R410A freon, the pressure reaches 26 atmospheres, and in R22 - 16. In the first case, a line with thick walls and a better flaring are required.
Air conditioner installation instructions
Monoblock versions of climatic equipment for an apartment are produced of window and mobile types. The first option is installed in the window opening, and the second does not require installation. It is enough to organize the removal of air to the outside through a special hose. A common type of air conditioners is a split system, selected in accordance with the area of the room. The stability of its work depends on the quality of the installation. The climatic equipment consists of two blocks:
- external - condenser;
- internal - an evaporator, it can consist of 2-4 modules, this combination is called a multisplit system.
The outdoor unit is always installed first. The system is connected by a line of copper pipes through which the refrigerant circulates. A drain hose is led out from the indoor unit. According to the rules, it goes down the drain. This is an expensive and complicated procedure. In practice, the condensate is drained outside. The design of the air conditioner does not affect the installation principles. The block placement rules for different models are almost identical.
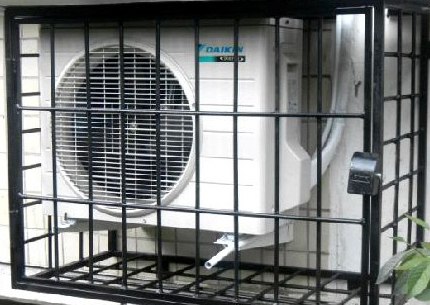
Choosing a place and fixing the outdoor unit
- side of the world (south is not recommended due to heating of equipment by the sun's rays);
- the presence of trees - leaves and other debris will clog the air conditioner;
- wall material;
- the mass of the outdoor unit;
- the ability to access for service;
- protection from weather conditions.
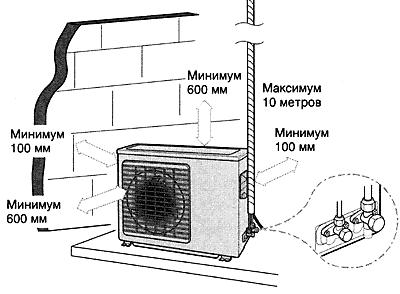
Common installation options: to the right or left of the window, under the window, on the balcony. If the apartment is located on the ground floor, the unit is fixed at a height of at least 2 m from the ground. Installation of split systems on the facade of a multi-storey building is performed by climbers. Considering the cost of their services and subsequent maintenance, the option of installing the outer part of the air conditioner on the balcony is relevant. The equipment will be sheltered from bad weather, repair and refueling of equipment will be simplified. Balcony requirements: no glazing or wide-opening windows for heat dissipation. Installation rules:
- The distance from the outdoor block to the wall is 15-20 cm. The gap will create conditions for heat dissipation and laying the route.
- Fastening is carried out not to a ventilated facade or insulation, but to a solid foundation (concrete, brick).
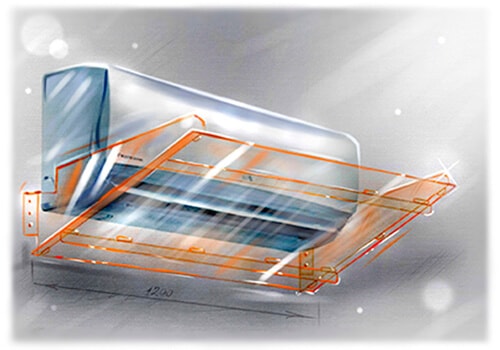
- The outdoor unit is installed horizontally, at the same level or below the inside.
- The length of the connecting line should not exceed 6 m. Long duration requires an increase in the volume of freon, there are losses of cold in the system.
- The water from the drain pipe must not fall on the wall and drip onto passers-by.
Before the installation of the air conditioner, an agreement is obtained with the housing office. It is prohibited to attach equipment to the facades of buildings of historical value.
A metal visor above the unit will protect against icicles falling from the roof and other negative effects. It is installed after laying a line with freon. The visor should not be close to the wall; a gap is required for air movement. When choosing the location of the outdoor unit, please take into account that the noise of the operating air conditioner may disturb the neighbors.
Indoor unit installation
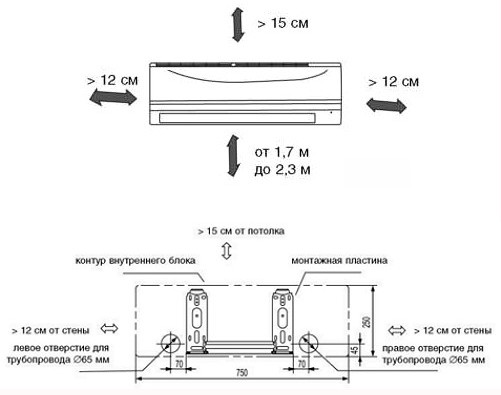
- over heating devices;
- below 1.5 m from the floor;
- behind curtains, curtains and other items that restrict air circulation;
- less than 15 cm from the ceiling;
- next to furniture;
- above the work or sleeping area to prevent colds.
Provide unobstructed access to the air conditioner. It will be required when servicing, replacing and cleaning filters.
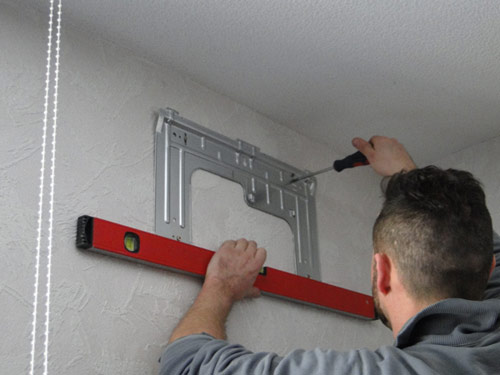
To connect the parts of the split system, a hole with a diameter of 45-50 mm is drilled in the wall. A sleeve is inserted inside for waterproofing wiring and pipes, reducing the likelihood of their damage. The hole is punched with a slope towards the street to drain the condensate. A mounting plate of the indoor unit is included in the package of the air conditioner. It is fixed horizontally, referring to the building level. Holes are drilled with a drill, installation is done with dowels. After fixing the block with special latches, the horizontal plane of the installation is checked.
Electrical wiring connection
The standard option for connecting household air conditioners of low power 1.5-2 kW is an existing socket. In case of insufficient power of the wiring from the shield, a separate cable with copper conductors is laid: 3 - single-phase connection, 5 - three-phase connection. Wire cross-section 1.5-4 mm2. An automatic shutdown device (RCD) is installed in the dashboard. There are terminals for wiring connections under the front panel of the air conditioner. The manufacturer's instructions describe the procedure schemes.Before connection, the protective insulation is stripped on each core. The end is inserted into the terminal and clamped with a screw.
From the indoor unit, the cable is routed to the outdoor part. The numbered terminals are located under the capacitor cover. The wires are connected according to the marking. The electrical cable is placed in a corrugation and mounted in a bundle with a copper pipe. Communications are laid in a decorative box.
Freon line laying

In the right places, the line is bent with a pipe bender. The use of a special tool eliminates dents and metal cracking. A heat-insulating sleeve is put on top, the joints of the insulation are fastened with reinforced tape. If the installation of the air conditioner coincides with the repair, a flush-mounted strobe is laid in the wall. Typically, communications are mounted outside the enclosing structures, excluding dusty cutting of concrete. The components of the line are wrapped from above with insulating tape.
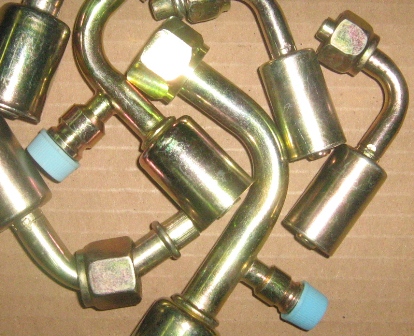
Threaded flanges are put on pipes with insulation. The ends of the tubes are expanded. The work is done accurately, there should be no cracks or grooves. Installation kits are available for self-assembly of the split system. They include all consumables:
- 2 copper pipes with a diameter of 6.35 and 9.52 mm with insulation, factory-flared edges and brass nuts;
- corrugated drainage hose;
- electric cable with a cross section of 1.5 mm2;
- brackets for mounting the outdoor unit.
When laying the highway, complex bends and differences in height are avoided.
After taking out to the outside, they are fastened to the wall with clamps with an interval of 0.5-0.6 m. The classic track is characterized by a length of 3-7 m and a simple configuration. The flared tubes are connected to the corresponding unions of the blocks. First, the nut is tightened by hand, then tightened with a torque wrench. The tool helps to control the degree of tightening. Excessive forces lead to shearing of the flared part, and insufficient sealing leads to loss of freon.
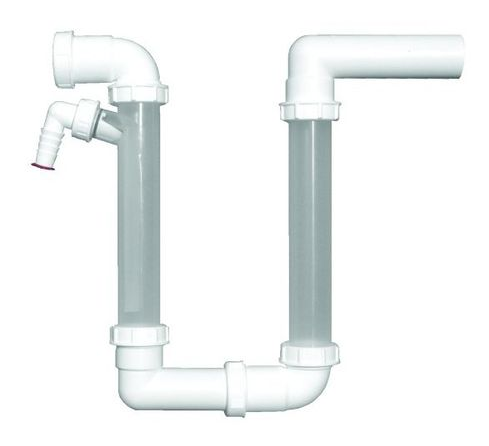
Drainage
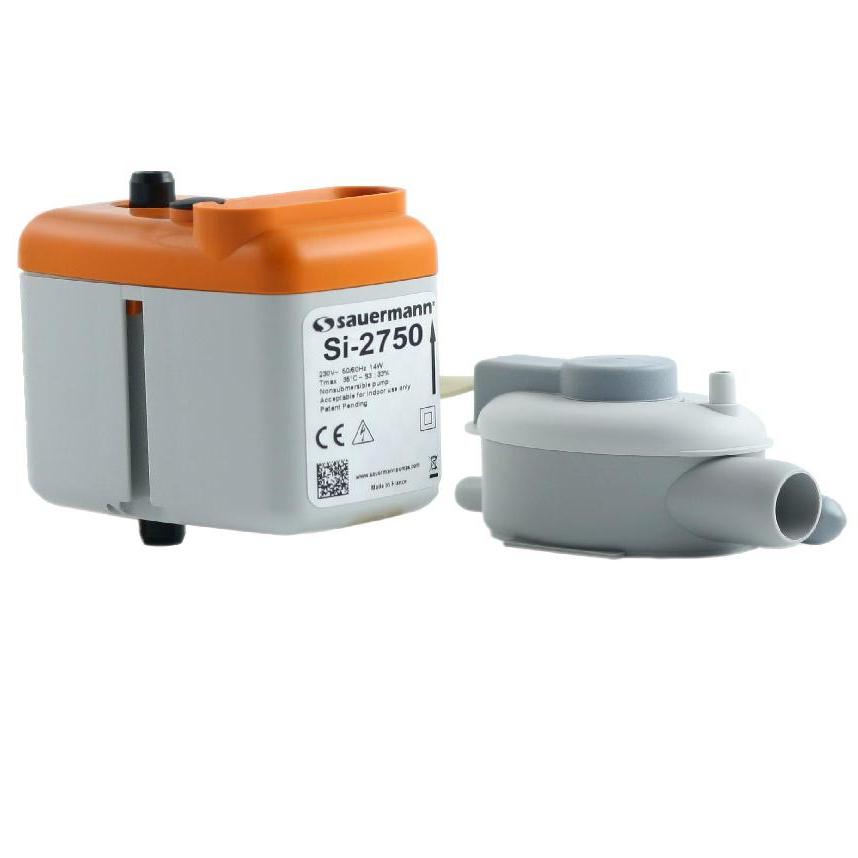
Simultaneously with the installation of the pipeline, condensate drainage is arranged. The drain hose is laid with a slope to allow water to flow freely or a drain pump is installed. The pipe is connected to the corresponding outlet of the indoor unit and is led out into the street or into the sewer.
System evacuation
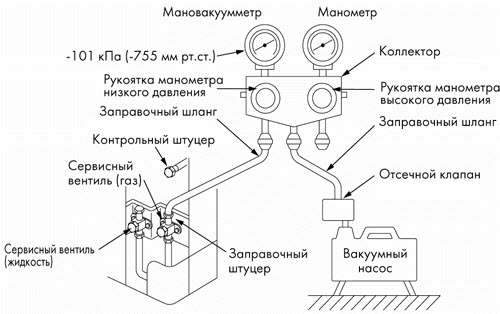
The structure is not disassembled within 30 minutes. During this period, observe the readings of the manometer. If they remain unchanged, the work is over. A deviation of the arrow towards zero indicates a leak in the system. Usually, problems arise at the junctions of copper pipes and air conditioner fittings.
It is not permissible to replace the evacuation by purging the system with freon. Moisture remains on the pipe walls and reacts with the refrigerant. The pipeline walls are oxidized.
Filling and testing the air conditioner
Having checked the tightness of the system, they begin to fill it with refrigerant. A hose is already connected to the service port, it should not be removed until the end of the freon injection.Use a hex wrench to open the liquid port valve. Freon movement through the system will be indicated by a characteristic noise. After filling, unscrew the hose from the gas valve. Work requires compliance with safety measures. Hands are protected from the release of freon with gloves, and eyes with special glasses.
Hissing, small amount of oil and refrigerant escaping are normal. The fitting is quickly closed with a plug, eliminating the loss of freon. The installation of the air conditioner is completed, you can turn it on for testing. When checking, close the windows and doors in the room.
Basic connection errors and their fix
Self-installation of split systems and the involvement of inexperienced installers in the work turns into connection errors. Typical flaws:
- Placement of the indoor unit in a niche, close to cabinets and other overall furniture. Violation of air circulation leads to freezing of parts, the appearance of a leak. The rational option is to perform a permutation. Moving furniture is easier than replacing the indoor unit in a new location.
- The lack of high-quality thermal insulation of the pipeline and the outlet to the outside leads to the appearance of condensation. High humidity provokes the development of fungus.
- Poor-quality flaring impairs the circulation of freon, the tubes do not fit well with the fittings. Refrigerant leaks.
- Kinks (kinks) of the line reduce the throughput of the line, increase the load on the compressor. An abnormal unit will wear out and break down quickly.
- Insufficient amount of refrigerant. The length of the pipeline in excess of the standard requires a proportional increase in the amount of freon. Insufficient refrigerant reduces the performance of the air conditioner. The system needs to be refilled.
- Moisture appears under the indoor unit due to skewed installation. The air conditioner is not installed horizontally, condensation from the drip tray drips onto the floor.
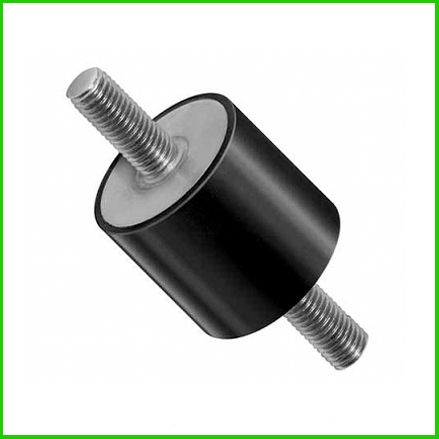
- The appearance of knocking from the outdoor unit due to weak fasteners or installation on a vibrating base without special pads. The situation requires an early correction of shortcomings. The fasteners are tightened to a reliable level.
- The outer wall is getting wet. The short drain hose allows moisture to drip down the façade. The tube is extended up to 80 cm, excluding the load-bearing wall getting wet. In winter, the hose can freeze if the split system is intended to be operated in a cold period, a heating cable is required.
- Installation of an air conditioner in a room where devices with high-frequency vibrations are located (drilling machines, welding machines).
- The flow of cold air creates a draft. Correcting the position of the front panel flaps will fix the problem.
The cost of installing an air conditioner depends on the power of the model, the location of the apartment (climbers work at a height will cost more), and the material of the walls. Each meter of the track over 5 m is paid separately. Taking into account consumables, the price of a standard installation is approximately equal to one third to one half of the cost of a split system.