The cellar can be placed on a plot of land in the form of a detached building or attached to the house. In the second case, you don't even have to go outside to enter the premises. This option is well suited if the space on the site is occupied by other buildings (for example, a garage, a barn, etc.) or if it has a very limited area. A good solution would be to equip a brick cellar - this material retains heat well and does not deteriorate under the influence of moisture.
Types of cellars
Having decided to make a brick basement, you need to decide on its design. This takes into account the climate of the area and the occurrence of groundwater.
Ground the storage facility is being erected in marshy areas and regions with high-lying groundwater, where it is impossible to make a dry deepening. Such a building is insulated with expanded polystyrene, and the walls are erected from bricks or various block materials that are not prone to rot under the influence of moisture. The option is suitable for regions with a temperate climate. In cold areas, increased requirements for insulation are imposed.
Wall-mounted the cellar is similar to the veranda attached to the building. Like the previous version, it is suitable for flooded and wetland areas. It is built in a similar way, but the pit is dug with minimal loosening of the soil so as not to weaken the area adjacent to the house (which threatens to crack the foundation).
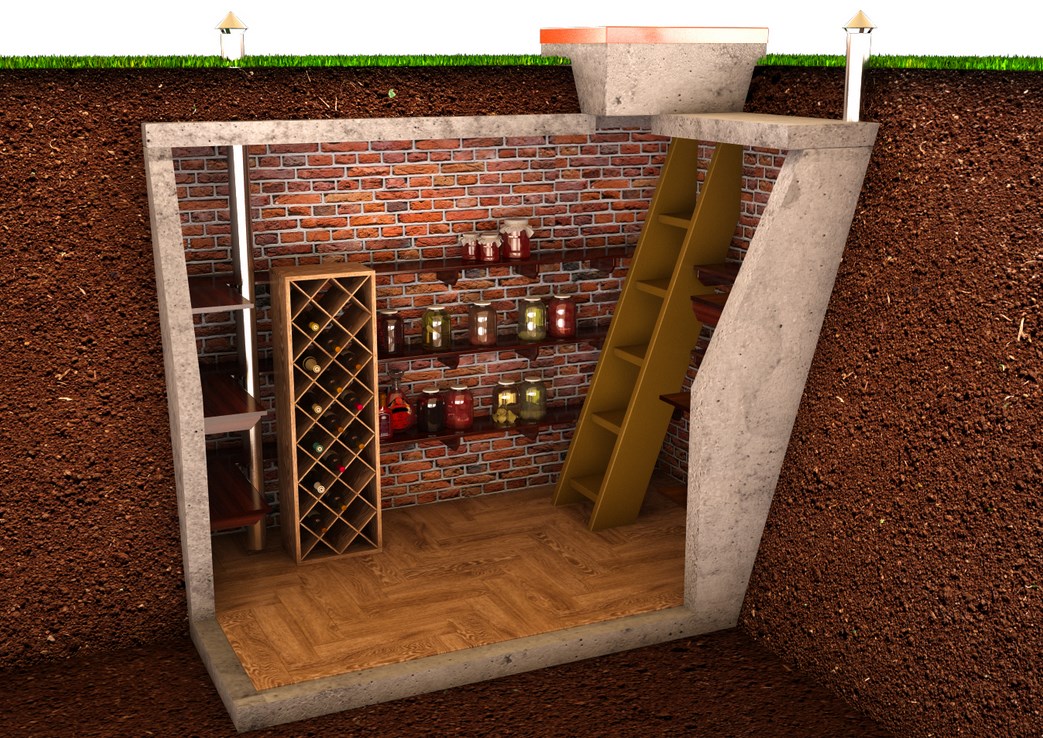
Deepened the structure is considered the best in terms of creating optimal conditions for the stored products. If for the above-ground version the depth of the pit is 0.5 m, then for this it is 2-2.5 m. Such a cellar is laid out in the ground made of brick or stone. However, it is only suitable for areas with deep groundwater. Before building such a building, you need to examine the soil with a garden drill and make sure that the distance from the floor to the water level is at least 0.5 m.If there are disabled or elderly people among those using the cellar, it is better to prefer a ground structure. Descending the stairs to an earthen cellar can be difficult for these family members. A hatch and a staircase will be arranged to enter it. It is also important to install two ventilation pipes - to remove the exhaust air and supply fresh air.
Semi-recessed the option involves the immersion of the building in the soil by a third or half of its height. It is chosen where the previous method cannot be implemented due to the location of the waters that is too high by these standards. There must be a distance of at least half a meter from their level to the floor of the building. Drainage should be arranged around the building. For the descent into the cellar, steps are made or a ladder is installed.
Another option is a cellar from a plastic caisson, in the form of a container with outlets for ventilation and a hatch. Inside there are shelves and lighting, which eliminates the need for the homeowner to prepare a project with drawings. The body has a sealed design, and since the material does not rot from moisture, the caisson can be mounted even in swampy areas. A pit is being dug under it and drainage is organized. At the bottom, mesh reinforcement is mounted and concrete is poured. In this case, anchors are attached to the mesh, which should protrude above the surface of the mortar. Strong cables are attached to them, which, in turn, fix the caisson to prevent it from being pushed out of the soil by groundwater. Installation is completed by backfilling.
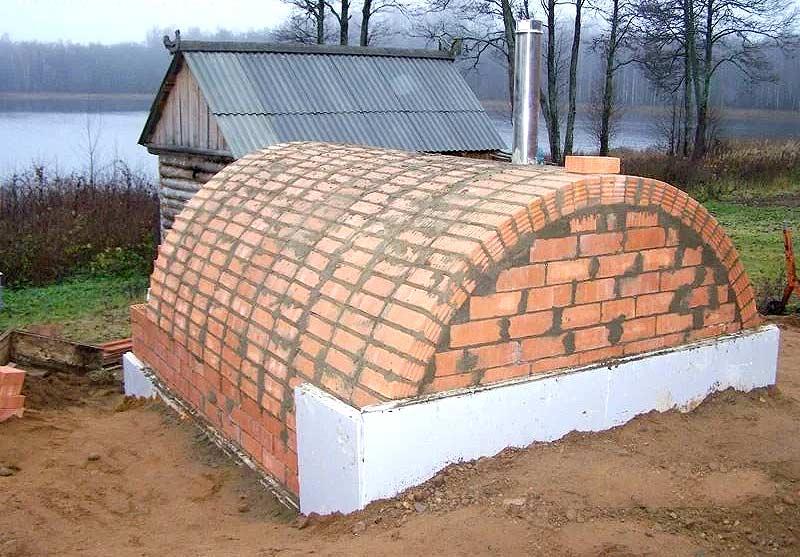
Often, an arched round roof with a low vault is organized near the cellar.This design provides a smooth drainage of water, while not taking up much space in height. It must be made from materials that are not subject to decay in dampness.
Types of structures by material
Since the main enemy of the cellar is dampness, materials that are resistant to moisture are used for construction. Usually these are block products, the walls of which are constructed using the masonry method. However, you can make a cellar from monolithic reinforced concrete. This option is highly reliable and suitable for different types of soil. In this case, the strip foundation is made of concrete. The formwork is created to the full height of the walls, a reinforcing frame is mounted into it and the solution is poured.
You can also make a cellar from concrete blocks. It will not work out alone or even together with this, if you do not involve special equipment (for example, a winch). But with the equipment and a team of several builders, the process does not take much time. Blocks are laid according to the project and fastened with mortar. As in the previous case, with full or partial deepening, the structure requires increased attention to waterproofing protection.
A brick cellar is made of special grades of material that do not allow water to pass through. The same requirement applies to structures made of foam concrete blocks and other similar materials. In this case, the foundation can be made both of brick and concrete.
Cellar location
Starting the construction of a brick cellar, you need to choose the right place. The main enemy of such buildings is moisture. Therefore, the cellar is erected on a hill. This ensures that there is no flooding even in case of heavy rain or melting snow.
You should not build a brick cellar with your own hands in an area constantly illuminated by the sun's rays. Better to prefer the shaded side. At the same time, there should be no large trees nearby: growing roots can damage the building.
If it is decided to make a building adjacent to another building, the pit must be located at least 0.5 m from the main foundation. This is necessary to protect the cellar from damage during soil sedimentation. A good option would be to equip a basement under a residential building or garage: this saves space, and the products will be protected from both frost and sunlight. If you take care of waterproofing and ventilation, a stable temperature regime will be maintained inside almost all year round.
Construction of a deep-buried cellar

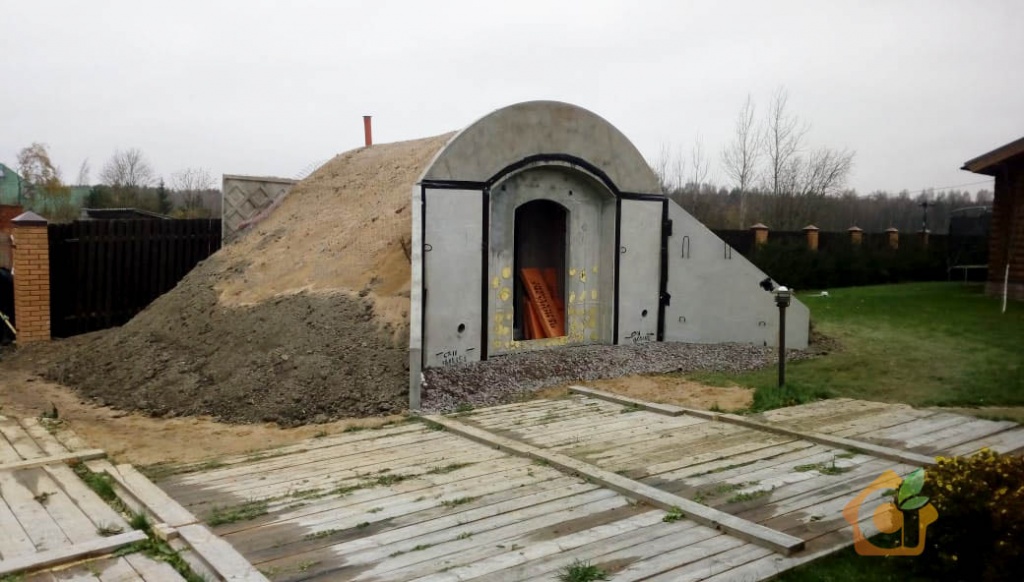
You need to start work in mid-late summer, when the groundwater ceases to rise. For the period of rain, the foundation pit is covered with a film. For a buried cellar, it is dug by 2-2.5 m. At the bottom, a crushed stone bed with a height of 0.3 m is created. The soil should not be taken far away, since part of it will be spent on filling the top. Within a week, the pit is allowed to stand to check the tightness. If the water does not begin to rise, the work can be continued.
Step by step guide:
- A strip foundation is being built and an earthen castle is organized. The floor is poured with concrete only after the formwork has been removed. When the solution sets, the surface is waterproofed with several layers of roofing material.
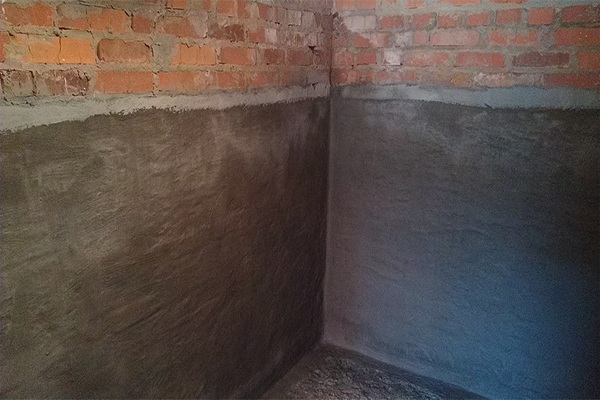
- Brick laying in the cellar can be carried out in one block. Outside, high-quality waterproofing is organized with two layers of bitumen and roofing felt. The area between the wall and the soil is covered with earth. From the inside, the walls are coated with penetrating waterproofing.
- Slabs can be made of wood, concrete, or a combination of both.
- The floor must be insulated with foam. A reinforced screed is organized on top. The ceiling is also insulated in a similar way. A crate is mounted on the vapor barrier on suspensions, the distance between the components of which is equal to the width of the insulation plates. After laying the latter, the gaps are sealed with polyurethane foam. A vapor barrier film is installed 4-5 cm from the insulation. This multi-layer design allows air to circulate.
Ventilation ducts are provided even during the construction of walls. One of them is located above the ceiling with a 10-15 cm outlet to the outside. If there is an outbuilding above the cellar, the channel is brought out to the roof 0.5 m above the ridge. The supply channel is equipped at a distance of 0.2 m from the floor on the opposite wall. The size of the channels depends on the dimensions of the structure itself: for every square meter of area there should be 26 cm² of pipe cut.
It is strictly forbidden to install sockets in the room. Luminaires must be protected from moisture penetration. The switch is installed in a residential building or outside near the entrance. For internal wiring, cables PRG and PR are suitable.


The vault was not laid out according to the technology!