A cellar is a useful household structure in a personal or summer cottage. It stores fresh vegetables and fruits, as well as various preserves. There you can also store agricultural implements and all kinds of tools. In order for such a building to be comfortable in operation, it is necessary to choose the right materials and precisely observe the technology of its construction.
- Features of concrete basements
- Advantages and disadvantages of concrete cellars
- Types of concrete cellars
- Caisson cellar
- DIY cellar construction technology
- Pit
- Bottom fill
- Casting monolithic walls
- The use of concrete blocks in the construction of prefabricated cellar walls
- Floor installation
- Waterproofing
- Installation of a ready-made concrete cellar
Features of concrete basements
A concrete cellar is either aboveground or underground. The last option fulfills its functions best. However, its construction requires an excessive investment of time, physical strength and material resources. Therefore, most often, a cellar is erected with their own hands in the ground from concrete, deepening them into the ground at half their height. This is quite enough to protect the premises from freezing.
The floor in a concrete cellar is often left earthen. However, this makes sense when the groundwater is well below its level.
When the cellar is completely buried in the ground, the roof is made flat. Otherwise, it looks like an arch.
Concrete cellars are insulated with soil extracted during the digging of the foundation pit.
Advantages and disadvantages of concrete cellars
The main advantages of concrete cellars are:
- long service life;
- frost resistance with the proper level of waterproofing;
- resistance to chemicals;
- strength;
- hygiene.
The structure has a relatively low cost and is easy to manufacture. Even one person can build it.
Main disadvantages:
- high thermal conductivity, which requires careful hydro and thermal insulation;
- the presence of cracks appearing during the work.
However, these defects can be avoided if the order and technology of work is strictly observed.
Types of concrete cellars
A reinforced concrete cellar can be built under any structure (house, garage, barn, etc.) or separately.
A cellar inside the building is made at the very beginning of the construction of the structure, and a free-standing one is erected at any convenient time.
Cellars can be built using pre-fabricated reinforced blocks or by pouring concrete into a pre-installed formwork. In this case, reinforcement with steel rods is additionally used.
When using any construction technology, the cellar floor is initially equipped with drainage and waterproofing systems. The surface is reinforced with steel mesh and poured with concrete, the layer of which must be at least 20 cm.
Reinforcement will avoid the destruction of the floor in the cellar under the influence of the changing groundwater level.
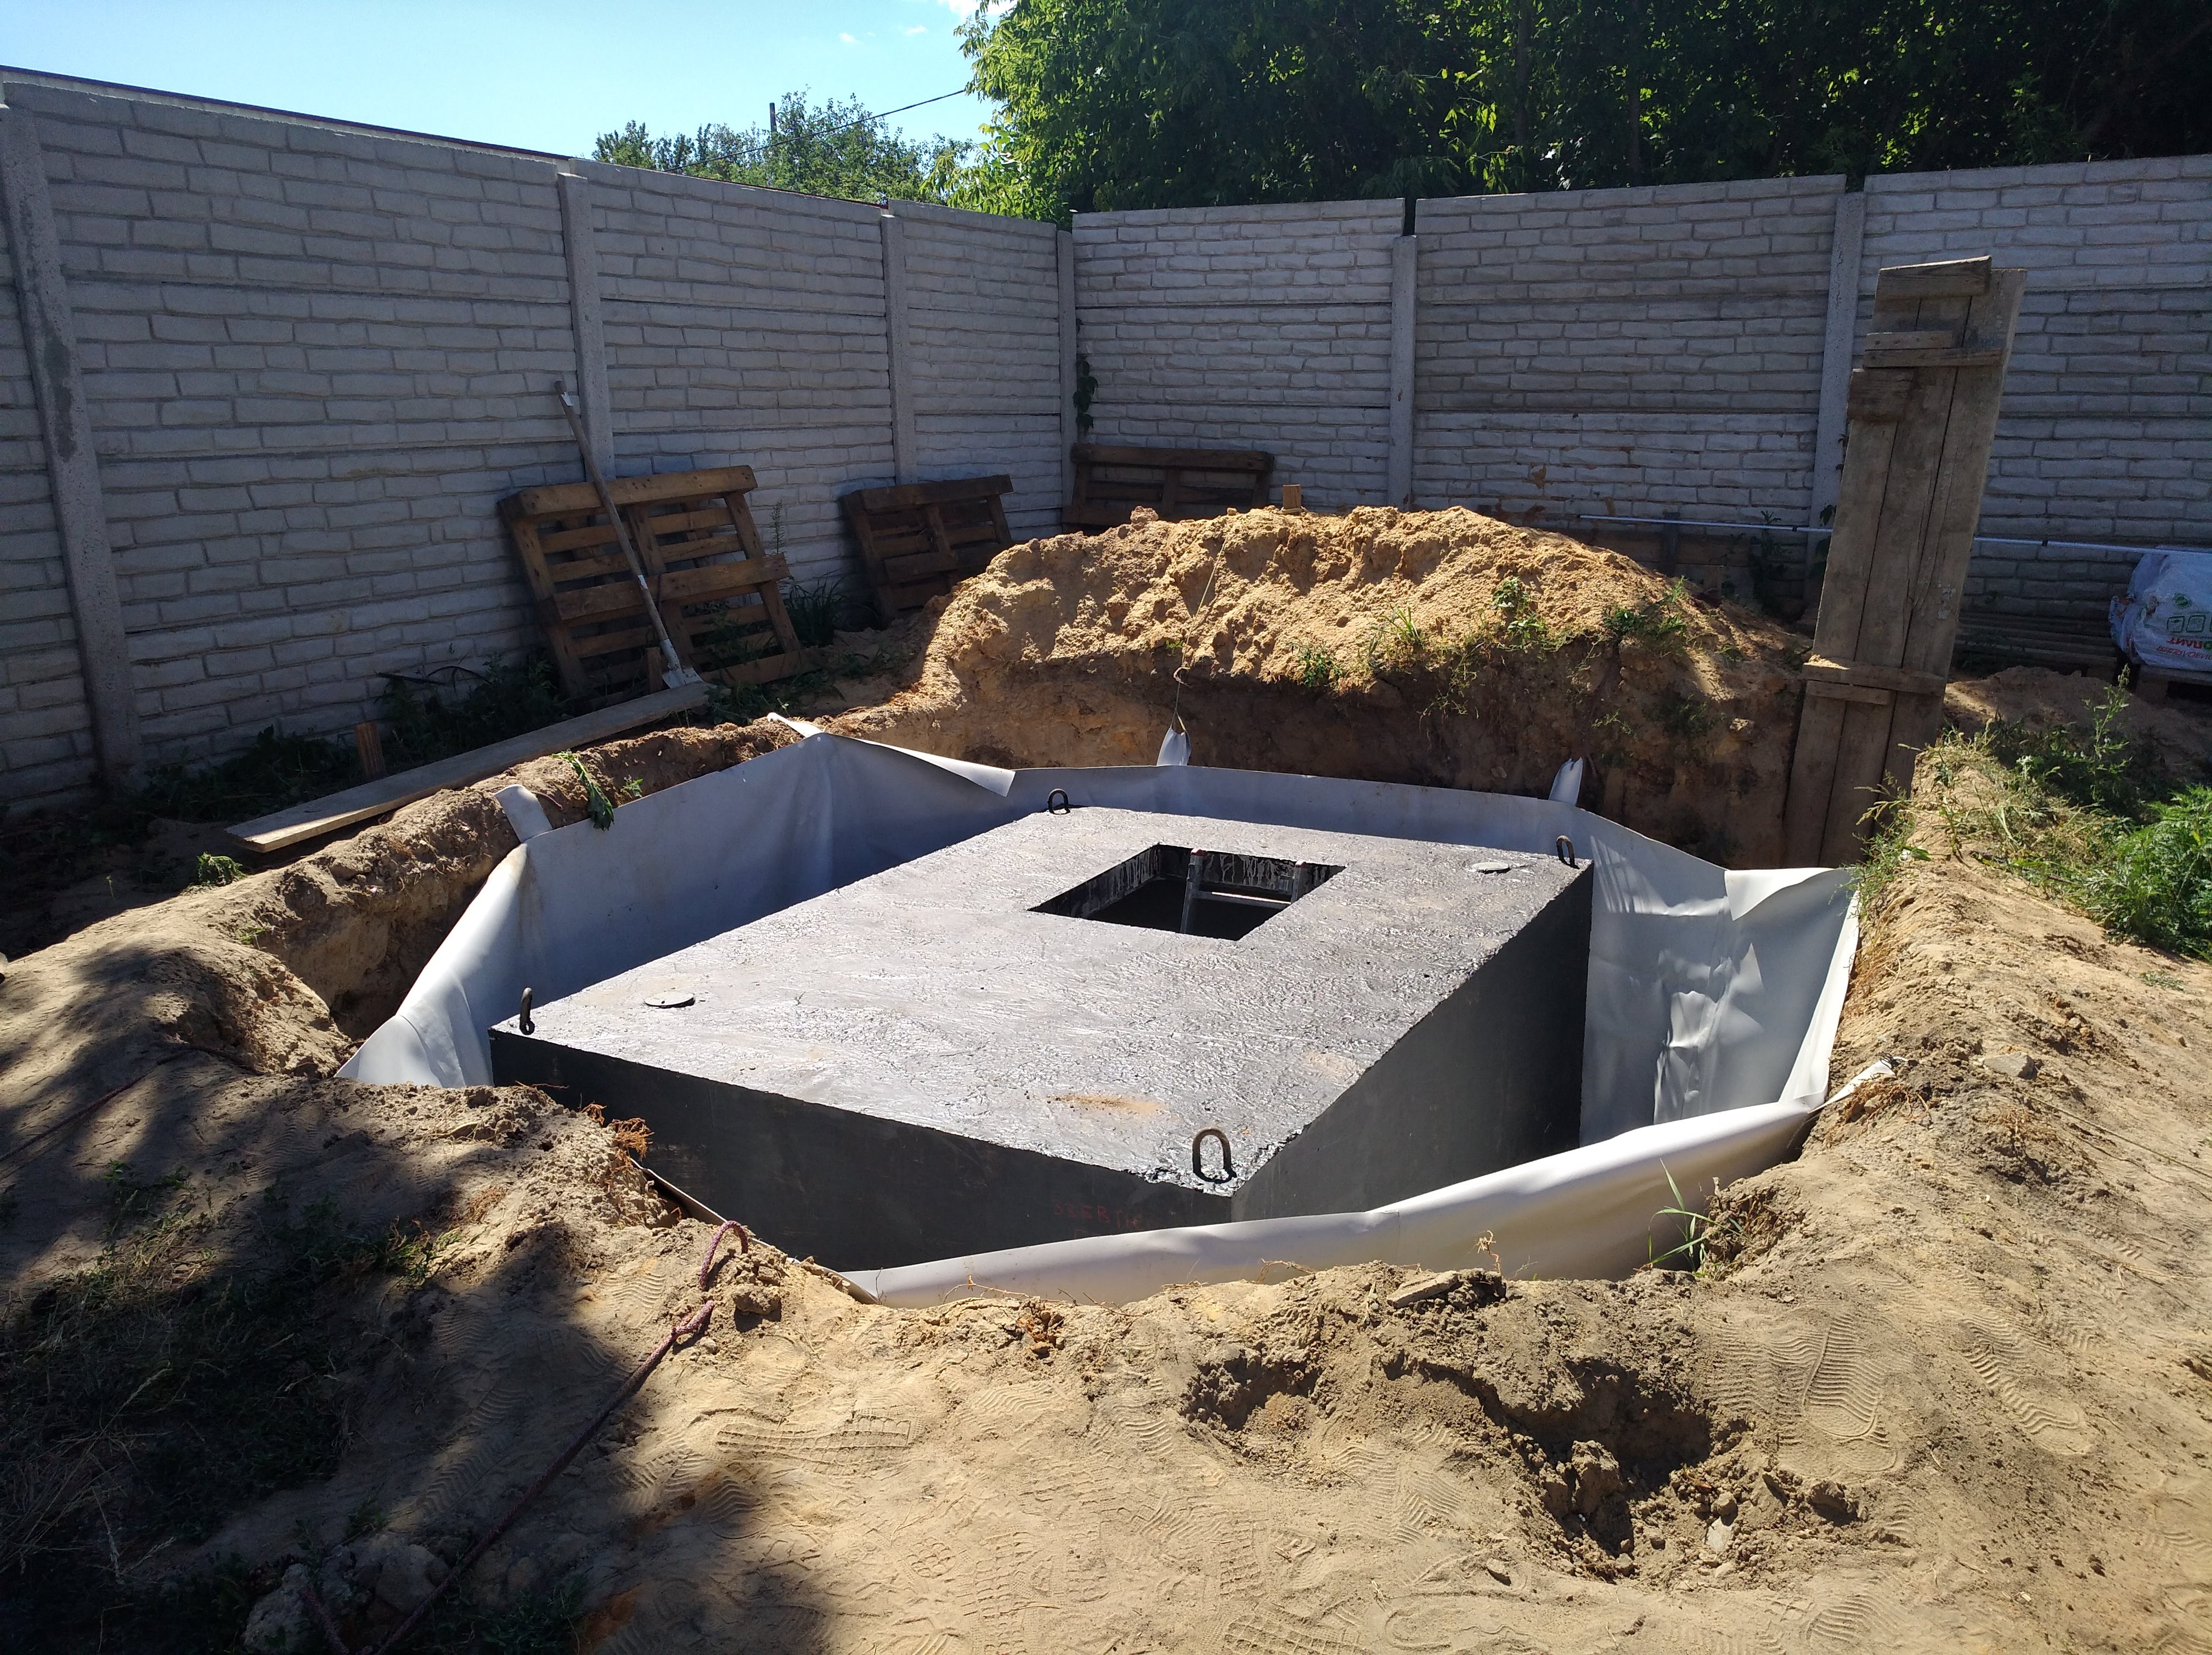
Caisson cellar
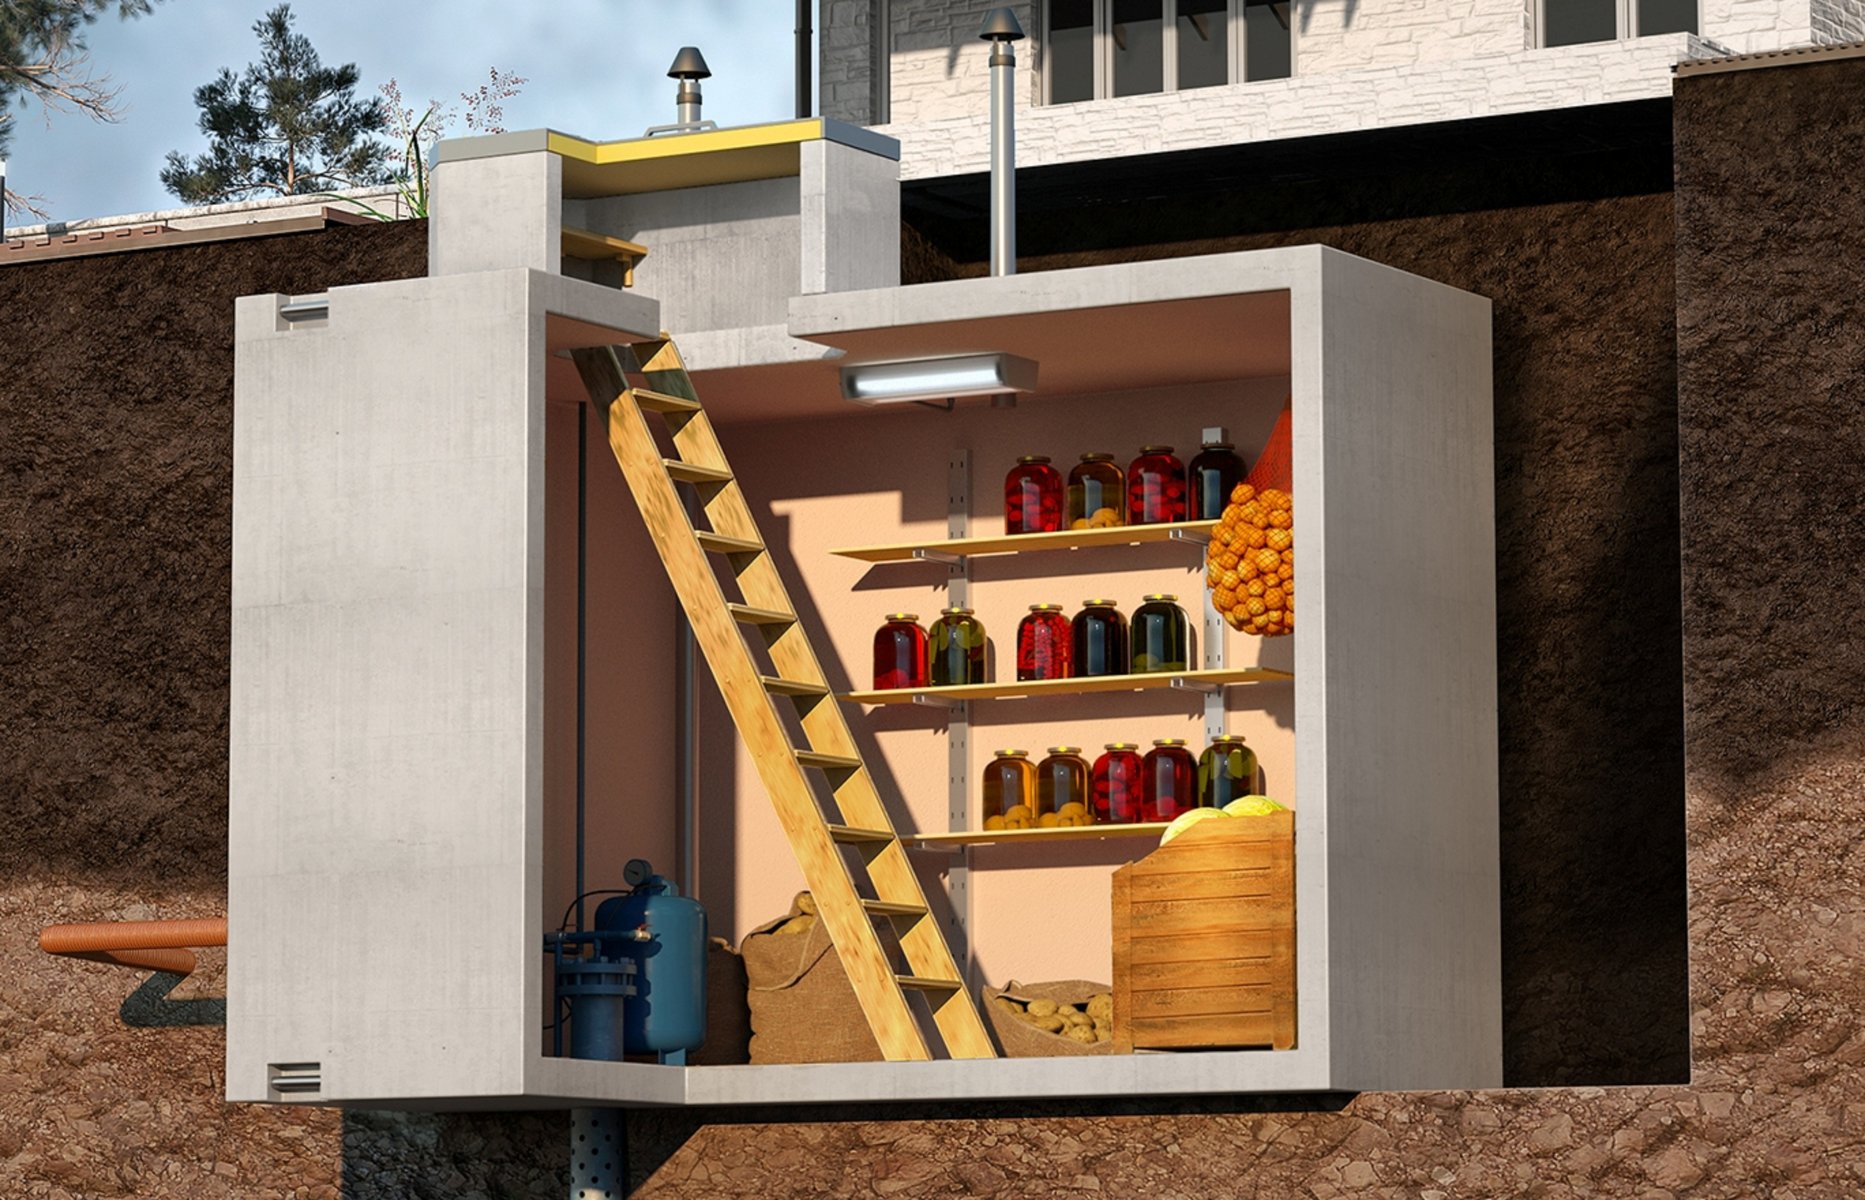
The finished caisson-cellar is made of special moisture-proof hydro-concrete. Structurally, it consists of several monolithic boxes, connected to each other with special glue. They are additionally reinforced with a steel lattice frame
A ready-made concrete cellar is supplied with a technical well, an entrance vestibule and a ventilation system.
The structure does not deform, does not condense moisture and is reliably protected from groundwater.
DIY cellar construction technology
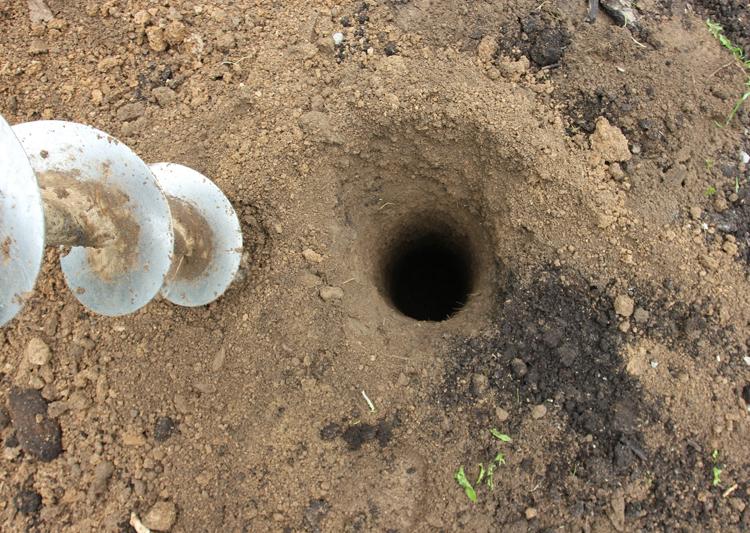
The depth of the cellar is determined by the depth of the groundwater. In order to find out at least roughly this, they drill a pit with a depth of at least 3 meters in spring or autumn, install a wooden plank in it and leave it there for several hours. If the plank remains dry, the groundwater is much lower; if it is wet, it is impractical to build a cellar in this place.
It is not recommended to build a cellar at the foot of the hill - the flowing rainwater will periodically heat it up. It is best to equip a basement at the top of a hill.
For the arrangement of an underground or semi-underground cellar, a pit is required, the lower point of which is at a distance of no closer than 0.5 m from the wet ground.
Pit
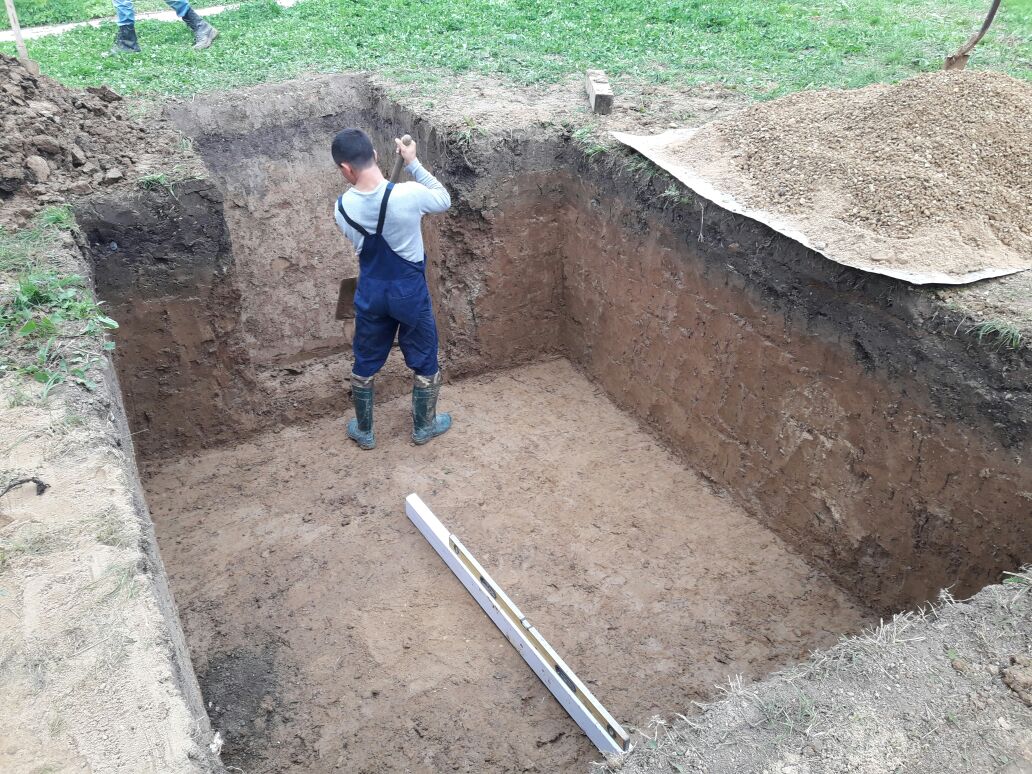
Before starting work on arranging a concrete cellar with your own hands, you need to perform a number of preparatory work:
- clearing the territory of the site;
- removal of sod and topsoil;
- marking the boundaries of the pit.
Then they begin to dig a pit. About a third of the volume can be dug manually, and then it is better to resort to the help of an excavator.
To avoid flooding, it is recommended to perform a drainage runoff - separately from the pit, a concrete well is made up to 80 cm deep below the level of the bottom of the pit. The water is pumped out with a drainage pump, the walls and the bottom are leveled, and then several layers of crushed stone are poured, sequentially compacting them.
Bottom fill
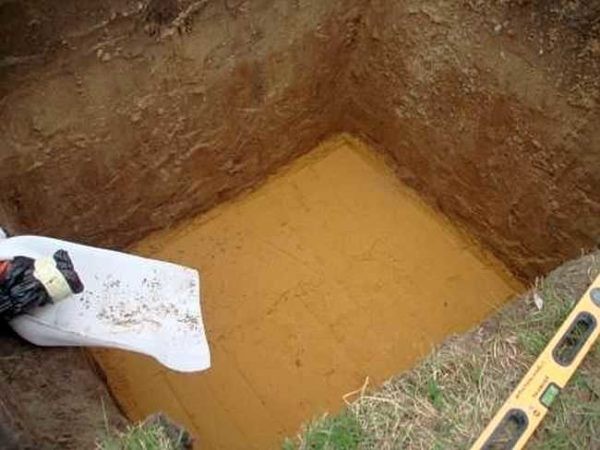
Any basement option requires the preparation of a reliable foundation.
- The bottom of the pit is carefully leveled and tamped.
- A layer of rubble is poured and leveled at the bottom, the thickness of which should be at least 20 cm.
- A mixture of clay and water is laid on top of the crushed stone, thus forming a water seal.
- The water seal is covered from above with a layer of bituminous material and concreted.
This design ensures that the cellar floor is always dry.
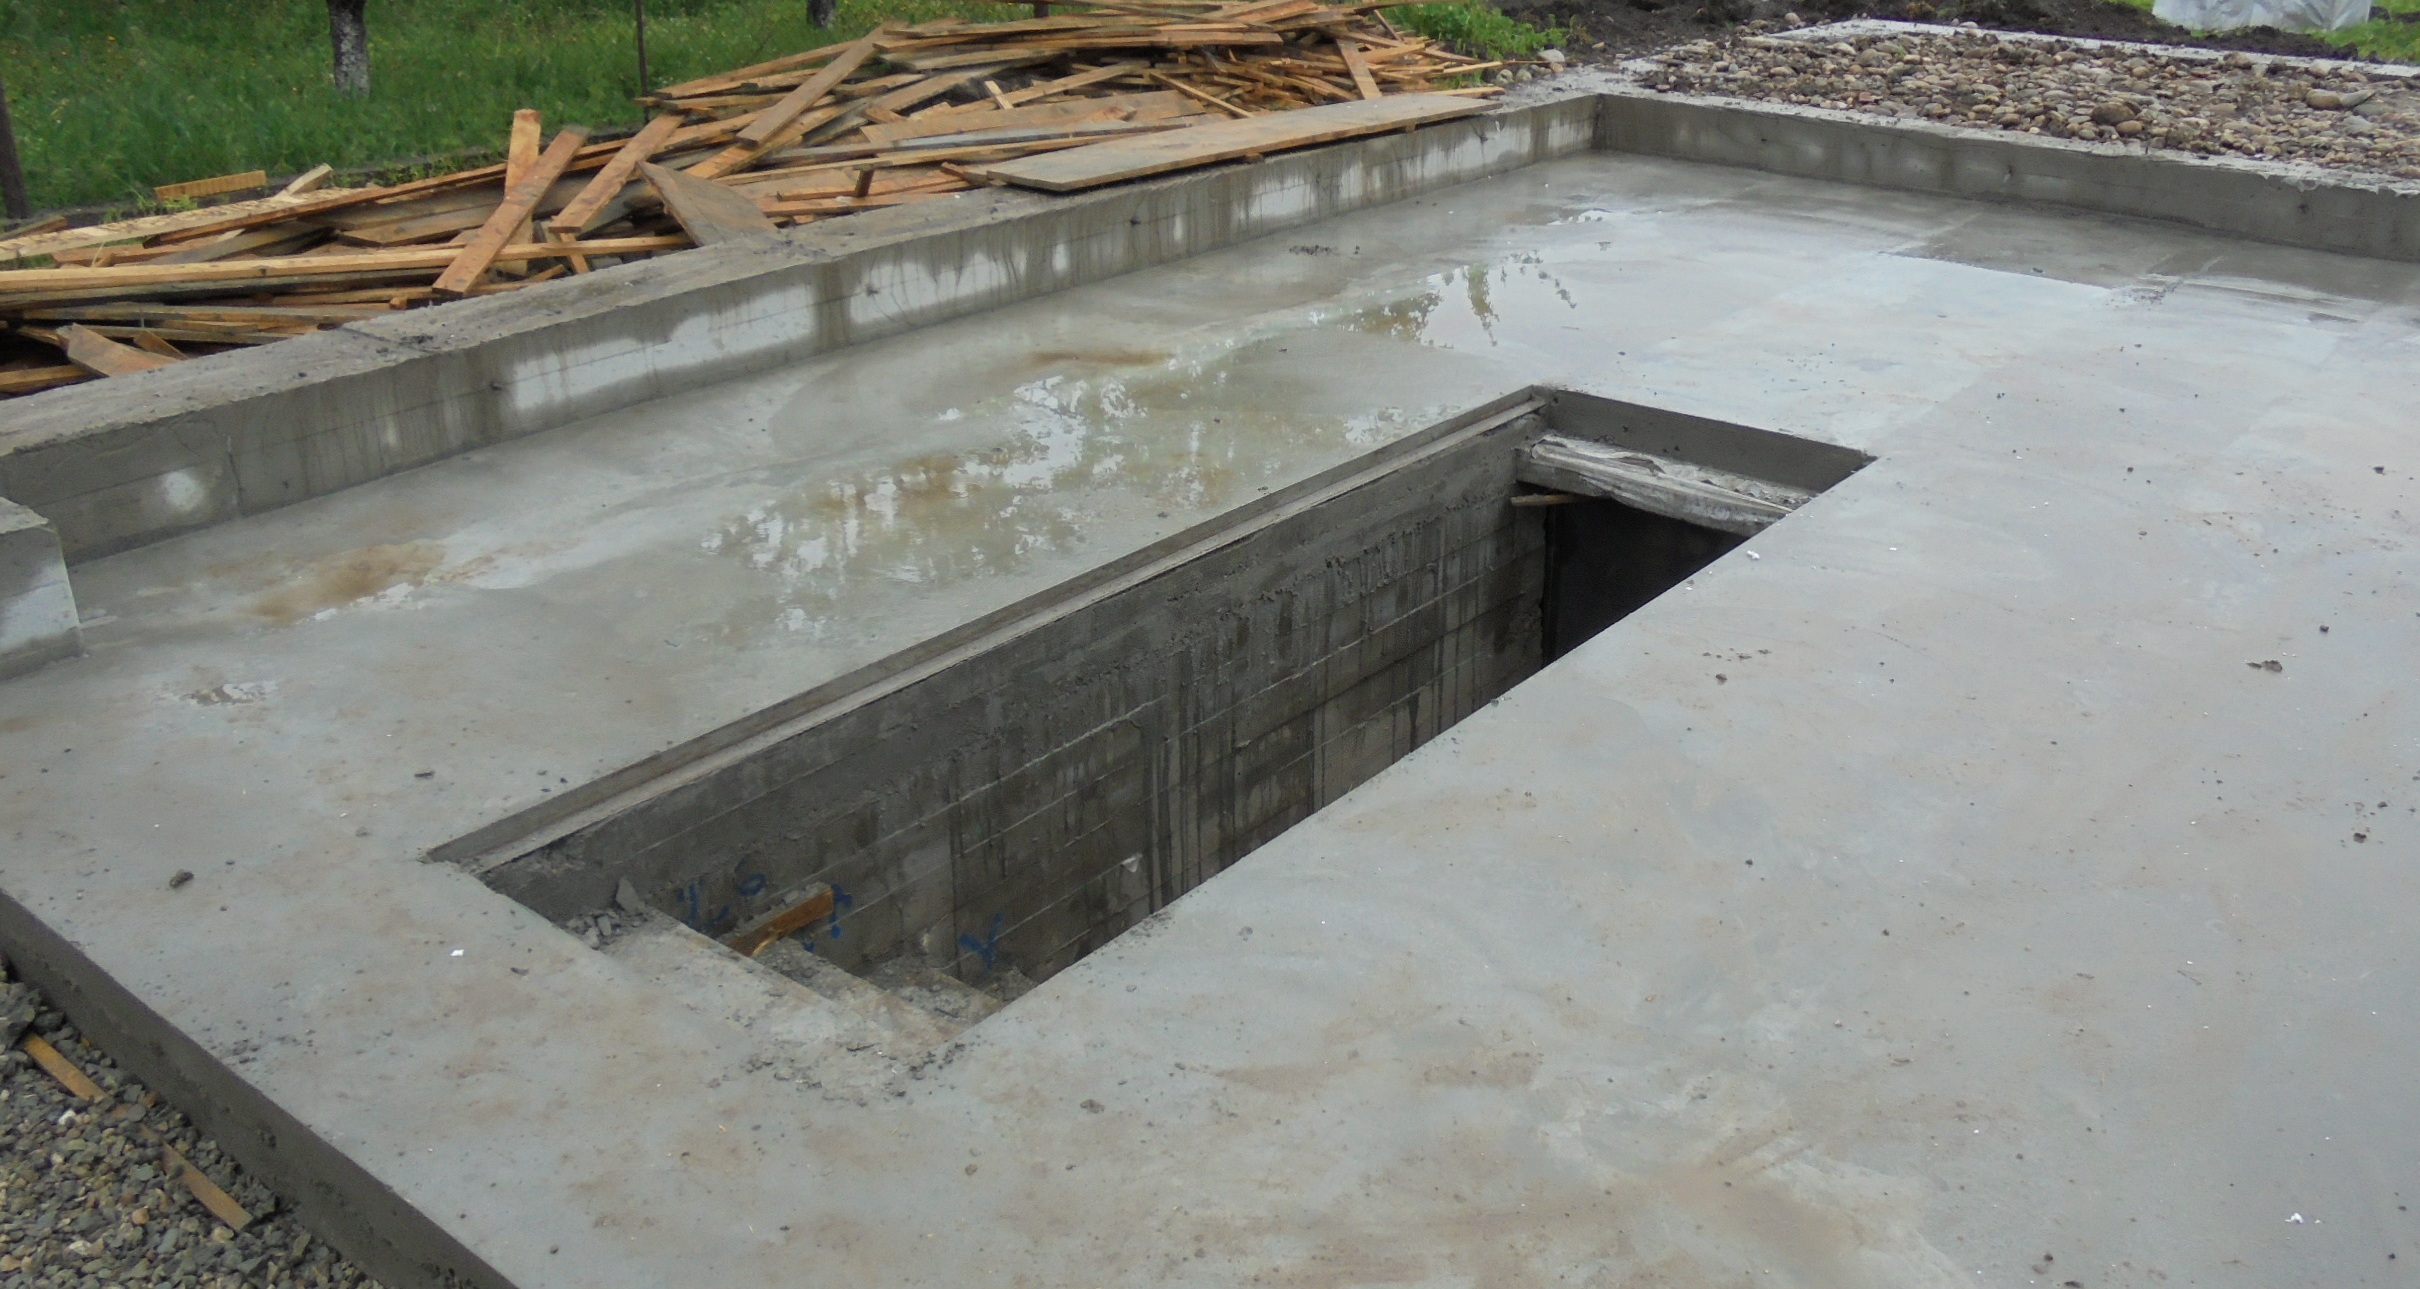
Bottom pouring process:
- Formwork is installed, for the manufacture of which boards with a thickness of 3-4 cm are used.
- A mesh connected from reinforcing rods is laid at the bottom. If in the future it is planned to build a monolithic cellar, vertically installed metal rods are additionally mounted along the perimeter of the pit.
- Concrete solution is poured.
- Cover slightly dried concrete with plastic wrap and wait until the floor is completely dry.
It will take about 30 days for the concrete to gain the required strength.
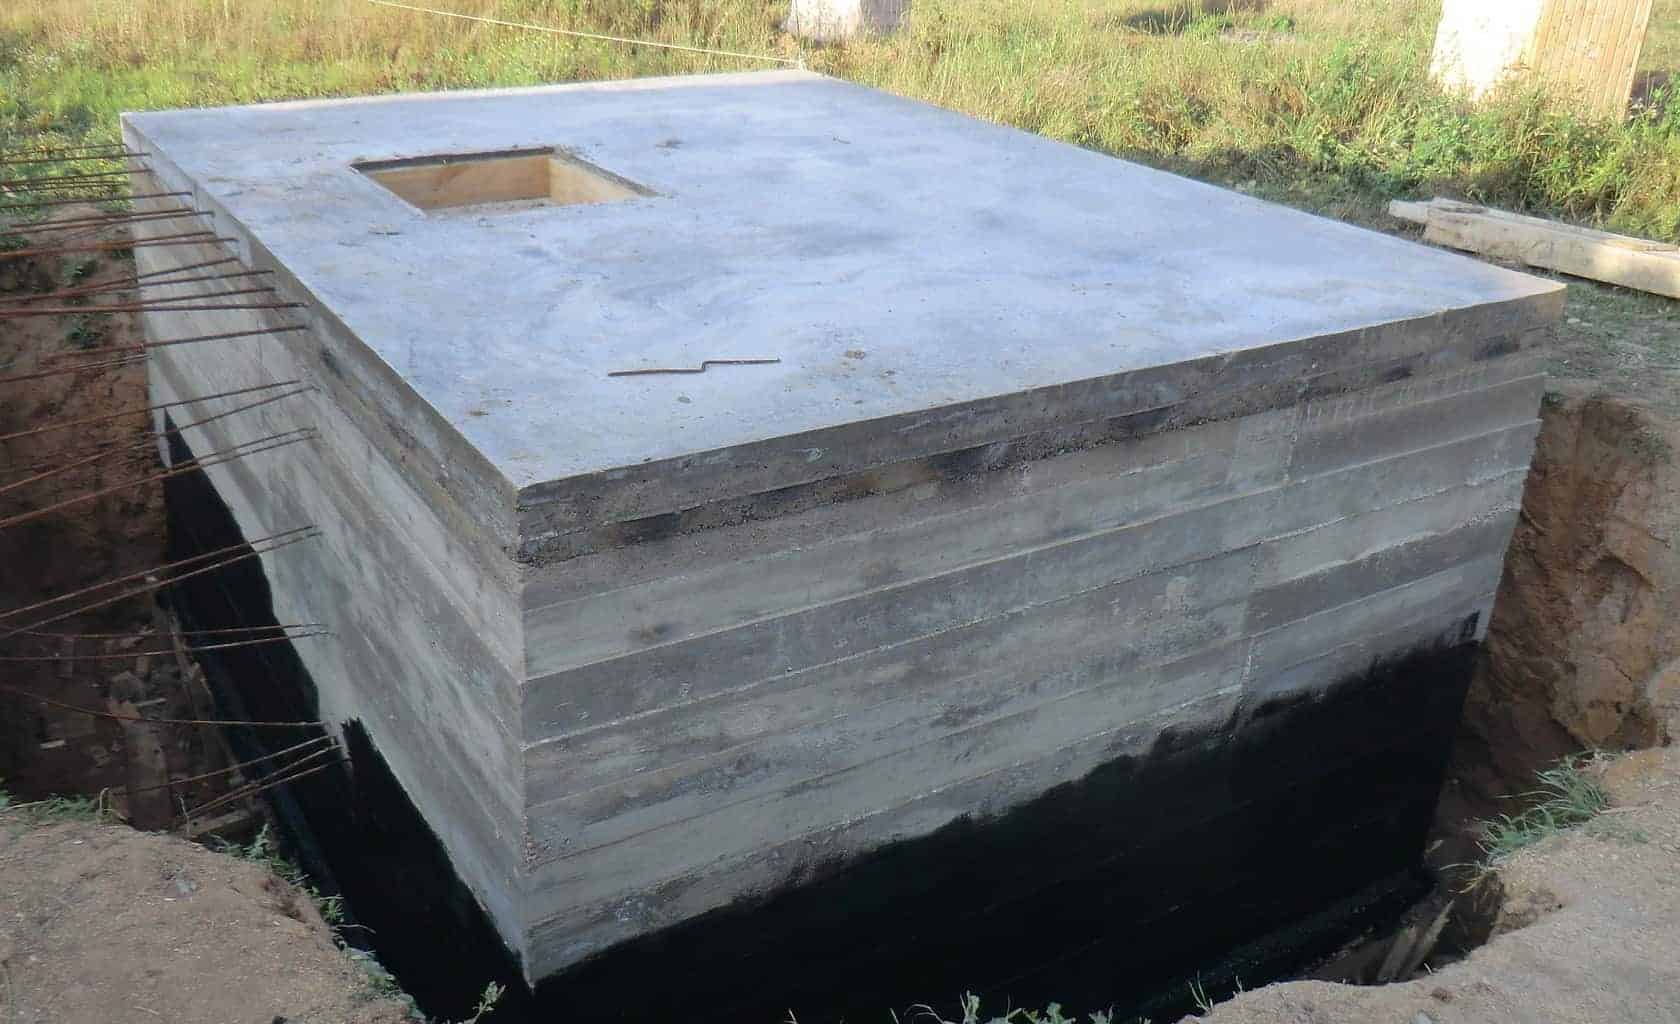
Casting monolithic walls
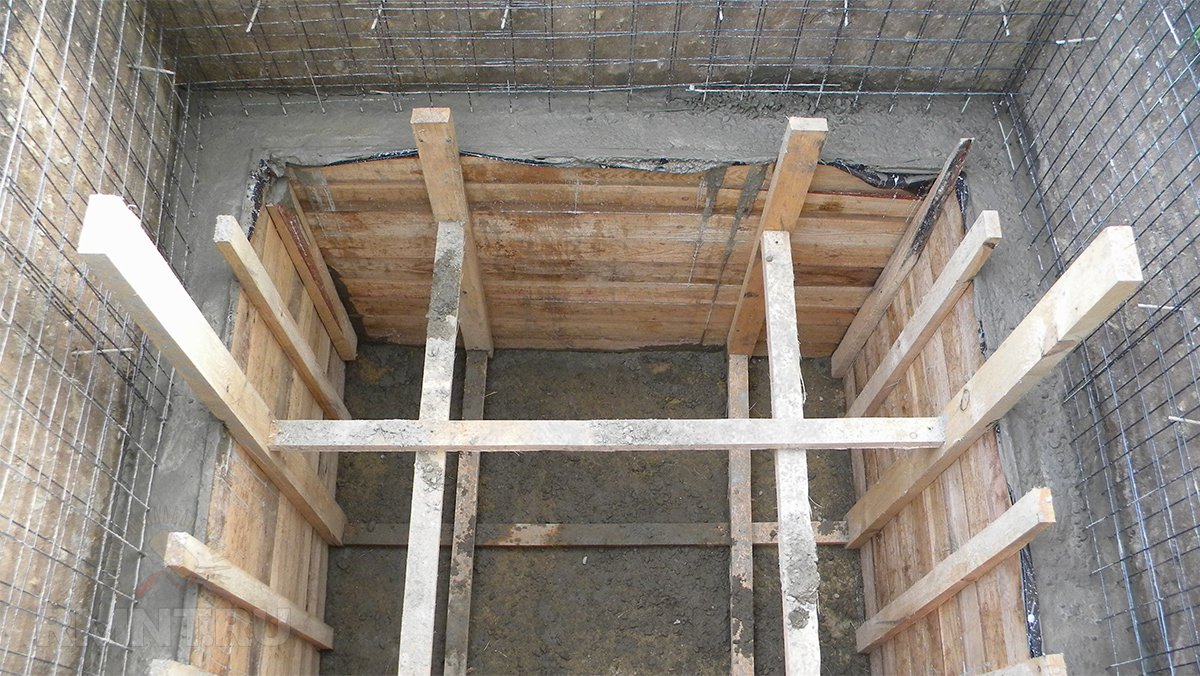
Monolithic walls are erected in the following order:
- Formwork is mounted along the perimeter of the walls. It is reinforced with internal supports. Consideration should be given to the location of the doors and vents.
- The vertical reinforcement installed during the arrangement of the floor is tied with transverse rods.
- Concrete is poured between the walls of the pit and the formwork. This is done alternately on each side. It is recommended to fill the walls in one go.
- The formwork is removed after the concrete is completely dry.
After the walls gain the necessary strength, the ends are leveled. Concrete is cut with diamond wheels.
The use of concrete blocks in the construction of prefabricated cellar walls
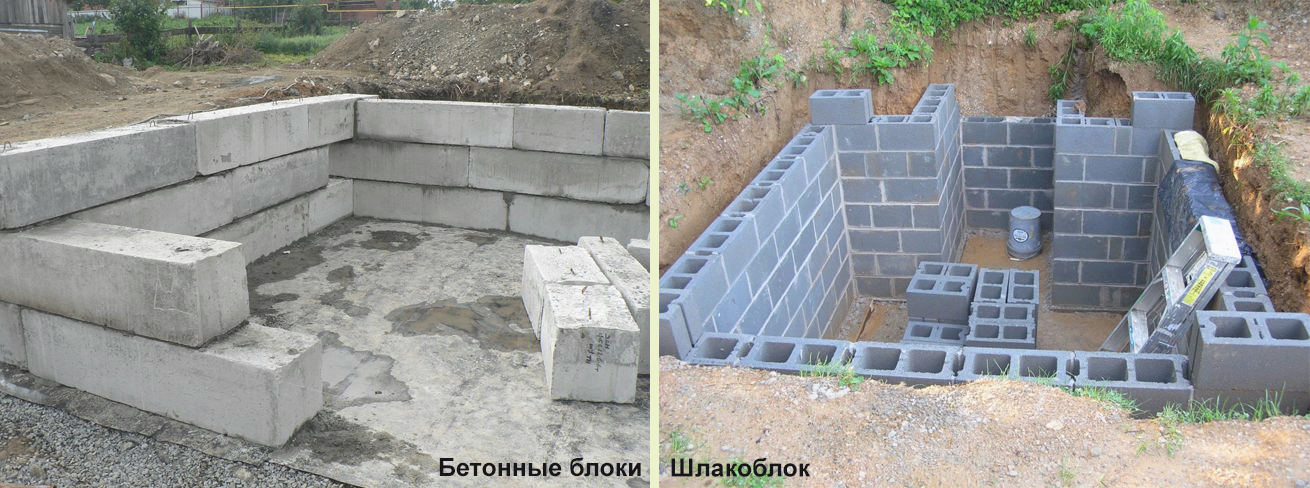
Since when assembling walls from concrete blocks, there is no need to wait until the concrete hardens, the process of their construction itself takes much less time. The blocks are installed similarly to brickwork and are connected to each other with cement mortar.
You cannot build basements from gas blocks, as they absorb moisture well, which contributes to their rapid destruction, despite even several layers of laid waterproofing.
Floor installation
The easiest way to mount the cellar overlap is to use ready-made reinforced concrete slabs. However, you can do it yourself. For this, a wooden formwork is mounted from chipboard plates, which are fixed with special supports. It can be mounted both vertically and horizontally. Then a reinforcing mesh is installed on the formwork and everything is filled with concrete mortar.
Waterproofing
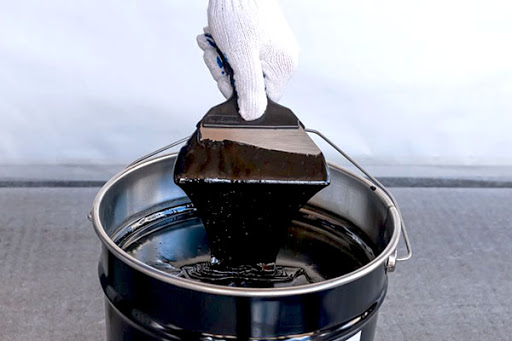
The construction of a concrete cellar is completed by the process of its waterproofing. Most often, bituminous mastic is used for this purpose, with which all surfaces of the structure are treated from the inside and outside.
Having completed the processing of the walls from the outside, all the voids between the walls of the pit and the cellar are filled with soil. At the same time, it is important to check that there are no stones in the soil that can damage this waterproofing.
Installation of a ready-made concrete cellar
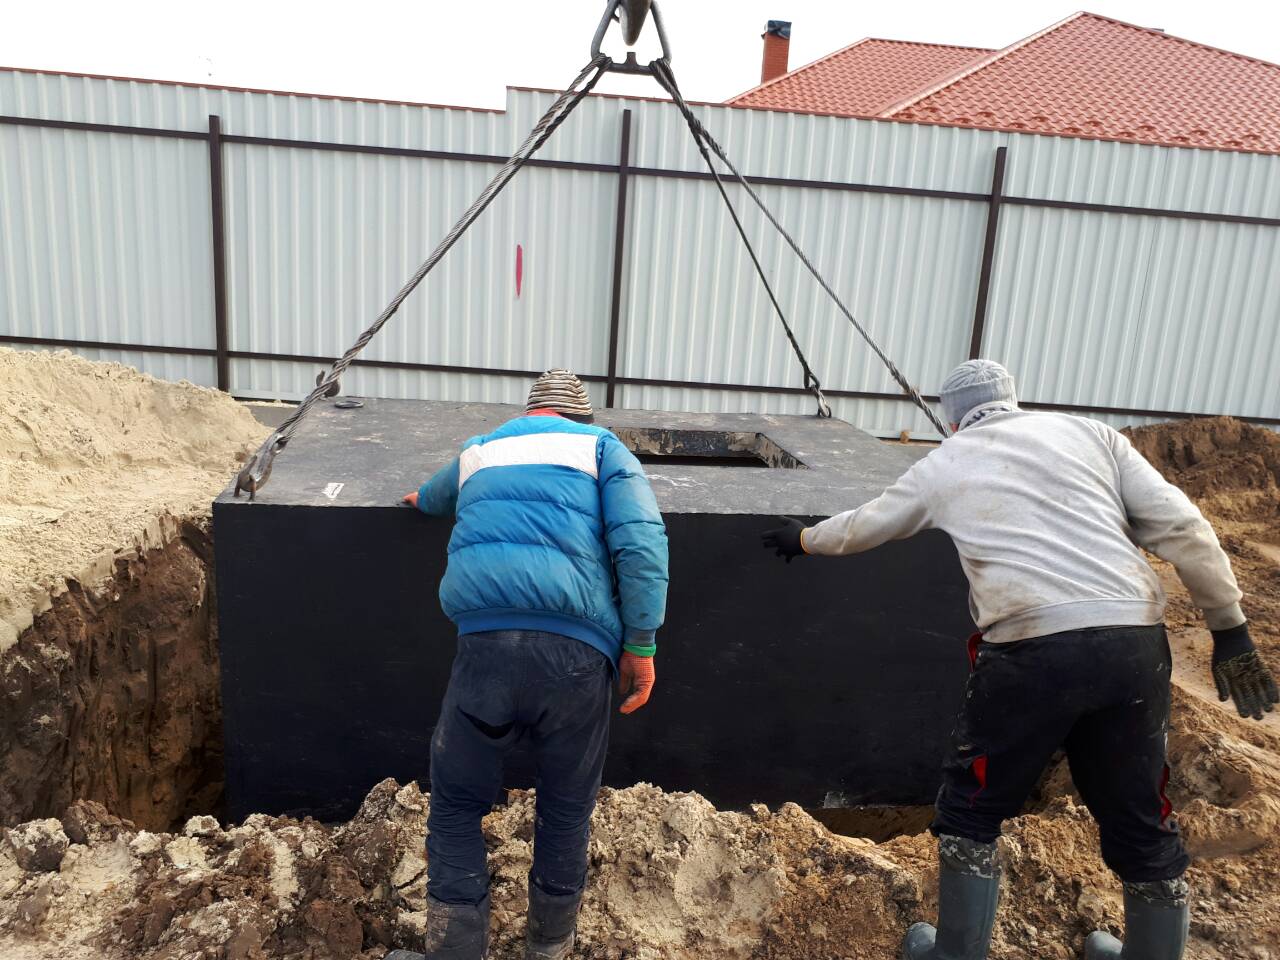
The finished caisson-cellar is placed in three stages:
- A pit is dug, the dimensions of which should exceed the overall dimensions of the product by 0.15-0.20 m.
- With the help of lifting equipment, the caisson-cellar is installed in it.
- Between the walls of the cellar and the pit, the soil is poured and carefully compacted.
If necessary, the walls of the cellar can be insulated.


