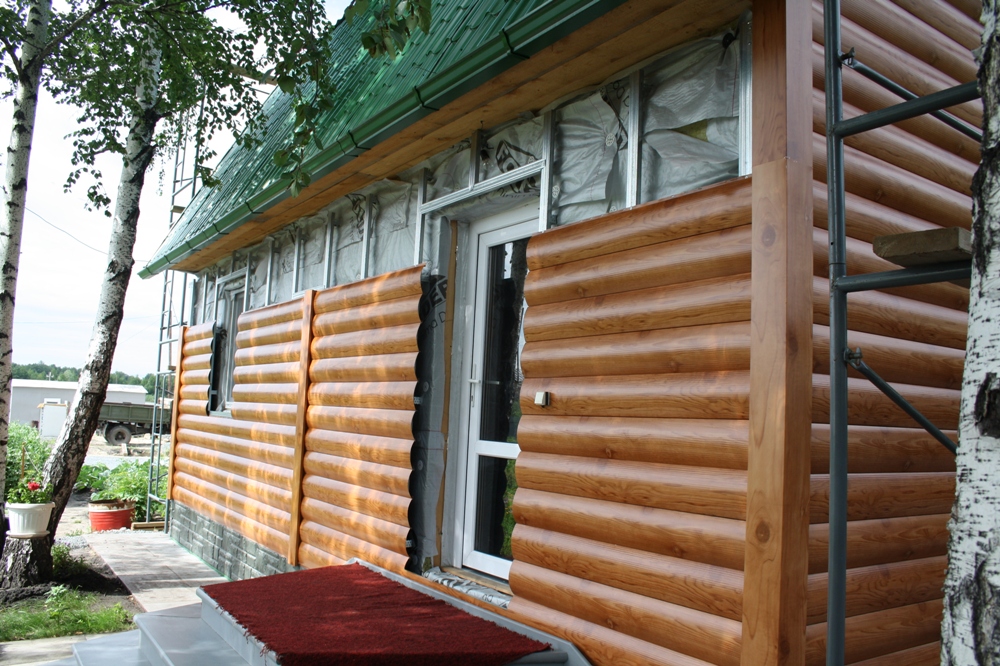
The technology of laying siding panels on the walls outside the building does not belong to a difficult category of work. Every home owner can do the installation of siding with his own hands if he studies the subtleties and takes the process responsibly. The defining reason for the choice of material is the speed of work, the absence of wet processes. The result is a beautiful, smooth and modern facade finish.
- Features of the choice of material
- Calculation of the amount of material
- Siding package
- Tools for the job
- Preparation of walls for installation and lathing device
- Insulation and waterproofing device
- Fastening siding
- Installation of the starter bar
- Installation of internal and external corner strips
- Extension of siding panels and installation of the H-profile
- Installation of ordinary siding panels
- Framing window and door openings
- Laying the finishing siding strip
- Gable trim
- Expert advice
Features of the choice of material
Siding is made on the basis of thermoplastic vinyl mass with the addition of modifiers. The composition includes pigments, plasticizers, color enhancers.
When buying, take into account the criteria:
- uniformity of color;
- strip thickness;
- the shape and location of the mounting holes;
- condition of the front side (peeling, small cracks).
The optimal siding thickness is 1 - 2 mm. Thick products are difficult to shrink, an increased thickness indicator indicates a violation of production technology, and not an increase in strength.
Calculation of the amount of material
To do this, calculate the total area of the walls minus the openings. The quadrature is divided into the useful area of the strip without the elements of the locks and the fastening strip. This value is slightly different for each manufacturer. Provided in the accompanying documents.
Calculation rules:
- if the walls are clearly rectangular, then the result obtained is multiplied by a factor of 1.07 - 1.1;
- for a trapezoidal broken facade of complex shape, such a multiplier can be in the range of 1.15 - 1.25.
In buildings with curved surfaces, a plan is drawn up for the layout of each strip.
Siding package
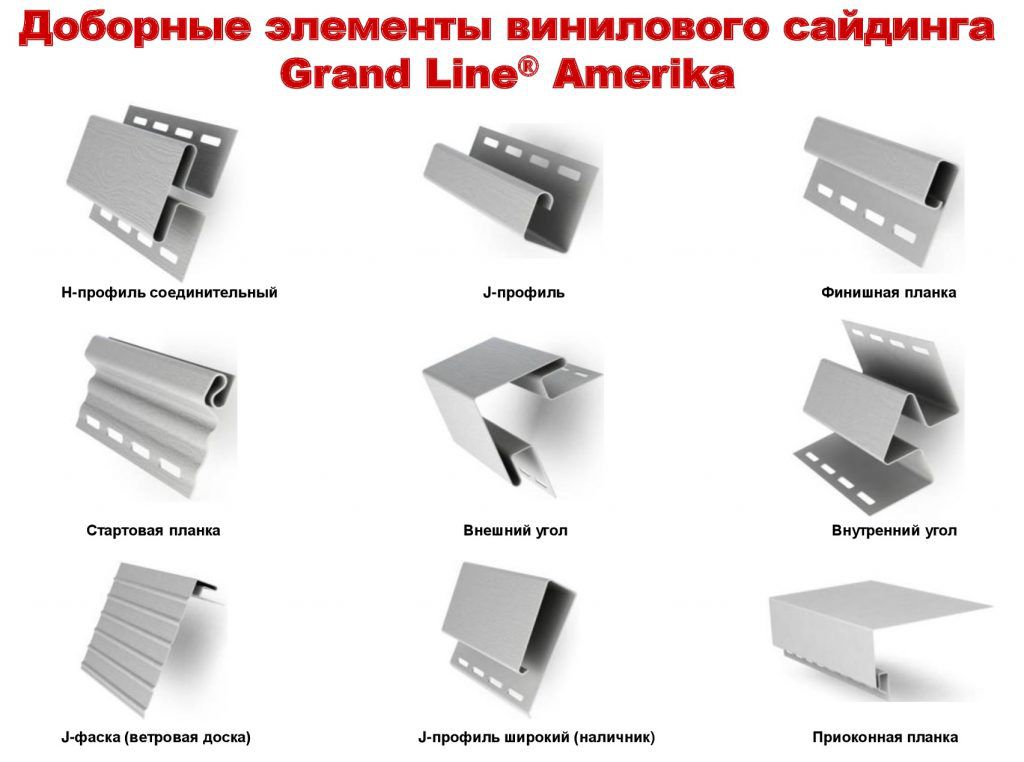
Other elements:
- corner radius strip;
- j-strip for windows;
- cornice profile;
- finishing bar;
- outer and inner corner;
- wide and simple near-window strip.
The siding panels are connected using a connecting strip, they are cut to the same size, joined at a length of 3.0 m in height. On top of the window or at the junction of the panels with the plinth, a hinged profile is used to protect against water flows.
Tools for the job

Be sure to prepare a measuring and verification tool, the set includes a tape measure, a pencil, a carpenter's square, a level and a plumb line.
Siding installation is carried out using the tools:
- hammer, pliers, construction knife;
- screwdriver, drill, puncher, grinder.
You will need a file and metal scissors to cut metal and vinyl siding.
Preparation of walls for installation and lathing device
The platbands are removed from the openings, the hinged parts (cornices, lights on the facade) are removed, the visors above the entrance are unscrewed. On the surface of brick, concrete walls, the remnants of the solution, if any, are knocked down.
The cracks are deepened, sealed with plaster or putty for facade work. Primed to strengthen the surface. If a plastic dowel with a self-tapping screw gets into an untreated crack, it will not hold the frame well.Perfectly aligned walls are finished with siding without the use of lathing, but such cases are rare.
Prepare for the crate:
- wooden lath with a section of 20 x 40 or 25 x 40 mm;
- galvanized profile from the fastening scheme of g / cardboard (CD-60), connecting elements to it.
Wooden parts are treated with linseed oil. You need dry slats that will not lead when dry in the mounting position. They are fixed with dowels through gaskets, and the steel profile is placed on an EC bracket with a length of 120 - 160 mm.
Places of installation on the facade are marked, a step between the profiles is made 30 - 40 cm. Horizontal elements of the frame are placed under the vertical fastening of the siding and vice versa.
Insulation and waterproofing device

Rolled insulation, penoplex are placed on the wall of the house using dowels, fungi. Then the material is pressed down with slats or profiles. Mineral wool gets wet from moisture, loses its properties, so a counter-lattice is placed for it to form a ventilation gap.
Waterproofing is carried out with PVC film or a special membrane is purchased. Polyfoam is installed in rectangles between the profiles, the resulting cracks and gaps are sealed with polyurethane foam. Sometimes foam blocks or aerated concrete are used.
Fastening siding
Correctly attach the siding from the bottom up. With vertical installation, the stripes begin to be placed on the left and move to the right. Top-down can also be attached, but the option is unsuccessful, since during the rain water will flow into the cavity of the inverted seam.
Installation of the starter bar
Draw a line of the beginning of the cladding at the bottom of the facade. It is located 1.5 - 2.0 cm above the base.
Next steps:
- 7 - 8 cm is marked up, at this height self-tapping screws are screwed in the corners, it is ideal to apply a water level;
- pull on the coated skip, shoot the line for the top edge of the starting bar.
If, when installing the start, a gap is obtained, it is closed with a galvanized cast for the base. The initial auxiliary profile is fixed with self-tapping screws using a screwdriver, the fasteners are screwed in at a distance of 20 cm from one another.
Installation of internal and external corner strips
The corners must be set before starting the installation of the cladding so that the sheets can be inserted into the mounted additional elements.
Installation rules:
- the inner corner must be fixed so that the lower edge coincides with the mark of the starting bar, the self-tapping screws are placed every 25 - 30 cm;
- if the start interferes with the location of the corner at the desired height, the nail edge is cut off from the second element to the start height plus a gap for possible expansion;
- corner punks overlap if necessary, cutting off the nail edge on one of them in the joint area.
External corners are mounted in the same way, while correcting for the geometry of the part. They also overlap, they must observe the temperature intervals. You can replace the inner and outer corners with j-strips. They are placed in the corner on adjacent walls close to each other.
Sometimes the outer corner is made out after installing the panels. For this, a decorative corner is used with an overlay, which is glued on top, or screwed to the sheathing. This option is suitable for untrained craftsmen, since it is easier to perform.
Extension of siding panels and installation of the H-profile
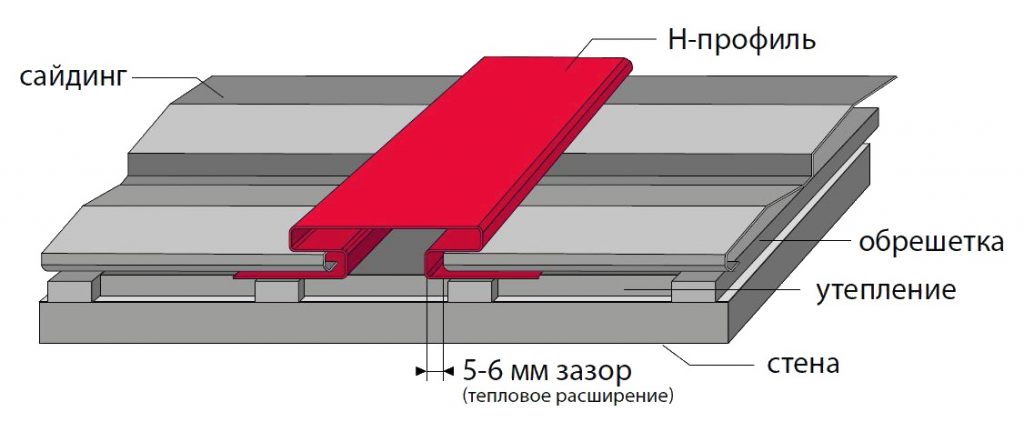
If the facade is longer than the siding panels in length, then a connecting H-profile must be installed. According to the instructions, it is mounted before sheathe the wall. In another version, the panels are connected without a strip, the ends are overlapped by 25 cm one on top of the other. Cut the nail edge to the size of the overlap, add a thermal gap of 12 mm. Such joints need to be assembled randomly along the plane so that they do not coincide.
Step-by-step assembly procedure with H-profile:
- determine the location of the H-strip on the facade, usually choose a central vertical line on the wall, symmetrical about the corners;
- the profile is fixed to the batten rail;
- if necessary, the H-bar is overlapped;
- the connecting element is laid simultaneously with the outer, inner corners, window strips.
When installing, do the same steps as when installing other additional elements: cut the nail edges for joining, provide gaps for thermal expansion. The use of the H-profile allows the panels to be connected more aesthetically. With a stationary arrangement of the connecting profile, the panels can be cut immediately to the desired length in several pieces, which speeds up the work.
Installation of ordinary siding panels
The design of the siding is such that all elements of the main cladding must be laid after the installation of auxiliary additional strips. The first panel is mounted in the starting strip, fully snapped in, fixed with self-tapping screws. To do this, insert the lower edge into the start lock, tighten the strip until it clicks, then move it so that the edge fits into the corner piece.
The hardware is screwed in strictly in the center of the oval hole and the strip is loosely attached so that it can move when heated and increasing in size. The next panel is set up in the same way, the process goes quickly if all the recommendations are followed.
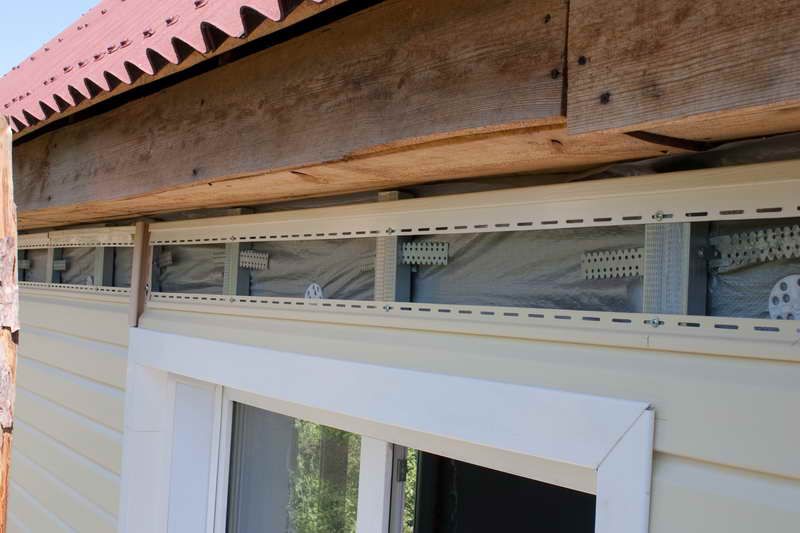
Framing window and door openings
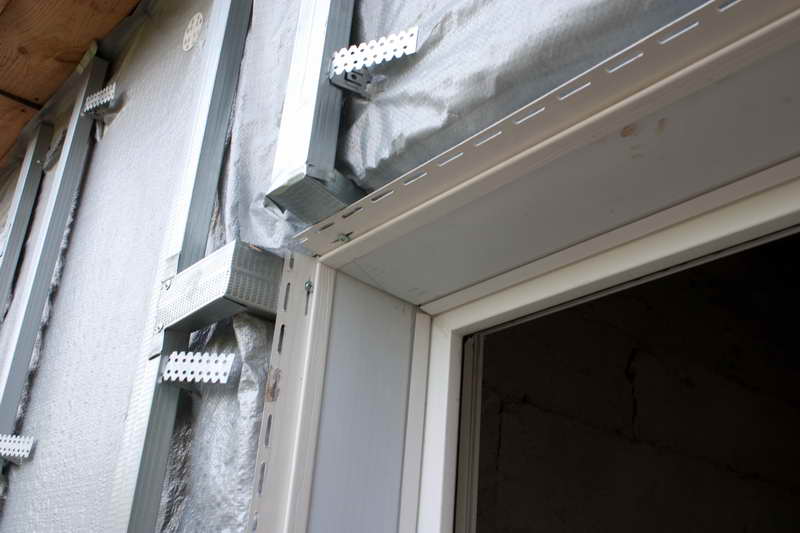
For work, use a j-profile or use platbands of the required width. The principle of trimming and installation at the joints is carried out in the same way as other additional elements. As a result, the tongue of the strip installed on top of the window forms a kind of ebb for water drainage in case of rain.
It is recommended to trim the corners with scissors on the iron. A deep-set window is framed by a near-window strip. When decorating the window, parts are cut out on the panels adjacent to the opening. They attach such a strip with a cutout by making new holes for the lock in the form of ears.
Laying the finishing siding strip
This is the name of the lock for the final upper strip. The distance between the start and the finish is calculated so that a whole number of panels fit. Sometimes you have to tinker with the docking of the finishing part.
Operating procedure:
- if the last panel becomes whole, and its top does not need to be cut off, a simple docking is made with an open end strip;
- if the last strip needs to be cut, an additional j-profile is used, with which the connection will look aesthetically pleasing.
When trimming, the toe is often cut off, so new ears are made to strengthen the panel.
Gable trim
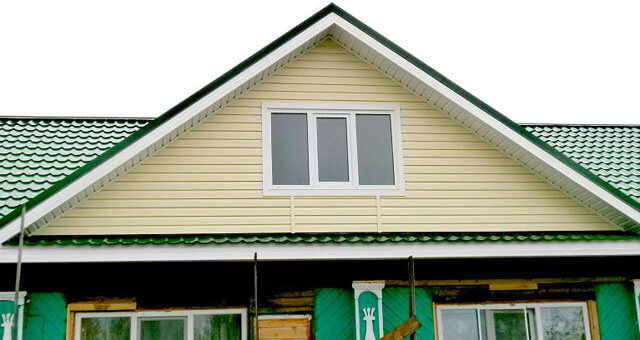
The siding strips continue to be laid horizontally, or installed vertically in contrast to the main cladding of the house. The difficulty lies in the fact that you need to accurately cut the material at an angle on the sloping sides of the gable. Usually this part of the building has an independent ebb, after which the starting bar is mounted. The pediment is best done with two people to keep the edges of the long panels high.
Expert advice
The caps of the self-tapping screws cannot be screwed tightly, pressed against the edges of the mounting hole. It is not recommended to punch directly through the body of the panel in order to attach it. The only exception is the last strip.
For metal siding, it is better to take self-tapping screws with a galvanized coating, as well as for wood. In wood, uncoated metal hardware will cause decay. Houses made of logs and logs are sheathed no earlier than a year after assembly. At this time, the walls will shrink, the siding will not lead, and cracks will not appear.


