Roof arrangement includes several stages. One of the critical structural elements is the roof gable. The work can be done independently or entrusted to a specialized organization. In any case, it is important to study the sequence of technological operations and choose a suitable building material.
- Description and functions of gables
- Varieties of frontispieces
- Forms of gables
- The influence of the rafter system on the structure
- Building materials
- Calculation of the pediment
- Step-by-step instructions for building a brick pediment
- Construction algorithm
- Construction of a frame type pediment
- Frame construction
- Frame sheathing
- Professional list
- Siding
- Simple and temporary options
Description and functions of gables
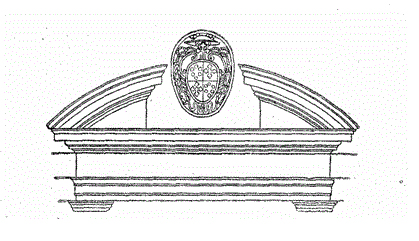
According to the dictionary of construction terms, a pediment (frontispiece) is the end of the facade (end) of a building, limited from above and from the sides by roof slopes, and from below by a cornice. It is used for arranging single-pitched, gable and broken roof types.
In the absence of a cornice, the pediment is made one with the front wall of the house.
The building structure performs several important functions:
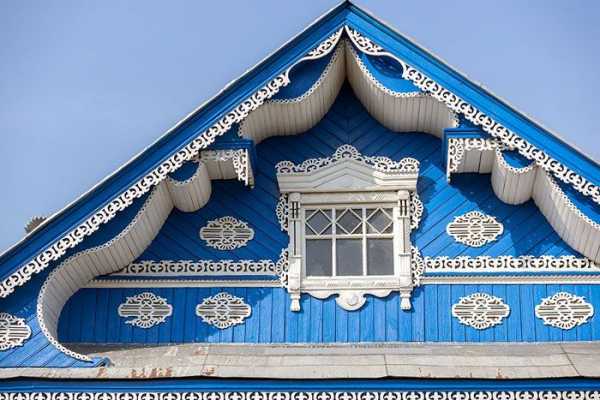
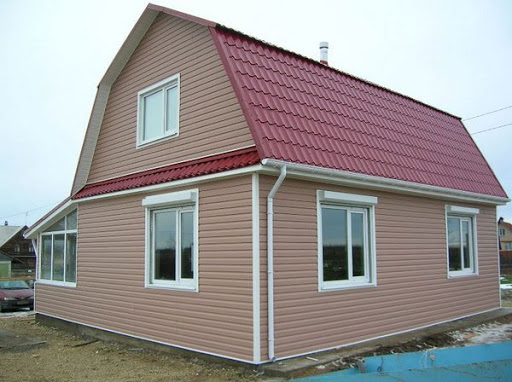
- the fine finishing of the pediment adorns the appearance of the building, performing decorative functions, and gives integrity to the architectural form;
- protects the attic from precipitation and snow cover;
- prevents wind blowing, debris and dust drift;
- reinforces the roof frame;
- reduces heat loss through the ceiling of the upper floors;
- allows you to equip additional living or utility rooms on the attic floor or attic.
For the arrangement of residential and utility rooms, the building element is insulated.
Varieties of frontispieces
The classification of gables is carried out according to several criteria:
- geometric shape;
- the way of construction, depending on the rafter system;
- material of manufacture;
- finishing options.
The gable project is developed in advance, since this part of the building affects the total mass of the house, which is taken into account when arranging the foundation. The sequence of work when arranging the roof also depends on the chosen design option.
Forms of gables
Architects and designers distinguish several options for the geometric shape of the pediments:
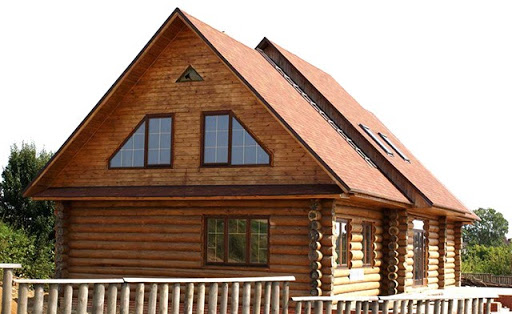
- Triangular is the most common type in private construction. It has the shape of an isosceles triangle, where equal sides are bounded by the roof slopes. To protect the wall from precipitation, it is often built with overhangs.
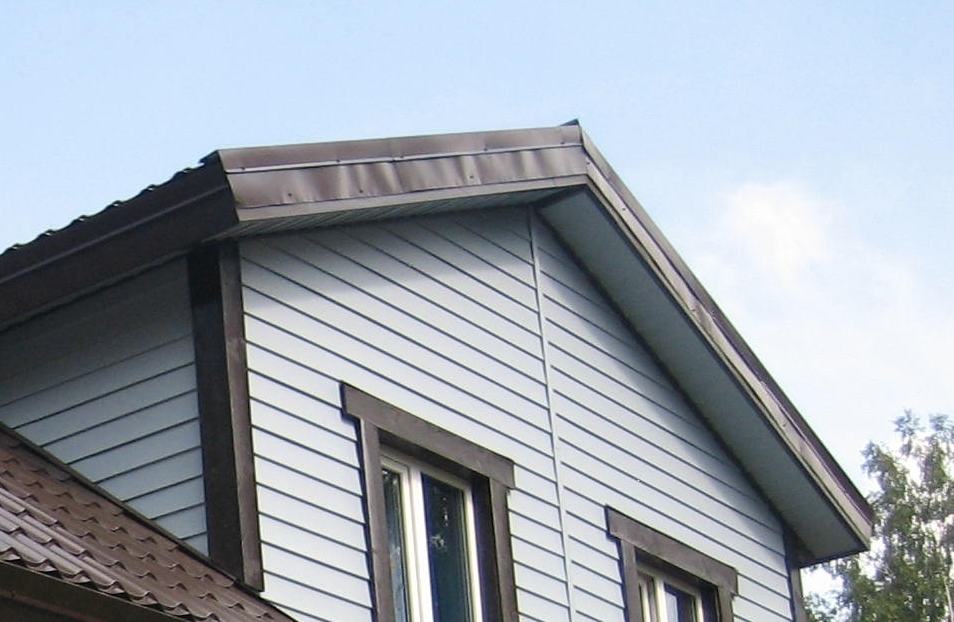
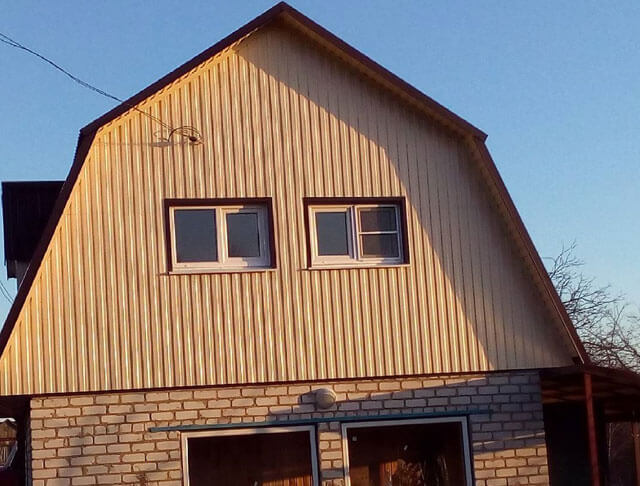
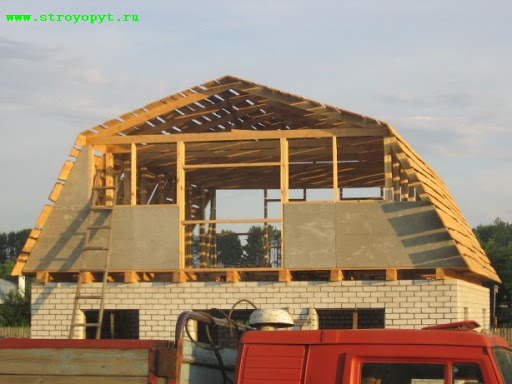
- The trapezoidal version is suitable for a broken roof, where the angle of inclination of the slopes changes. It has become widespread in private houses, since it allows you to equip an attic floor with a sufficient height of rooms at lower costs.
- Semicircular, the upper part has the shape of a circular arc. It involves the arrangement of a roof of a complex curved shape, which sharply increases the cost of construction.
- Onion - a kind of semicircular, but with a lower height, resembles a bow with a bowstring in shape.
Pediments are rarely used in mass construction:
- stepped;
- keeled with complex shapes;
- loose, inherent in expensive housing and requiring great skills in construction;
- interrupted ones are used to install any building structures;
- torn apart.

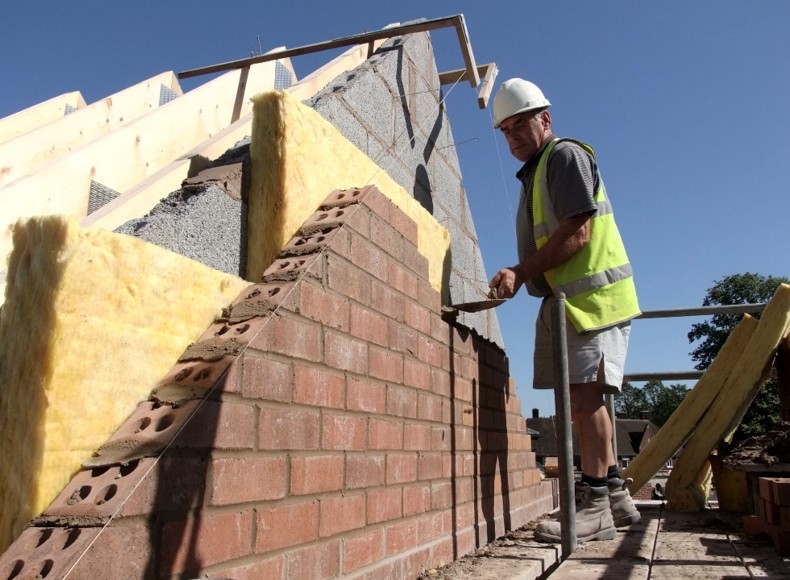
There are also male pediments, which during construction are performed as a continuation of the main wall, for example, in houses made of timber, bricks, blocks.
The influence of the rafter system on the structure
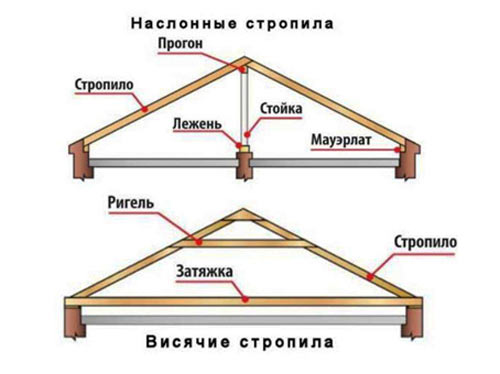
The bases for pitched roofs are made according to the technology of layered or hanging rafters.
In the first case, before the installation of the rafters, a pediment is built on which the longitudinal bar of the ridge rests. It is on this element that the rafters are attached with the upper edge.
The version of the hanging rafters provides for support on the walls of the house and can be made without a ridge beam. In this case, the pediment must be specially fastened to the rafters or reinforced in another accessible way after the completion of the roof construction.
Building materials
You can equip the pediment from a variety of materials, but they should be combined in texture and finish with the design solutions of the walls and roof.
Elements are built from timber, bricks, concrete and foam concrete blocks, wood.
It is possible to sheathe a pediment in a frame design with clapboard or siding, profiled sheet, OSB panels or plywood.
Calculation of the pediment
Before construction, they calculate the area of the structure in order to purchase the required amount of building materials for sheathing the gable with siding or in another way.
The easiest way to calculate the area of the symmetrical gable of a house with a gable roof.
To do this, multiply the height to the ridge by half the width of the house.
For trapezoidal gables and other forms, the surface is divided into elementary geometric shapes, their area is calculated and the resulting values are added.
Step-by-step instructions for building a brick pediment
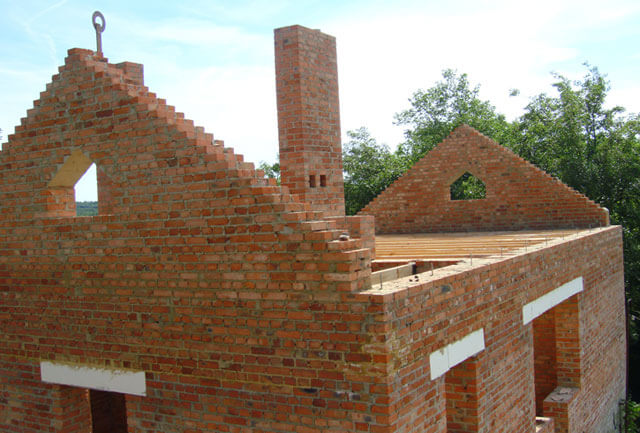
The brick pediment is suitable for any roof configuration.
Advantages of bricks:
- long service life, comparable to the full period of operation of the building;
- resistance to external influences - precipitation, wind, sunlight;
- small size, allowing you to build any geometric shape;
- does not require maintenance - cleaning, washing and painting;
- able to withstand the weight of finishing materials such as siding or wall paneling.
The building material is not devoid of disadvantages:
- The mass of the pediment must be taken into account when calculating and arranging the foundation.
- It is necessary to fill in an additional armored belt - the load on the pediment and the back wall of the building will be much higher than on the sides, which can lead to cracks in the walls.
- The material will require additional labor for lifting bricks, mixing mortar, masonry.
- Until the mortar has completely hardened, significant loads should not be applied to the brick pediment, for example, the longitudinal beams of the rafter system.
Construction algorithm
Step-by-step plan for installing the gable roof gable made of brick:
- If necessary, an armored belt is poured along the entire perimeter of the building.
- A horizontal marking is carried out, comparing and achieving equal length of the diagonals, if the house is rectangular.
- Vertical pillars are fixed on the front and back of the building in the places of the highest building height. For an isosceles roof, the pillars are installed in the middle of the wall.
- At the height of the future pediment, a marking cord is attached to the posts. The lower end of the rope is fixed at the height of the Mauerlat.
- Lay out 2 rows of bricks along the width of the front wall without narrowing to the center - this is necessary in order to hide the end of the Mauerlat.
- Guided by the vertical level and stretched pattern cords, the front and rear pediments are erected. Brick trimming is carried out along the border of the cords.
- After 3-4 rows, reinforcement is required.
- Eliminate the unevenness of the side walls of the pediment with a cement-sand mortar.
The outer facade of the pediment is finished or left unchanged.
The gable cladding can be done with siding or other artificial materials using the ventilated facade technique.
If desired, the pediment can be sewn up with a metal profiled sheet or imitation of a tree.
Aerated concrete gables must be finished.The material easily absorbs moisture and is rapidly destroyed by temperature changes.
Construction of a frame type pediment
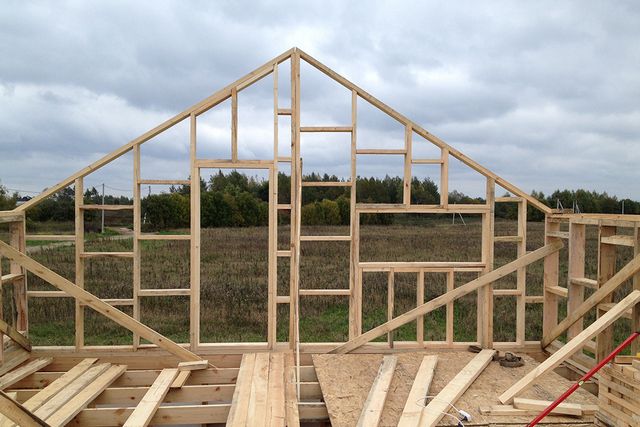
The frame type of arrangement of the upper part of the building is the most popular. Such structures are built after the completion of the manufacture of the roof and fastened to the rafter system.
Advantages of the frame pediment:
- simplicity of the device;
- availability for self-construction, which does not require the skills of a bricklayer and finisher;
- a wide range of materials for manufacturing;
- construction speed, construction time can take only one day;
- light weight compared to the stone version, which reduces the load on the walls of the building;
- you can build a frame and sheathe the pediment in any weather, since the roof has already been erected;
The frame includes under-rafter legs, which additionally strengthen the structure.
Frame construction
With various finishing options for the pediment of a private house, the construction of the frame differs slightly.
The work algorithm is as follows:
- They carry out measurements of openings, purchase lumber. For racks, beams with a thickness of 50 mm and a width of 100 mm are used.
- The tree is dried under a canopy, impregnated with a fire-retardant composition, and dried again.
- A frame is built taking into account the size of the material with which it is supposed to sew up the pediment. Fastening to the wall is carried out in a suitable way, depending on the material of the building - hammered or embedded anchors, dowels with screws and a corner, etc.
- Vertical racks are made in one piece or spliced from two pieces of timber and placed at a distance of 50-60 cm from each other.
- Connect the vertical posts with horizontal lags. The type of connection can be different - the parts are cut in with a thorn-groove connection or fastened with galvanized corners of a suitable size. For fastening do not use "black" self-tapping screws for drywall. As a result of thermal expansion and contraction, the heads of such self-tapping screws break off.
- If it is necessary to build a window, a separate frame is made from a bar for it.
- With an appropriate project, they provide for the manufacture of a stem for the construction of a front overhang.
After the frame has been erected, the possibility of attaching the sheathing to the racks and joists is checked again.
Frame sheathing
Sewing the frame begins with the calculation of the material. To do this, it is enough to calculate the area of the pediment and know the dimensions of the cladding material.
For each type of cladding, there are differences in installation. For cladding, scaffolding will definitely be required, since the fastening is made from the outside.
Professional list
The pediment made of corrugated board is durable. It is important to choose sheets with a thickness of at least 0.5 mm - otherwise, gusts of wind can lead to damage to the outside. kind, leave dents.
The step of the frame is important - it should not exceed 600 mm.
The profiled sheet is fixed to the wooden frame with roofing screws with rubber washers. Black hardened ones are not used due to their high fragility and insufficient strength. Attachment step through two waves.
Metal is cut only with scissors or a jigsaw with a special file. It is undesirable to use an angle grinder. Heating leads to burning of the paint, which turns black.
Advantages of corrugated board:
- with proper cutting, there is practically no waste;
- low cost - no additional finishing is required on the facade;
- construction takes a minimum of time;
- the possibility of replacing damaged elements during operation.
The color scheme of the profiled sheets sometimes does not allow you to choose the desired shade, which makes the finish less attractive.
When buying material, each sheet is checked for creases, dents, non-staining - the seller, most likely, will not make a replacement.
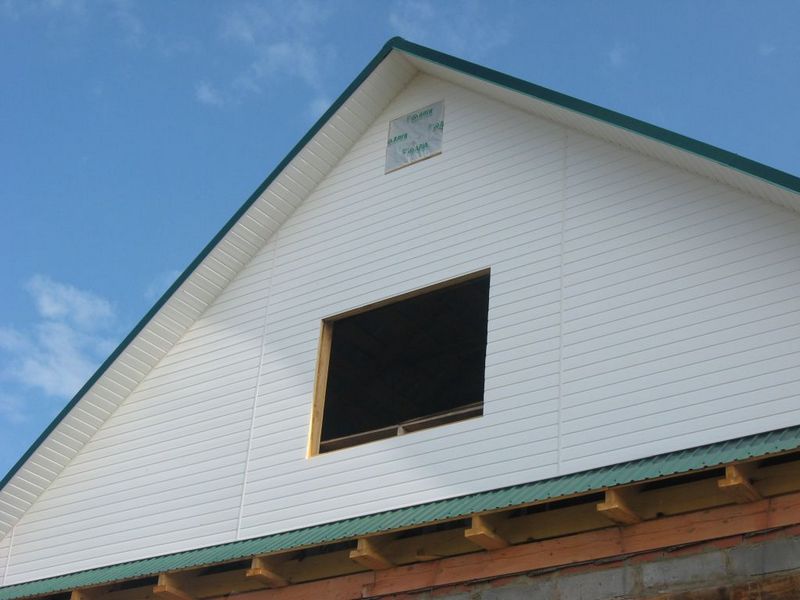
Siding
Facing the gable of the roof of a house is often done in the same style as the walls.
Siding is one of the finishing options. The material is made from plastic, vinyl, steel and aluminum.
It can be sheathed with horizontal, vertical or inclined stripes. Before buying, they clarify how the material you like should be located in the space so that precipitation does not flow under the skin.
Siding panels have special locks and drips for fastening with self-tapping screws.
The gable filing is carried out using the ventilated facade technology, since moisture can penetrate between the individual parts, which should evaporate in dry weather.
Layered composition of the ventilated facade:
- internal lathing;
- waterproofing membrane;
- counter-lattice;
- siding.
When installing the first element, be sure to accurately measure out the horizontal. Use a starter bar that will protect the wall from birds and insects entering the siding.
Particular attention is paid to the gaps that are kept to a minimum.
Siding benefits:
- beautiful finishing result;
- light weight;
- ease of filing;
- resistance to moisture and ultraviolet light.
The main disadvantage is to calculate the required amount of material in order to obtain a minimum of waste is extremely difficult.
To save material, the finishing is not carried out in solid strips, but the segments are closed by means of two symmetrically located connecting strips.
Simple and temporary options
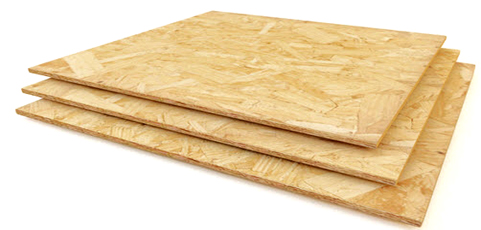
When you need to save money, you can hem the gable with Oriented Strand Board (OSB) or planks. The first option will last about 3-4 years, then the plate will collapse under the influence of ultraviolet radiation.
The boards will need to be replaced after 15–20 years.
Both options can subsequently be finished with siding, profiled sheet, other similar materials, or painted.
Building a pediment with your own hands is a reliable way to reduce the cost of construction. The construction of a structure does not require special skills and is available to any person who owns a construction tool. Compliance with simple rules allows you to get results for many years.


