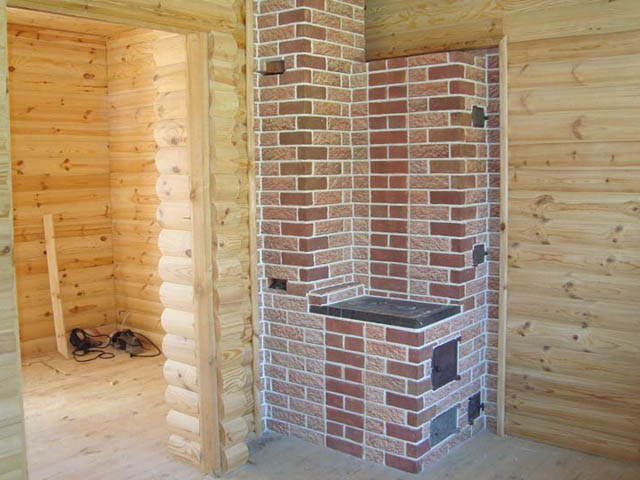
Self-construction of a brick sauna stove is a difficult task, but quite doable. It requires careful preparation of materials, thinking through the methods of installation, the method of heating. Even novice craftsmen are able to build a building. A properly designed brick sauna stove creates pleasant, healthy warmth and comfort.
Classification of stoves for a bath
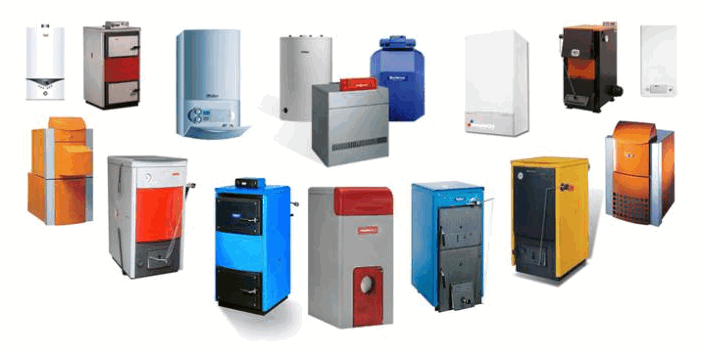
There are many iron and brick sauna stoves to look out for. You can purchase them from the store or make your own. Before erecting a furnace structure, you need to draw up a project and understand which type of furnace is most suitable for the room. Furnace options should be selected on the size of the room, ceiling height, method of heating the water tank.
Advantages of a brick oven:
- heat remains for a long time;
- high quality steam;
- high power, capable of heating a spacious bath;
- fireproof and does not require additional protection against fire;
- there is no release of toxic substances;
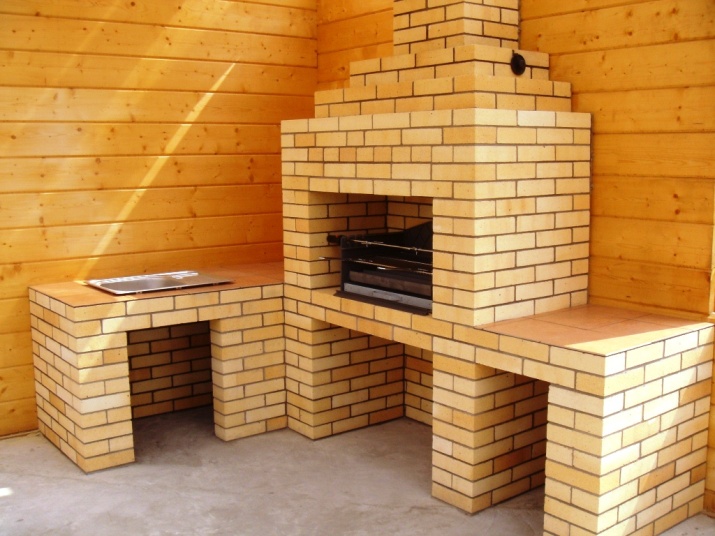
- aesthetic appearance;
- the ability to create unusual architectural designs.
Brick does not require finishing. In exceptional cases, it is covered with tiles, stone or tiles.
A brick oven for a bath is laid out according to different methods.
In a black way
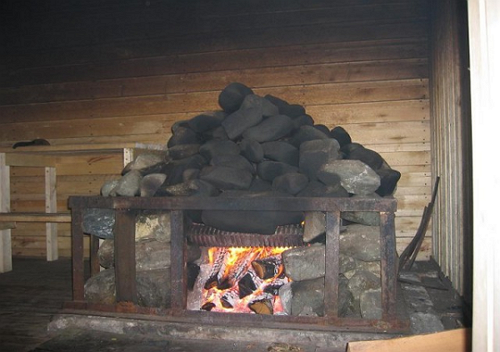
This type of oven has been used since ancient times for centuries. The peculiarity is that the hearth does not need a chimney - the smoke comes out right through the door. Plus - the preservation of heat and aroma of the wood-burning stove. The disadvantage of this method is the long wait for heating and ventilation of the room. The heater is usually very massive.
The use of this type of firebox makes changing clothes in the dressing room inconvenient. All the heat and soot come out through it. Soot and ash come out of the hearth openly, making the room black and glossy with soot. Before entering the bath, the walls and shelves are washed from soot.
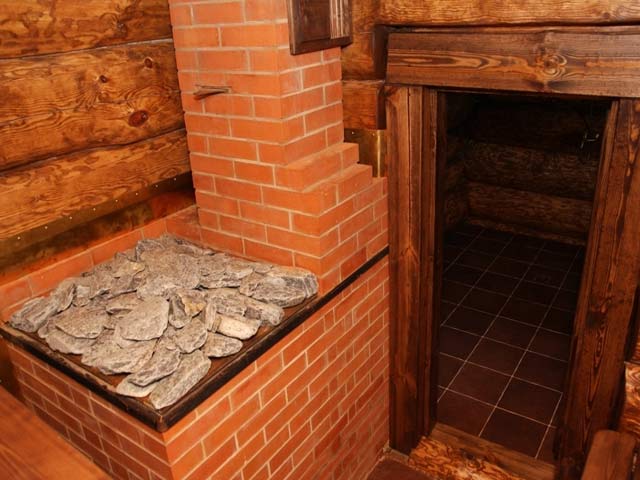
In gray
This option is the golden mean of the variety of ovens. As with the black version, there is a drawback of a long wait for the fuel to burn out. The chimney removes most of the carbon monoxide and helps the room warm up quickly. There is no excess dirt and soot, so the steam room does not require thorough cleaning before washing. With this method, the stove is positioned over an open fire. Some of the gases enter the room.
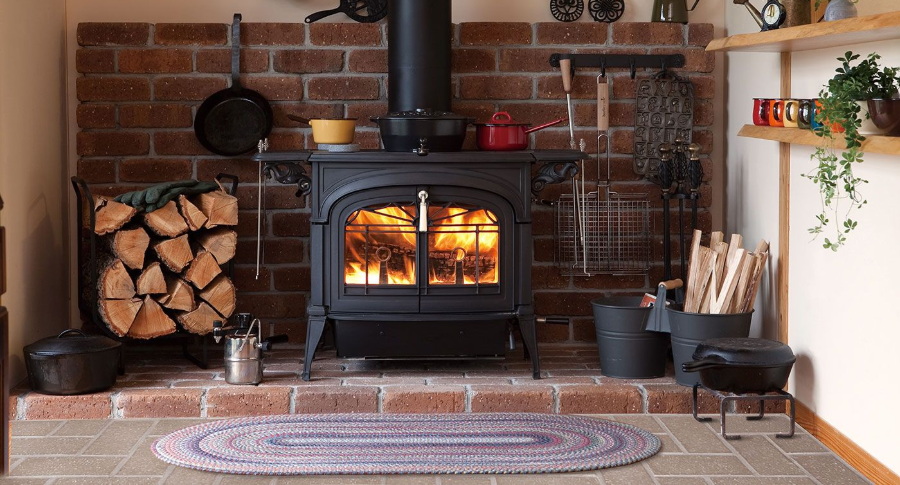
White oven
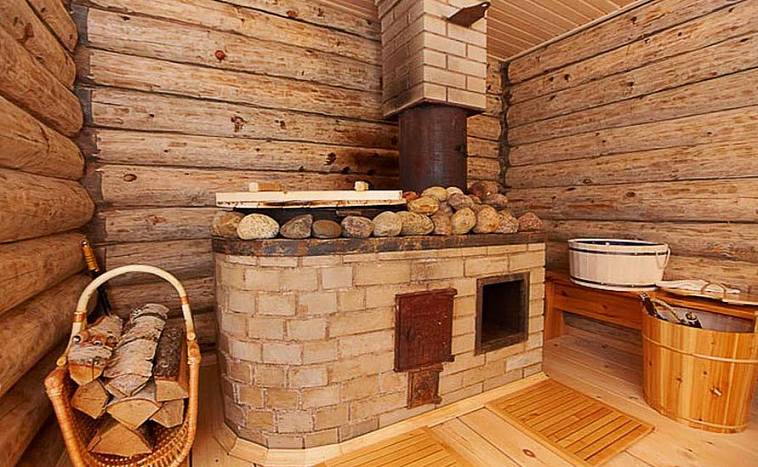
With this method, the stove is isolated from the fire, heating up through a metal wall. Stones do not come into contact with smoke, fire, soot. The room remains clean after heating. It takes a lot of time to warm up using the white method. It is not always convenient, but it saves time on cleaning the premises.
A stove with a stove is the most successful option. The water tank is located on a cast iron plate. It is lined with bricks or bath stones on 3 sides. The heated stones keep the water hot for a long time. Most often, the tank is installed on top of the firebox, but there are options for side location.
Choosing a brick for a stove in a bath
The selected brick stove in the bath must meet certain criteria - a Russian steam room or a Finnish sauna. In Russian, the optimum temperature is 60 degrees with a humidity of 50%, the sauna is characterized by increased heat up to 90 degrees and a humidity of 5-15%. The higher the temperature in it, the less moisture.
The main building material is brick. Mainly used fireclay hearth from refractory clay and red.
Fireclay has a pale yellow color and withstands high temperatures, has a high heat capacity. It is more expensive than red. Therefore, it is used mainly in places with long-term heat load - around the firebox. The structure can be laid out only from chamotte, but it will be too expensive. In addition to chamotte, refractory red or heat-resistant alumina, clinker is used in the furnace.
Heat-loaded chamotte structures and other elements of the furnace are covered with red. Combined masonry reduces construction costs.
The purchased material is carefully examined, the defective material is discarded. The standard size of the bar is 125 * 258 * 65 mm. Deviation up to 2 mm is not critical. Brick for masonry must be free of cracks and chips. Filamentous cracks and small grooves are allowed. When choosing a material, make sure that the specified parameters are met. This is especially true for refractory materials. Even individual batches may differ in properties from different manufacturers.
To make a flat oven, the bricks must be the same size. Otherwise, over time, the difference in heating the bricks and mortar will give uneven shrinkage and smoke will seep out of the cracks. Products with a shiny "mica" surface are defective and are not recommended for use.
You should purchase material for a brick oven for a bath with a margin - some will have to be cut.
The color of the brick should be uniform, without large inclusions, foreign inclusions. The fracture should be free of dark spots and burned areas. The optimal grade is at least M-150.
Arrangement of the base
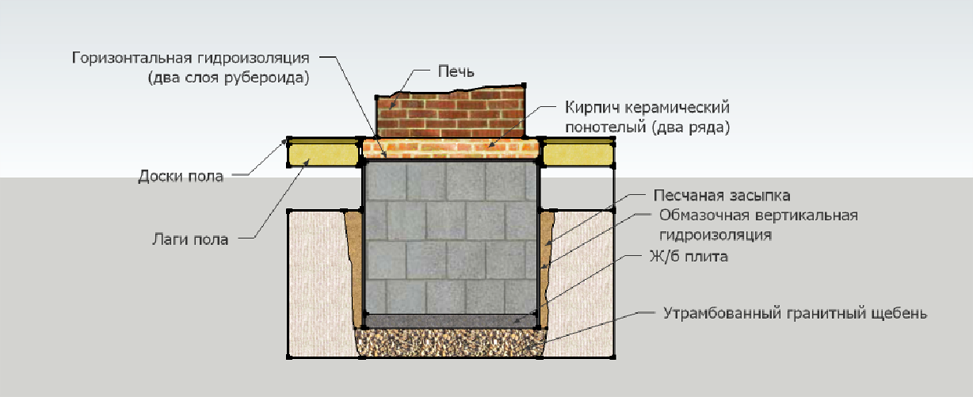
The heavy brick oven is placed on the foundation, not on the floor of the structure. The foundation of a heavy furnace is constructed separately from the foundation of the house. The foundation is similar to creating a strip foundation. Stages of work:
- marking the foundation and driving in pegs along the edges;
- pulling the rope between the pegs for orientation;
- digging a pit: 0.6 m deep with the extension of the last 10 cm by 15 cm, the width and length should correspond to the dimensions of the furnace;
- the bottom of the foundation is covered with sand by 10-15 cm and tamped;
- sand is covered with broken brick or crushed stone, rammed;
- lay out a waterproofing layer and build a formwork;
- the pit is poured with concrete reinforced with mesh or connected reinforcement;
- when pouring, leave 15 cm for the starting row of the furnace.
After laying the concrete, it is allowed to stand for 5-7 days, after which the formwork is dismantled, the voids are covered with crushed stone.
A waterproofing layer is laid on top:
- spreading with melted bitumen;
- roofing felt;
- another layer of bitumen and roofing material.
The waterproofing layer will prevent the ingress of groundwater.
Creation of sandy-clay composition

The bricklaying of the stove in a brick bath is carried out on clay mortar. Cement slurry will not work as it breaks down when exposed to high temperatures. The optimal solution is prepared from clay and sand. The best option would be clay used to make refractory bricks - fireclay or red. The sand is pre-sifted through a fine sieve and freed from debris, small stones, silt deposits. The size of the grains of sand is ideally 1-1.5 mm. To ensure this size of sand, it is necessary to select a sieve with the required holes. The best sand is from a quarry. It is shallower than the river one and is not so heavily polluted with silt.
A properly prepared solution will expand equally when heated, which will save it from cracking. Water for filling is taken fresh, without a pronounced musty smell.
For 100 pieces of bricks, about 20 liters of water are needed.
Stages of mixing the solution:
- clay is poured into a clean container - a basin or a tank;
- pour water until a homogeneous mass of thick sour cream is obtained;
- mix the solution thoroughly, removing or kneading the lumps;
- the poured mixture is left for a day, then the lumps are wiped through a sieve;
- add sifted sand at the rate of 1 liter per bucket.
The mixing process of clay and sand is carefully controlled. If you add less, you get a greasy solution that quickly collapses. A thin mortar has poor adhesion to the brick and will not hold the masonry.
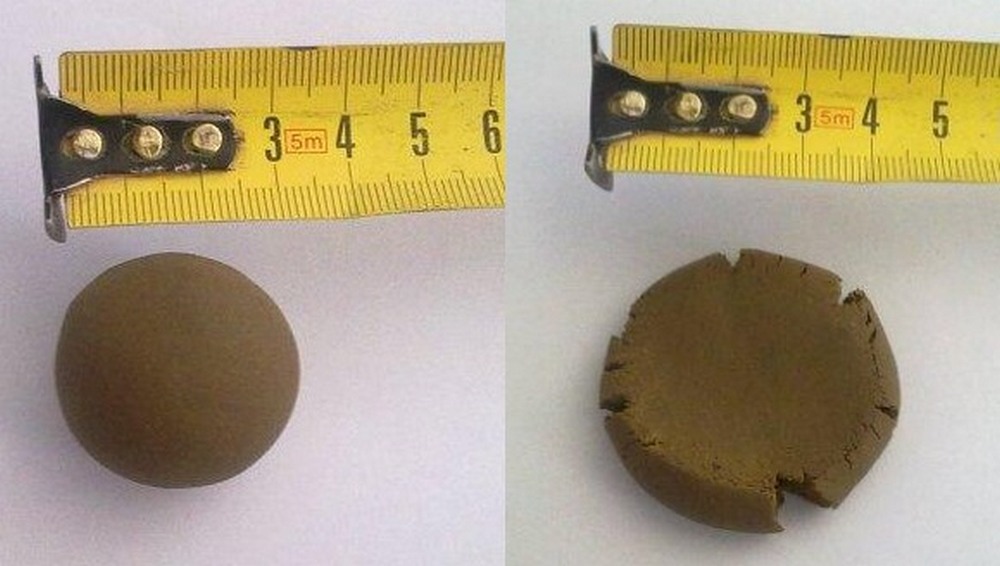
You can determine the fat content of clay in the following way:
- Knead 0.5 kg of clay by hand until a homogeneous consistency does not stick to your hands;
- roll a ball 5-6 cm in diameter;
- press gently with a board until cracks appear.
If the ball disintegrates without cracking, the clay is skinny. Cracks larger than the radius indicate high fat content. Average fat content gives a crack less than half the diameter.
The liquid of the solution is determined by the degree of spillage when raking it with a trowel. If it breaks, add water, if it floats, add mixtures. The finished solution should not tear, it keeps its shape well when raking.
Determination of the fat content of the solution using a trowel:
- Greasy if it sticks to the trowel.
- Pushes out water - skinny. It is necessary to add clay or reduce the amount of sand. Since the solution is already mixed, it will not work to pull out the sand from there.
- Normal if it remains in fragments on the trowel removed from the mortar. The tool comes out of the batch clean or almost clean.
Often the solution is kneaded a little more fatty than required. Lumps are disposed of manually or using a construction mixer. Experienced stove-makers let the clay chatter stand for several days - so it acquires a uniform consistency.
Furnace masonry
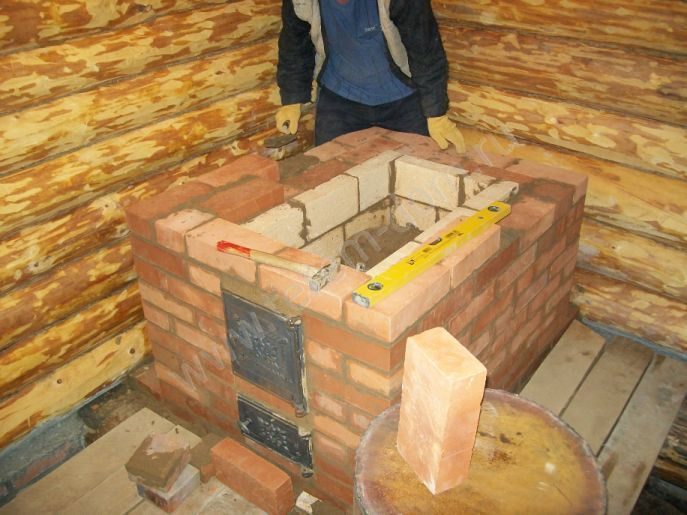
The brickwork of the stove will be considered using the example of a small closed structure with a tank. In preparation for work, all bricks are soaked until air bubbles appear. This action improves the adhesion to the mortar, protects against rapid drying. Soaking chamotte removes dust from it.
The base of the oven begins to lay out from the zero row. It is done to level the foundation and bring it flush with the floor. The first row is laid especially carefully using plumb lines, levels, angle meters. The entire furnace is leveled along the bricks of this row, and the rest of the walls are aligned with the help of a plumb line at its corners.
Laying of 1 layer is done without mortar, dry. Further rows are laid with a thin layer of 3–6 mm mortar. They coat the plane and the side joint of the brick. The packing density is controlled by tapping the trowel. For strength, the bricks are folded with an offset of the next row, with the joints overlapping by half.
The second row of bricks is laid out taking into account the ash chamber. Its dimensions and location should be shown in advance in the sketch. The opening for installing the door is made 0.5 cm wider than the frame to be installed on each side. At this stage, the ash pan door is being fixed:
- an asbestos cord is inserted into the hole left and covered with a solution;
- pieces of twisted wire with a diameter of up to 5 mm are attached to the lobes of the door frame;
- the structure is embedded in the masonry as it is installed, and the wire is inserted into the slots in the brick and ensures reliable fixation of the door.
The third row continues the laying of the ash chamber with the fixing of the wire fasteners of the door in the grooves cut by the grinder. The combustion chamber is entirely formed from fireclay bricks.
Tank installation and grate installation
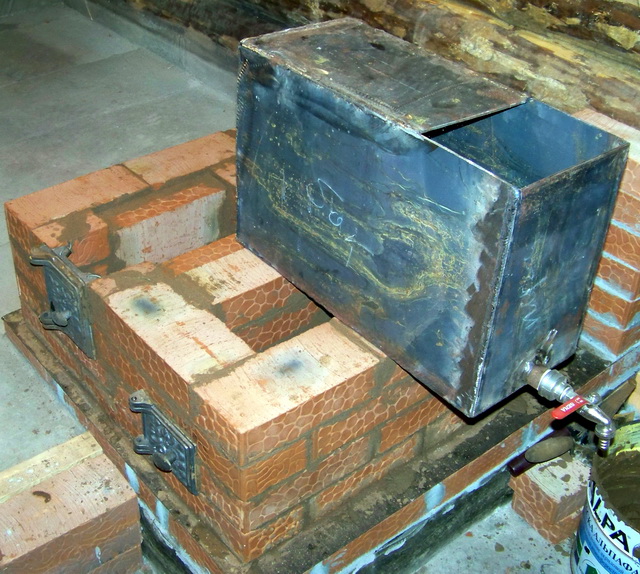
In the fourth row, the base of the firebox is made of refractory bricks with two grates. For them, special holes are cut in the brick. Sometimes pieces of corners are laid under the grate, for which grooves are cut in the bricks. This is practical, since when the grates burn out, they easily change along with the corners without destroying the brick.
In a furnace with a lower location of the tank, it is placed on 4 bricks, going up to the firebox itself. The tank can be purchased at the store or cooked yourself. Usually, a filling hole is left at the top, and a drain valve is welded in at the bottom, at a distance of a couple of centimeters from the bottom.
Laying the fifth row
When installing the tank, a difficulty arises. The bricks at the smoke channel are non-standard and will take additional time to fit. Solution - both bricks are moved to the blower by 3 cm. The third brick is replaced with pieces and adjusted with minimal gaps. Moving the leftmost brick by 1.5 cm, eliminate the extra gaps.
After the final adjustment of the bricks of the 5th row, the water tank and the firebox door are wrapped with two layers of asbestos cord, in order to avoid deformation during heating.
Installation of the fire door and upper rows
The firebox door is fastened with 3 times twisted wire for each lug. Fastening and sealing is similar to the installation of doors for cleaning wells. Already on the 6th row, the problem of adjusting the bricks will become acute. Invisible defects in the size of bricks accumulate and serious problems arise. You have to cut them and lay them in pieces - only this allows you to eliminate unnecessary technological holes. By the 8th row, the bricks are leveled and after the 9th row, a chimney is formed.