Video surveillance over the Internet is used in various organizations for the purpose of remote control by responsible persons. With the development of technology, online video surveillance has become widely used for household purposes. Installation and configuration of the system can be done by hand, without resorting to the services of professionals.
The principle of operation and the main components of the system

The principle of operation is simple: what is happening is recorded, data is transmitted via the Internet. This requires special equipment capable of capturing video in digital from different points, broadcasting it online, recording and saving, as well as software for setting parameters.
The optimal list of devices includes:
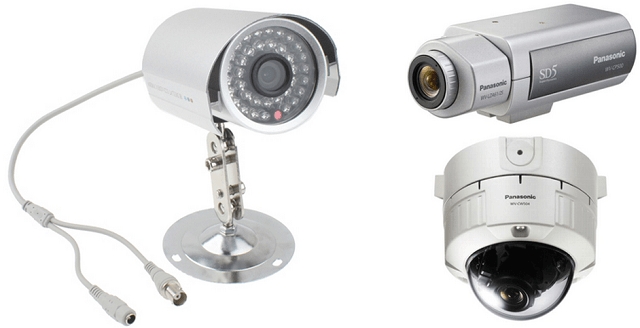
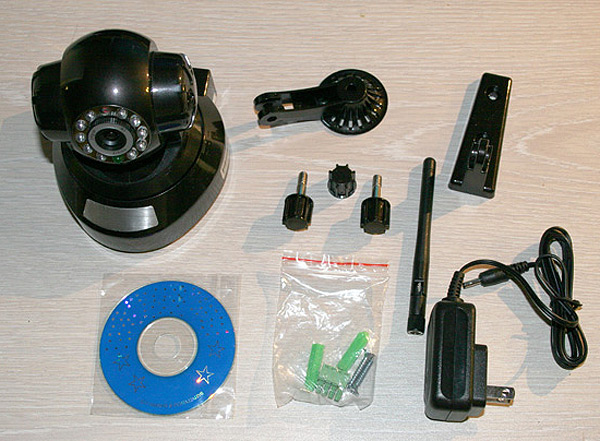
- one or several cameras record what is happening on video;
- switch - ensures the proper operation of devices, combining them into a local network;
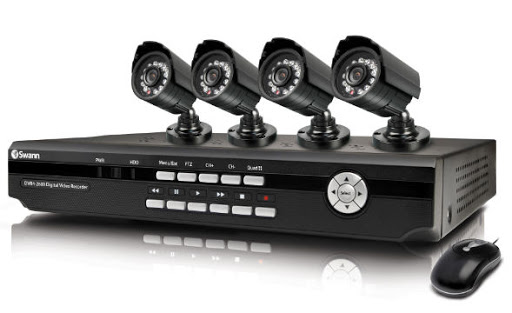
- digital video recorder - an image is transmitted to it, and it records it;
- device for storing information;
- router or router - needed to access the image;
- Software (often supplied with the system on disk, but there are also free programs that can be downloaded from the Internet) - with its help you can configure certain parameters of the system;
- UTP network cable of sufficient length - used to connect equipment.
It is recommended to request a permanent IP address from an Internet service provider for comfortable use of the devices. If you don't want to use such an address, you can limit yourself to cloud services.
The main ways of organizing video surveillance online via the Internet

In order for the home system to work properly, all the parts need to be connected, the cameras must be fixed at the selected points and the parameters must be adjusted. The large number of instruments and settings complicates the adjustment.
With one IP camera
The most affordable way to create a video surveillance system at home via the Internet is to connect a video camera directly to a laptop or PC. For this purpose, you need a permanent IP address, as well as a video camera, UTP cable and power supply. The latter is connected to the camera and the network, and the video device is connected to the computer via a patch cord.
The IP address of the camera is indicated in the browser. It can be found in the user manual, on the label affixed to the instrument, or in the software. After the IP is set, the interface will open, where you should write the settings:
- IP address - choose either "automatically" or enter the one that is known;
- indicate port 80 or other;
- set registration data.
Then the equipment is disconnected from the PC, and the Internet cable is inserted into the camera connector. You can view the image remotely by entering the IP and port number in the format: http: // IP address: port.
If port 80 is blocked, you need to change the number in the camcorder settings.
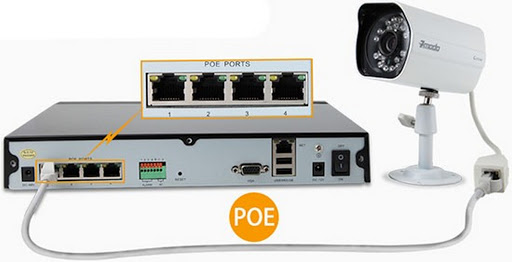
Using a router

The router forms its own local network to be able to connect to multiple devices and receive live images. Each of the cameras is connected to the router, and the router is connected to the Internet. A static IP is also required.
To enter the router interface, you need to specify the received IP address in the browser. Next, a username and password are set, and each video camera is assigned its own port number. Everyone is prescribed in the Routing or Port Forwarding section. Rules for forwarding external requests to different IPs of the local network are formed, forwarding to internal port 80 is organized for each video camera.
The setup looks like this:
- service name - video camera 1 (2, 3, etc.);
- port range - manually assigned port of the first (or other) camera - 8086;
- local port - 80;
- local address - the camera's address is set;
- protocol - TCP;
- protocol number - any.
To set up surveillance via the Internet, each camera must be connected to a PC and assigned the IPs that were set (port 80 or other). Then the camcorder is connected to the router and the Internet connection is set up. Next, in the address bar, enter: http: // permanent IP address: external port for forwarding. Then they print the login and password, the data of the desired camera.
Video recorder

The inclusion of the registrar in the video surveillance system for the home with viewing via the Internet significantly expands the user's capabilities. For example, you can connect a motion sensor to the recorder, store a certain amount of data on the internal memory. Thanks to the recorder, you can initiate recording manually, according to a schedule or when a motion sensor reacts.
It is necessary to register the network addresses of the DVR and the router in such a way that they belong to the common subnet. If this rule is not followed, the devices will be invisible to each other. Some cameras and DVRs are not compatible.
To configure the DVR, you need a permanent IP. From it, forwarding is organized to the local network, in which the registrar is a member. To enter the required data, you need to open the Network section. Here, first the local IP of the registrar is indicated, then in the gateway column - the IP address of the router, where the subnet mask is written 255.255.255.0.
Next, the router is configured:
- They open the online interface of the router and Remote Management, where you need to allow remote control with the allocation of a separate port.
- Virtual Servers are opened and redirection is set: the external port (for example, 8087), the port of the registrar (for example, 80) and its IP are indicated.
- It is recommended in Address Reservation to associate the MAC address of the DVR with the IP address so that it will not be reset during reboot. To remotely access the video surveillance system recorder, enter in the browser: http: // static address: 8087 (or the number of another external port that was specified)
You cannot enter the DVR from the same dedicated address that is assigned to it. To check the correctness of the configuration and connection of the equipment, you need to enter the recorder from a different IP address.
Through cloud services

Cloud services allow you to opt out of permanent IP. However, the registrar in this case must support P2P. The order of operation of the system is such that the video recorder or camera is always connected to the cloud service and transfers data there, so you can always view the image online or go to the archive of records. It is required to open the cloud website and log in with the registrar's identification number. When setting up the equipment, it will be enough just to check the box next to "P2P" or "Cloud".
The online video surveillance system via the Internet using a cloud service can be used by users who do not know how or do not want to perform complex equipment configuration. However, such services have one drawback - they limit the connection speed, so the image quality will be low.
Connecting, configuring and viewing cameras

- White-orange.
- Orange.
- White-green.
- Blue.
- White and blue.
- Green.
- White brown.
- Brown.
Only conductors # 1, 2, 3 and 6 are used for connection. Conductors # 4, 5, 7 and 8 can be used to connect the camera to the mains by assigning “-” for one of them and “+” for the other. When connecting a switch or modem to a computer, a different pinout scheme is used - 568A:
- White-green.
- Green.
- White-orange.
- Blue.
- White and blue.
- Orange.
- White brown.
- Brown.
After connecting the equipment, configure the camera parameters: resolution, quality, frame rate. If your network bandwidth is low, the frame rate, resolution and quality should be kept low so that the picture does not freeze. Ideally, this is the highest possible resolution and quality, and the frame rate is 24 frames per second, then the video will be smooth. For security purposes, it is quite possible to get by with a frequency of 1–5 frames per second.
For remote video surveillance, you need to enter http: // static IP address in the browser: external port number or use a special program.
Remote access and remote monitoring

- video recording;
- viewing the video archive;
- rewind recording;
- event notifications.
It is possible to remotely monitor in a web browser, but it is much more convenient to use a dedicated application.
- TinyCam Monitor Pro. Supports simultaneous operation of up to 16 cameras of different brands, added multi-screen function, digital zoom.
- IP Cam Viewer supports most camera models, connecting multiple devices at the same time, direct recording to media.
- Exacq Mobile. Can be installed on Android and iOS devices. Advantages: connection of up to 48 video cameras, user-friendly interface.
In the application, you can connect via the Internet to cameras installed in completely different places, and control all objects at once, as well as set up video surveillance via the Internet.