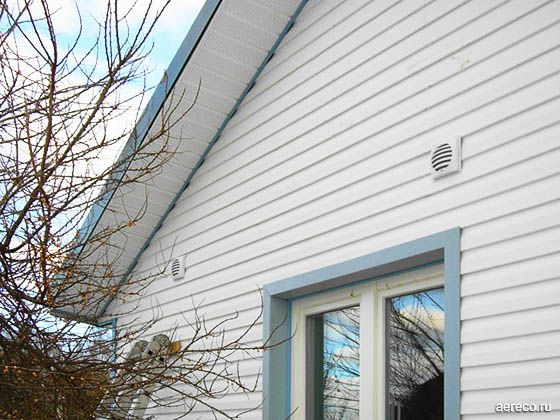
One of the most common options for removing a ventilation pipe from an apartment or private house is a hole in the wall. It is used for supplying and removing exhaust air. Most often, ventilation of a bathroom or kitchen is pulled through the wall to the street. Read on to learn how to make a ventilation hole in the wall, what tools to use and how to insulate the resulting hole without breaking the thermal insulation.
Ventilation schemes through the wall
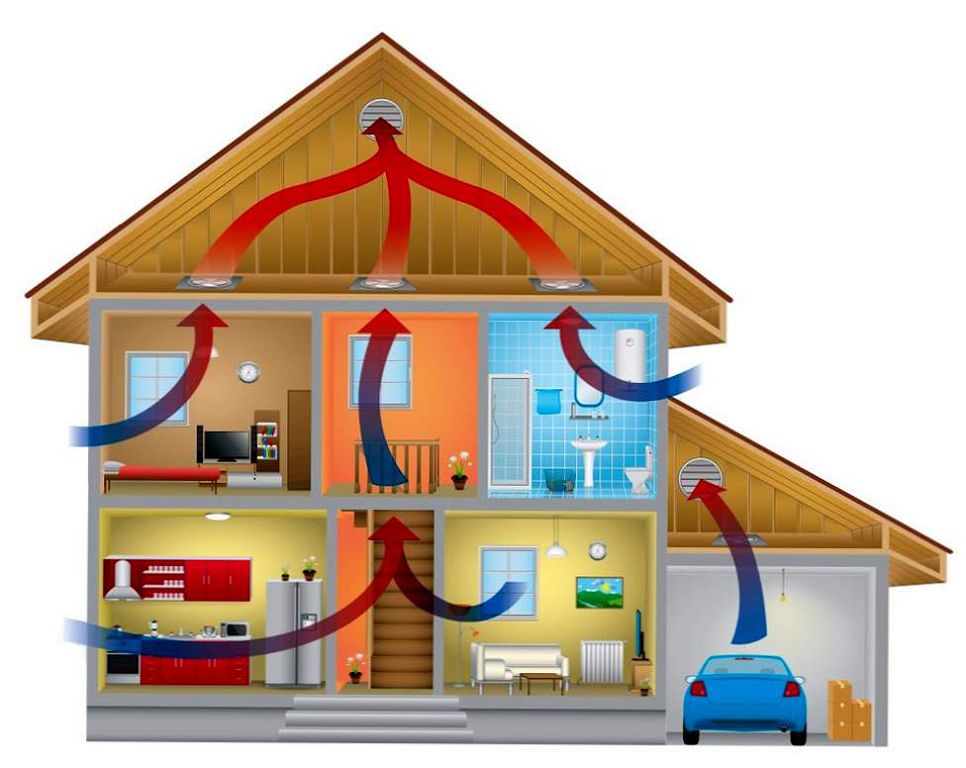
In apartments or private houses, the most rational arrangement of ventilation through the wall:
- with natural draft;
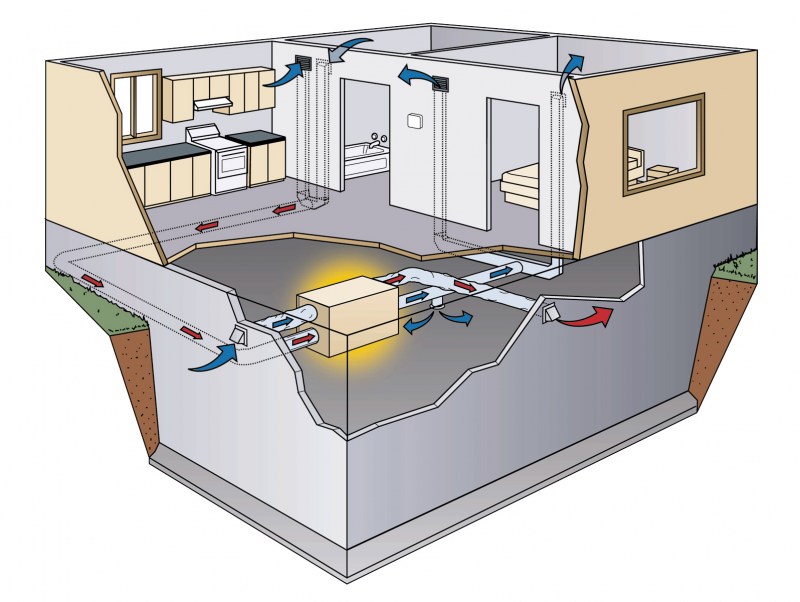
- with mechanical outflow;
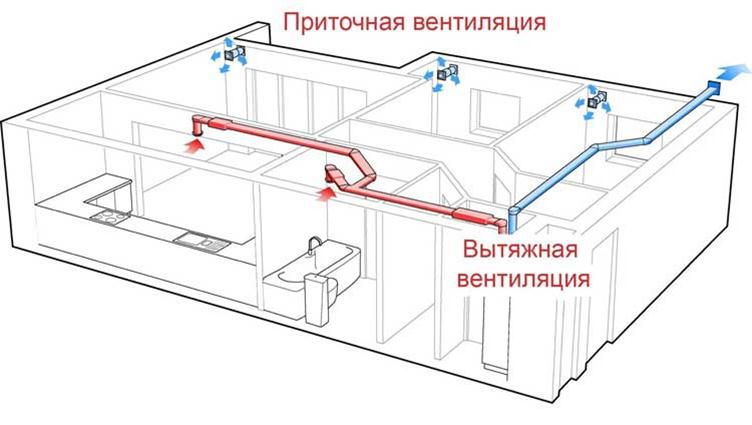
- combined.
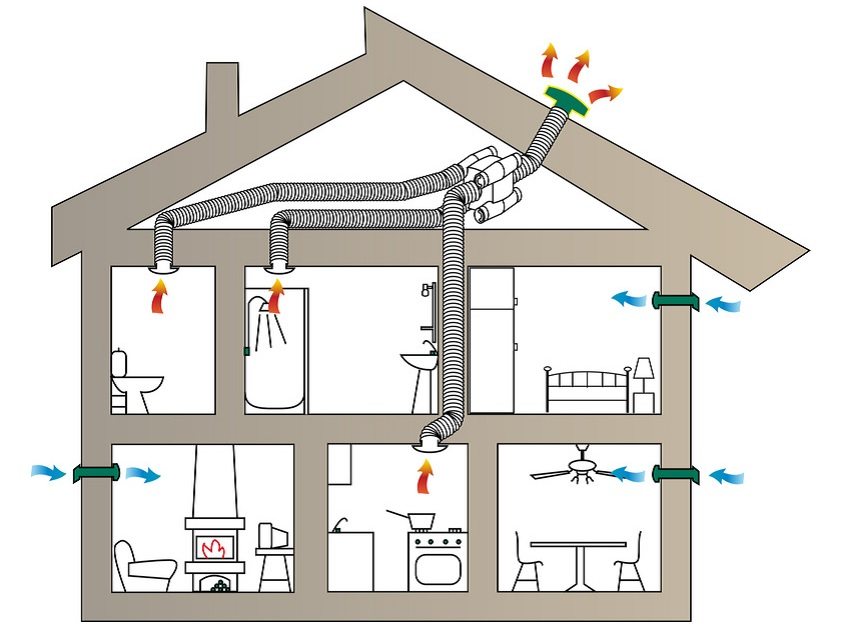
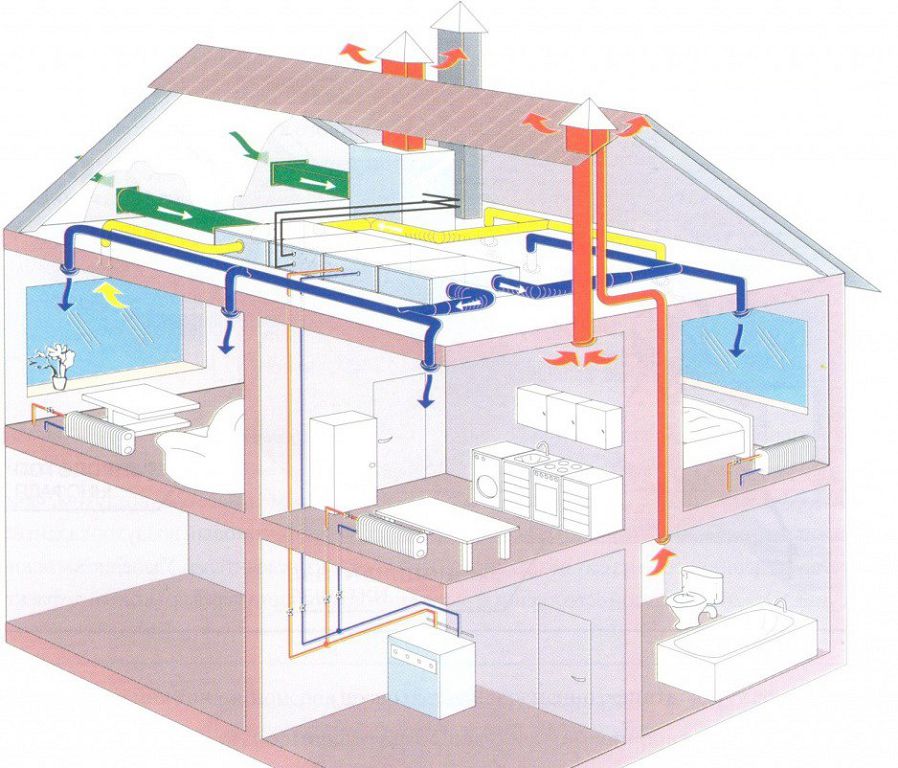
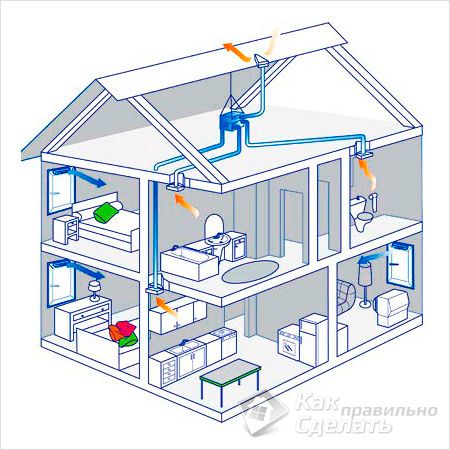
Natural ventilation is based on the draft principle. Air moves due to the difference in pressure and temperature inside the apartment and outside. Such a system is independent of energy sources and is a structure of air ducts and openings, as a rule, extending through walls.
Natural ventilation was widely used in the construction of old multi-storey buildings, much less often in modern buildings.
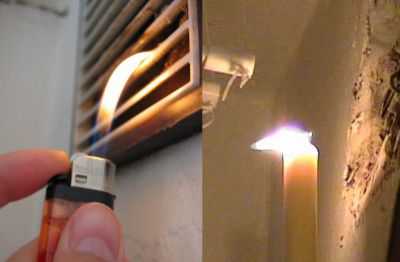
One of the problems that arise during its operation is the lack of air flow. It is understood that fresh air enters the premises through the cracks between the window sashes, open vents. However, modern windows provide almost complete sealing. Therefore, residents solve the problem on their own, pulling ventilation through the wall to the street, installing supply valves.
Household hoods also often work poorly, but it is not possible to make a ventilation passage from the bathroom through the wall in all apartments. It is much easier to build ventilation in the wall of a private house. It is advisable to design the ventilation passage through the wall in advance, linking it with all other structures.
Mechanical or natural?
When planning ventilation in an outside wall, decide on the system. One of the most important indicators of air exchange is speed and temperature.
This is probably why people feel worse in rooms with fans. But in some cases, mechanics are indispensable. For example, if it is not possible to make wide exhaust ducts in the outer wall for exhaust ventilation. The higher the speed of the air flow, the smaller the section of the ventilation duct. Therefore, mechanical ventilation is often installed in the outer walls. Mechanical stimulation is more expedient also in large rooms.
Comfort is achieved at a lower speed of movement of air masses. The speed of air movement in natural ventilation in the wall of an apartment is not more than 1 cubic meter per hour, while with mechanical ventilation it can reach 5 cubic meters per hour.
Supply ventilation devices in the walls
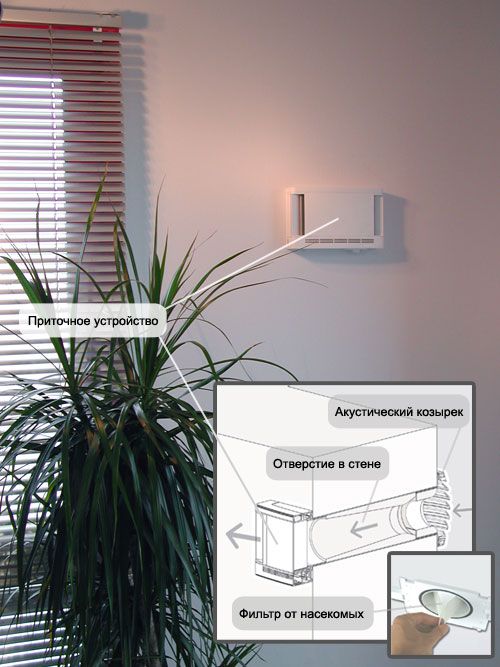
Natural ventilation will work satisfactorily if a supply valve is located on the opposite wall from the exhaust outlet.
Supply valves for ventilation through the wall are made of PVC of various models and shapes:
- rectangular;
- oval;
- round.
Ventilation installation locations in the wall:
- between the window sill and the battery;
- in the sash of a plastic window;
- near the window, as close to the ceiling as possible.
If you bring ventilation outside through the wall, in regions with cold winters, icy air will penetrate through the valve. Even icing of the adjacent section of the wall is possible.
To avoid trouble, make a ventilation passage through the wall above the radiator.
The cold air will first be warmed up by the battery, and only then it will penetrate into the room.
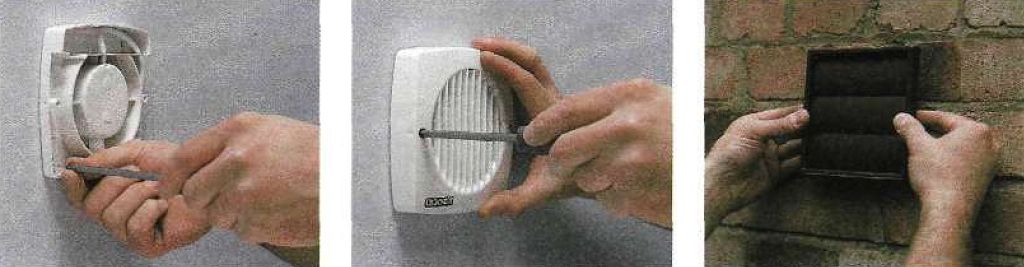
Installation of the supply valve
Installation of ventilation into the wall is not difficult, but it requires accuracy:
- Mark the location of the valve on the wall with a pencil;
- How to make a hole for ventilation in the wall: with a perforator with a special nozzle. The hole diameter is about 60 mm. Make the hole with a slope towards the street approximately for the outflow of condensate and atmospheric precipitation;
- Pass the air duct into the channel. Some models are sold already insulated. Others insulate themselves with mineral wool. With it, very carefully lay all the voids between the duct and the wall. Fill the remaining gaps with polyurethane foam. In places where there is no insulation, condensation will appear;
- Now you should make a markup for fixing the case and attach it with dowels or screws;
- Put on a protective mesh on the outer head and a cover on the inner head.
Depending on the design, the valves can be equipped with filters, plugs and other accessories. But regardless of the "feature", the installation procedure is the same.
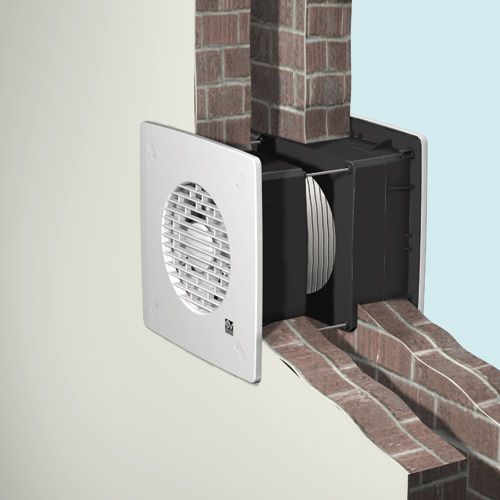
Exhaust devices in the walls of houses
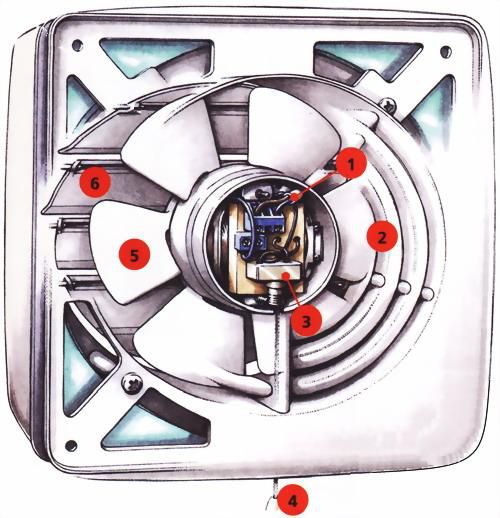
In some cases, it is more convenient to resort to mechanical exhaust air, that is, to install exhaust ventilation through the wall to the street. The main component of the system is an exhaust fan. It is built into the wall outlet and fulfills its function perfectly. Axial models are presented as household ones. Some of them are equipped with louvers that prevent back draft.
The fan can be started manually or automatically by the command of the humidity sensor. The most advanced ones are equipped with a timer that starts the engine according to a given mode.
How to bring ventilation through the wall is an important question, but first you need to calculate the characteristics of the equipment:
M = O x B,
Where M - fan power,ABOUT - the volume of the room (to get it, multiply the length, height and width of the room),IN - air exchange depending on the purpose.
Air exchange rates:
- for the kitchen 15 times;
- for a toilet 8 times;
- for a bathroom or shower room up to 20 times.
The best place to install a fan in the wall of a private house is on the opposite side from the source of clean air, but not too close to it. At the top of the wall.

first stages of work To install the exhaust fan in the wall of the apartment, it is necessary to drill a round hole with a drill and a feather hole drill.
- A sleeve is inserted into the finished hole, which is included in the kit.
- If a square hole is required for the selected fan model (this is rare), a rotary hammer with a paddle is used.
- Next, markings are made for attaching the fan. It is screwed to the wall with spacer dowels.

and now the fan is installed - From the street side, the gaps between the pipe and the wall are carefully foamed.
- A check valve is installed to prevent cold air from entering the room when the fan is off. Some fan models are equipped with their own non-return valve.
- After the ventilation has been brought out through the wall, a decorative grille is attached to the outside.

The fans are connected to the power supply through low-melting fuses, which are installed in the electrical panel.
If you doubt your own knowledge of an electrician, invite a professional master to connect the fan. And to help the brave, our video:

Thank you.