The garage is designed to protect the car from theft and adverse weather conditions. However, the wrong microclimate in the garage can cause stagnation of dirty, musty air, high levels of humidity and poor health of the car owner. The hood in the garage will help to avoid such unpleasant phenomena. Most car owners equip ventilation with their own hands, however, before starting such work, you need to know how to do it correctly.
Why do you need a garage hood?
- with high humidity, moisture accumulates on metal parts of the body, electronic devices and car parts, which leads to corrosion and the appearance of mold and mildew inside and outside the passenger compartment. In addition, the shelves and tools in the garage also deteriorate from time to time;
- lack of ventilation contributes to the accumulation of exhaust gases and vaporization products of gasoline or diesel fuel in the room. This can lead to poor health, headaches, and even poisoning.
Types of ventilation
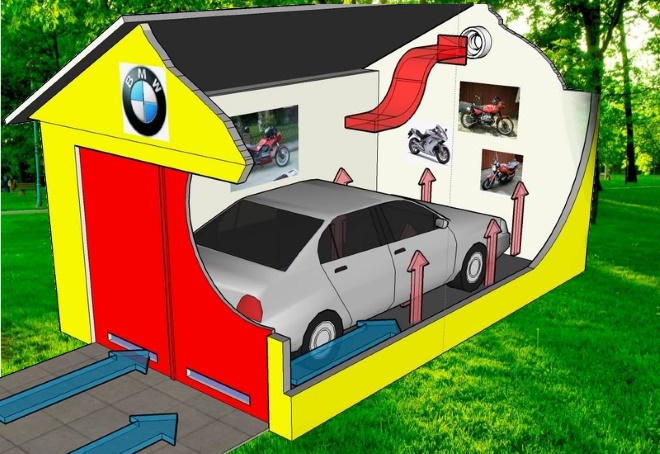
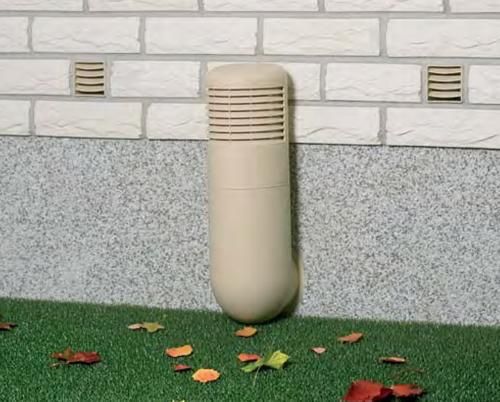
The garage can be set up in the basement or outside. The options for arranging a room with a ventilation system in both cases are almost the same, however, basement and semi-basement garages must be equipped with special exhaust systems, since air circulates poorly in such rooms, as a result of which unpleasant odors and dampness are formed. The photo shows a variant of the organization of ventilation in the basement:
There are three ways to organize a ventilation system:
- Natural.
- Forced.
- Mixed.
Natural. This type of ventilation is carried out by circulating air through the cracks in the doors and windows, as well as through special ventilation holes.
Forced. To equip a garage with forced ventilation, ventilation openings are equipped with special devices that contribute to the quick and efficient removal of dirty air from the room and provide fresh air.
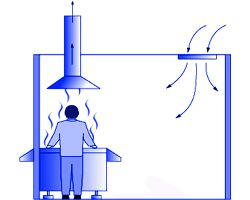
Mixed. It is natural ventilation in combination with exhaust ventilation, when the garage is equipped with a special exhaust hood to remove the exhaust dirty air.
The norms of SNiP established that the volume of fresh air entering the garage should be 180 liters per hour, and during the day the air should completely change 6-10 times.
Do-it-yourself hood organization
When equipping a garage hood with your own hands, it must be borne in mind that the pipes used can be made of metal, plastic or asbestos. Moreover, their diameter will depend on the volume of air that needs to be replaced. According to the current regulations, a diameter of 15 mm is required for 1 m². For example, to equip a garage with an area of 10 m², pipes with a cross section of 150 mm should be used.
To make ventilation with your own hands, you need to prepare:
- metal grates;
- Pipes for 100-200 mm;
- exhaust fans;
- grinder;
- puncher;
- sealant.
DIY installation process
- First of all, you should organize natural ventilation in the garage. For this, the following calculation is performed: for example, the size of the garage is 6: 4 m, and its area, respectively, is 24 m².Since 1 m² of floor space requires a diameter of 15 mm, multiply 24 m² by 15 mm. As a result, the size of the diameter of the ventilation ducts will be 36 cm. However, the obtained value is relevant only if the garage is equipped with only one supply hood and one supply channel. In the presence of two hoods, the obtained value (36) should be divided by two.
- Having calculated what diameter the pipes should be, holes of the appropriate size are made in the walls of the garage using a puncher. The inlet openings are made about 15 cm above the floor.
- Exhaust holes should be located on the opposite wall below the ceiling level by about 10-15 cm. Next, a pipe is inserted into the hole made, which is removed above the roof level by 50 cm or more. The rate of air exchange depends on the length of the pipe protruding above the roof: the higher it is, the more efficient the air exchange inside the garage will be.
- The holes that remain between the pipes and the walls must be filled with sealant. To protect the air duct from the ingress of debris, foreign objects and rodents, metal grates are used to close the ends of the pipes. Small domes are used to protect the upper pipe from rain and snow.
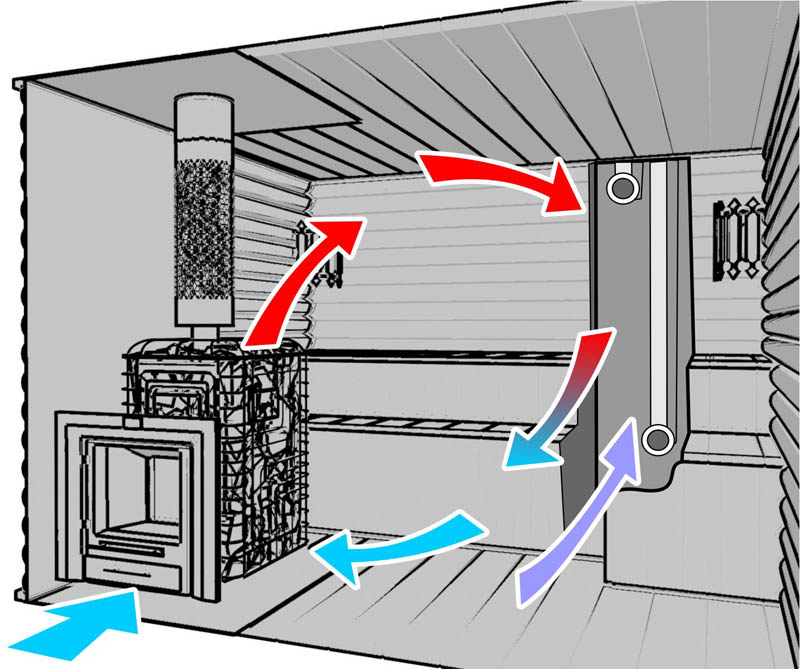
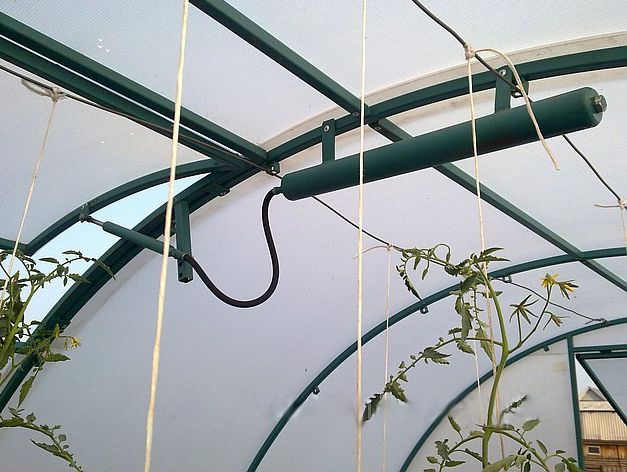
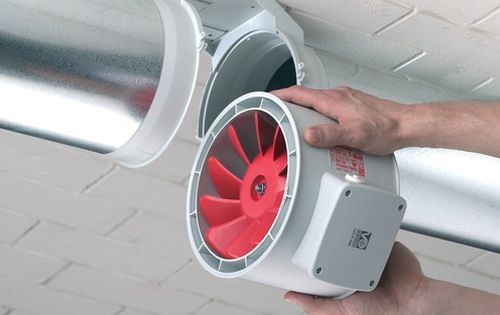
- When the arrangement of natural ventilation is ready, it is necessary to equip the exhaust air ducts with fans. At the same time, only the hood for the garage is equipped with fans, and air will flow naturally into the air inlets. When purchasing fans, it is advisable to choose such models that work as quietly as possible, since during the operation of the exhaust system, too loud operation of the fans will interfere with the car owner. The photo shows an exhaust device used to ensure efficient and fast air outflow:
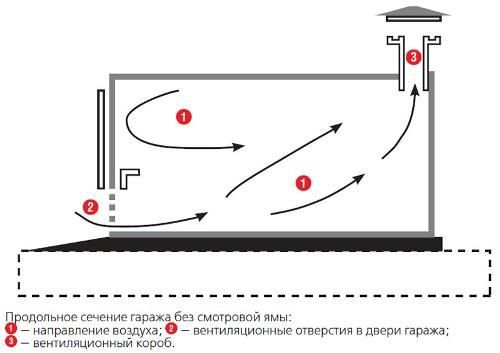
It should be noted that the air inlets can be made not in the garage wall, but in the lower part of the door. For this, holes are made in the gate, which are closed with metal grilles. In this case, the size of the holes should be 2-3 times larger than the diameter of the exhaust pipe.
A deflet core can be used to speed up the air removal process. Thanks to this device, built into the duct, a reduced pressure is created, which contributes to a faster and more efficient removal of dirty air from the room. To prevent condensation from forming on the deflector, it must be equipped with thermal insulation.
Exhaust hood for inspection pit

Many car owners use the inspection pit not only for repair work, but also for storing keys, fuel, oil, and tools. In addition, many pits are equipped with electric lighting for convenience. Therefore, it is also necessary to maintain the correct microclimate in the pit.
A garage hood differs from an inspection pit hood in that the latter does not need to be equipped with fans. To maintain the correct humidity level in it, it is enough to install two pipes in the corners. One of them should be located very low at the bottom of the pit, and the other in the opposite corner at a height of 10 cm from the upper level of the pit. To protect the air duct from debris, its ends are equipped with special gratings.
It should be remembered that in winter a large amount of moisture is released from the inspection pit into the garage, which practically does not evaporate due to the cold. Therefore, experienced car owners always bury a hole with wooden boards in the cold season.
Neglecting such a moment as organizing a hood for a garage can lead to quite unpleasant consequences. Therefore, every car owner should know how to make a hood in the garage with his own hands, how to correctly calculate the volume of air that should flow into the room, and what pipes of what diameter should be used.